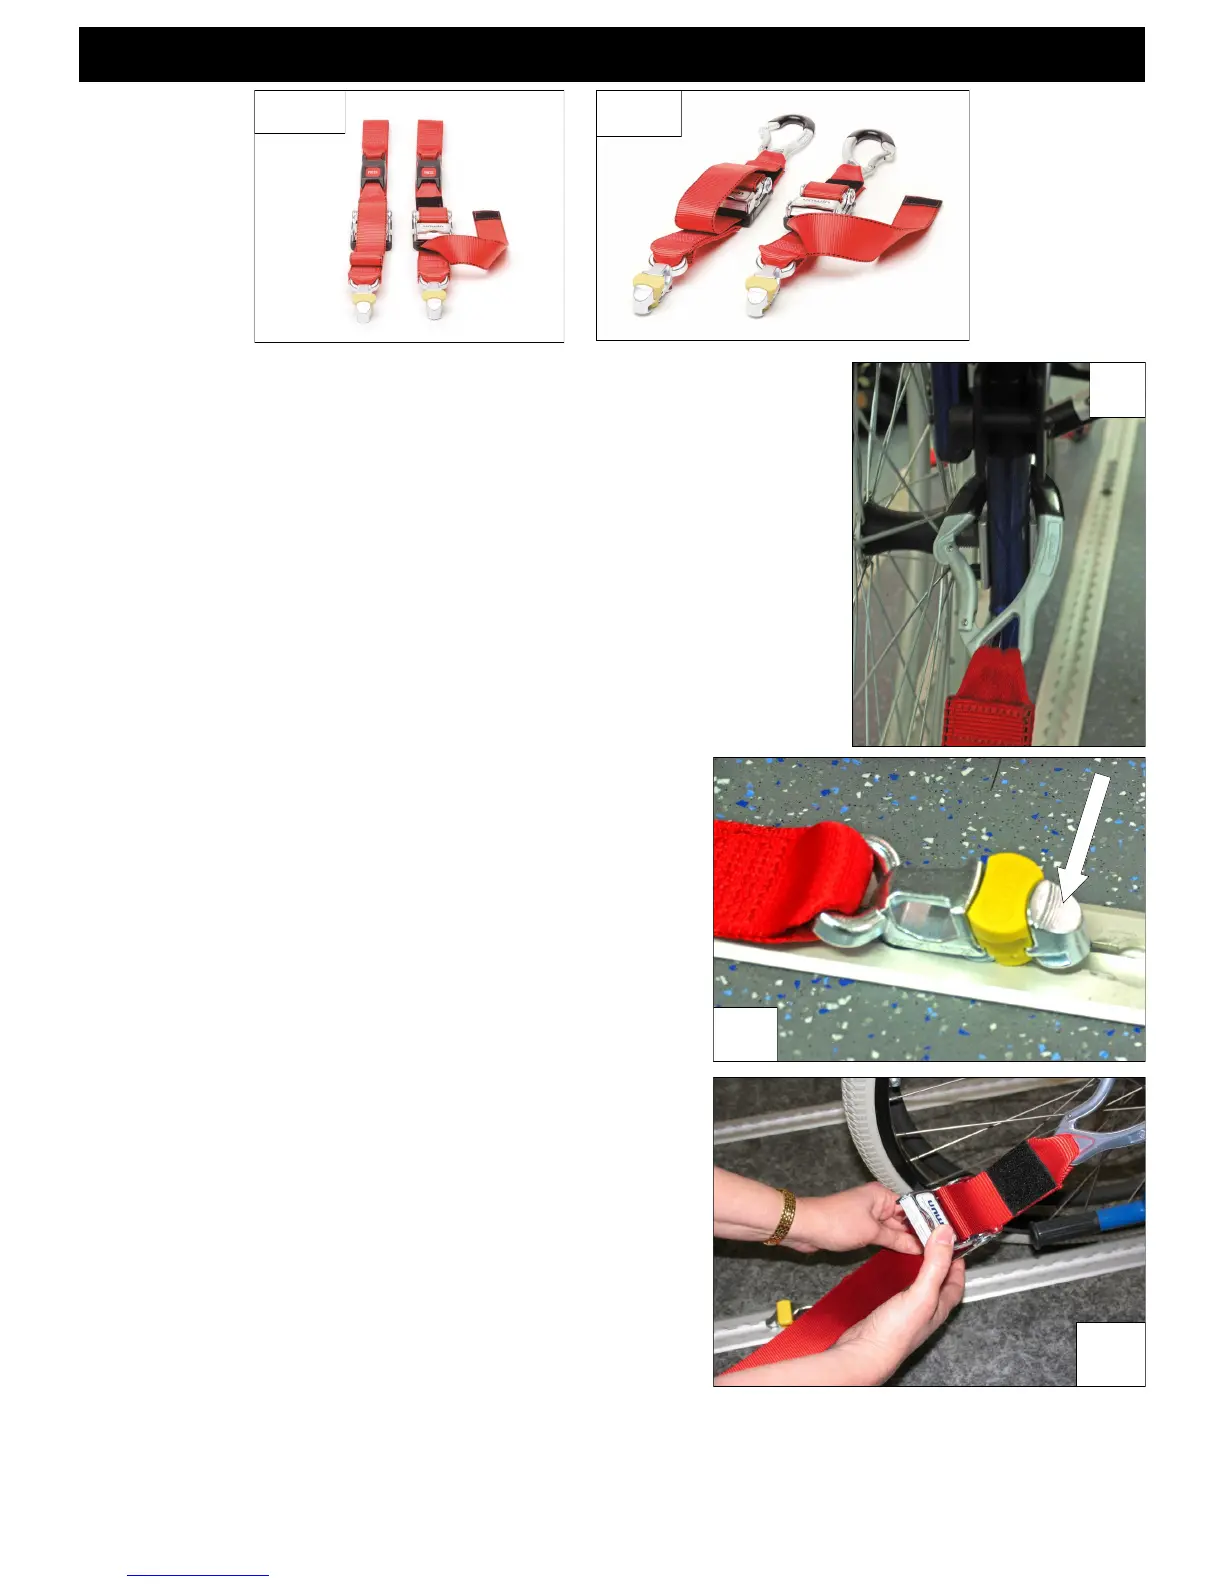
D. FITTING OR01, OR02
OR01 OR02
1. The rail will have been installed in the vehicle, in accordance with our
own and the vehicle converters instruction. A front wheelchair tie-down
should be secured rst, before any rear restraints are tted.
2. To attach the above rear wheelchair tie-down, select each half of the tie
-down so that the karabiner gate faces outboard from the wheelchair,
(Fig 2). If using the tongue and buckle wheelchair attachment, either
strap can be selected for either side as they are not handed.
3. Attach each tie-down into the oor rail by aligning the ATF (aluminium
track tting) feet with the cut-out sections of the rail, (Fig 3). Note: the
yellow plungers must face toward the rear of the vehicle. Press on the
ribbed part of the ATF, (Fig 3) and push rmly down and towards the
wheelchair until the yellow plunger drops and locks into the rail. Ensure
that each ATF is sited opposite each other.
4. Remove the webbing from the Velcro patch and release
the over-centre buckle.
5. Attach the Karabiner or the tongue and buckle xing to
the wheelchair main frame to create an angle of about 30-
45° within the rear view zone, (Fig 5). (Some chairs will
indicate this tie-down position). If using tongue and buckle
press the red buckle button(s) to release the webbed
tongue(s), extend and pass around each of the wheelchair
frame tie-down points, reconnect the tongue back into
the buckle.
6. Pull the webbing through the over-centre buckle until it is
tight. With the free hand begin to close the buckle, once
the webbing is retained, fully close the buckle using both
hands, (Fig 4). Re-secure the Velcro to prevent the loose
end from becoming a tripping hazard.
7. An occupant restraint should now be tted.
3
4
2


 To Next Page
 Loading...