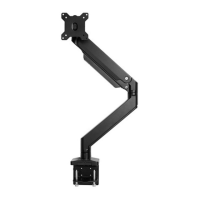
The Crestview Single Monitor Arm (MON031) is a versatile and robust solution designed to enhance ergonomic comfort and optimize desktop space by securely mounting a single monitor. This manual provides comprehensive instructions for assembly, installation, and adjustment, ensuring safe and efficient use.
Function Description:
The Crestview Single Monitor Arm allows users to position their monitor at an optimal height, tilt, swivel, and rotation, reducing strain on the neck, eyes, and back. It features a gas spring mechanism that facilitates smooth and effortless adjustments, enabling the monitor to float above the desktop. The arm can be attached to a desktop using either a clamp method or a bolt-through method, offering flexibility for various desk setups. Integrated wire management helps keep cables organized and out of sight, contributing to a cleaner workspace.
Important Technical Specifications:
- Acceptable Monitor Weight Range: 2.2 to 33 lb (1.0 to 15 kg)
- Desktop Thickness Compatibility:
- Clamp Method: 0.4" to 3.3" (10 mm to 84 mm) thick
- Bolt-through Method: 0.4" to 1.8" (10 mm to 46 mm) thick
- Bolt-through Hole Diameter (Desktop): 0.4" to 3.15" (10 mm to 80 mm)
- Height Adjustment Range (VESA mount center): 10" to 23" (254 mm to 584 mm) from the desktop
- Monitor Tilt: 90° (+/-45°) forward or backward
- Monitor Swivel (Upper Arm Hinge): 180° (+/-90°)
- Monitor Rotation (VESA mount): 180° (+/-90°), allowing for landscape or portrait viewing
- Lower Arm Swivel: 360° (or limited to 180° for specific setups)
- Upper Arm Swivel: 360° (though swiveling past the back of the desk is not recommended due to potential instability)
- Hardware Components Included:
- Allen Wrenches (3mm, 4mm, 6mm)
- M6 x 12 Flathead Screws (qty 4)
- M4 x 12 Screws (M-A) (qty 4)
- M5 x 12 Screws (M-B) (qty 4)
- M5 Washers (M-C) (qty 4)
- Package Contents: Base, Upper Clamp, Lower Clamp, Upper Arm, Lower Arm, Upper Base Plate, Lower Base Plate, Adhesive Pad, VESA Plate, Wire Cover.
Usage Features:
- Mounting Flexibility: The monitor arm offers two primary mounting options:
- Clamp Method: Ideal for attaching the arm to the back edge of a desktop. This method is suitable for desktops between 0.4" and 3.3" thick.
- Bolt-through Method: Allows for attachment through a grommet hole or a drilled hole in the desktop, suitable for desktops between 0.4" and 1.8" thick and hole diameters between 0.4" and 3.15".
- Easy Assembly: The manual provides clear, step-by-step instructions for assembly, starting with the base and progressing to arm and monitor attachment. Specific steps are outlined for both clamp and bolt-through methods.
- Adjustable Tension for Monitor Weight: The gas spring mechanism can be adjusted to properly counterbalance monitors within the specified weight range (2.2 to 33 lb). If the monitor drifts down, the adjustment screw should be turned towards "+" using the 6mm Allen Wrench. If it drifts upward, turn the screw towards "-".
- Extensive Ergonomic Adjustments:
- Height Adjustment: The monitor's height can be adjusted from 10" to 23" (center of VESA mount) from the desktop, accommodating various user heights and preferences.
- Tilt Adjustment: The monitor can be tilted 90° (+/-45°) forward or backward, allowing users to find the perfect viewing angle and reduce glare. This adjustment is made by loosening and re-tightening a socket head screw on the VESA Mount with the 6mm Allen Wrench.
- Swivel Adjustment: The Upper Arm can swivel 180° (+/-90°) at its hinge, while the Lower Arm can swivel a full 360°. The Lower Arm's swivel can also be limited to 180° by tightening an upper set screw, which is useful when the desk is against a wall or has a privacy panel.
- Rotation Adjustment: The VESA mount allows for 180° (+/-90°) rotation, enabling seamless switching between landscape and portrait orientations.
- Wire Management: Integrated wire covers on both the Upper and Lower Arms provide a discreet solution for routing and organizing monitor cables, contributing to a tidy and professional workspace. The wire cover for the Upper Clamp (when using the Clamp Method) also helps manage cables.
- Quick Monitor Attachment/Detachment: The VESA plate slides into the Upper Arm and clicks securely into place, allowing for easy attachment and removal of the monitor.
- Safety Warnings: The manual highlights important safety considerations, including warnings about the spring mechanism that can cause injury if monitors are removed carelessly, and cautions to read all instructions to prevent damage or personal injury.
Maintenance Features:
- Regular Tension Adjustment: Periodically check and adjust the gas spring tension (Step 14) to ensure the monitor remains in its desired position. This is crucial as monitor weights can change or the spring may settle over time.
- Secure Fasteners: Ensure all screws and bolts are tightened according to the instructions during assembly and periodically check them to maintain stability. The 3mm, 4mm, and 6mm Allen Wrenches provided are essential for these adjustments.
- Cable Management Maintenance: Regularly check the wire covers and cables to ensure they are properly routed and not pinched or damaged. Reinstall the screw for the Upper Wire Cover to secure it.
- Cleaning: The manual implies that the monitor arm should be kept clean. While not explicitly detailed, general cleaning with a soft, damp cloth is recommended for the arm's surfaces.
- Adhesive Pad Application: The adhesive pad applied to the base (Steps 3B and 7B) helps protect the desktop and prevent slippage. Ensure it is properly aligned and adhered during initial setup.
- Retain Manual: Users are advised to retain the manual for future reference, especially for assembly assistance, troubleshooting, or if the product is sold to a new user. Contact information for UPLIFT Desk is provided for support.