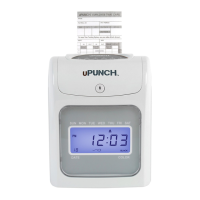
9
HN1—BASIC SETTINGS
HN1 is the rst menu in the time clock and allows you to program the following
features.
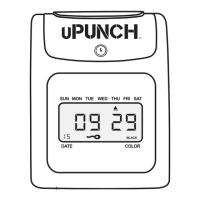
Setting the Year (code 00)
Move the Set switch to the “0” position (to the right). When the code “00” appears on
the display, set the last two digits of the current year using the + and – buttons. Press
Enter to conrm the setting.
IN OUT IN OUT
IN OUT
Setting the Month and Date (code 01)
After conrming the year, the code “01” appears on the display. Set the month and date
using the + and – buttons. Press Enter to conrm the setting.
Setting the Hour and Minute (code 02)
After conrming the month and date, the code “02” appears. Set the hour (HH) and minute
(MM) using the + and – buttons. Press Enter to conrm the setting.
Setting the Hour Format Display (code 03)
When the code “03” appears, set the hour display. This
allows the selection of 24-hour (Military) or 12-hour
(Standard) time for display on the time clock and printing
on the time card. Use the + and – buttons to make your
selection, then press Enter to conrm the setting.
Setting the Month and Date of the start of Daylight
Savings Time (code 04)
When the code “04” appears, set the month and date of
the start of Daylight Savings Time (MM-DD). Use the +
and – buttons to make your selection, then press Enter to
conrm the setting. This may need to be set each year,
depending on your time zone.
STANDARD MILITARY
1:00pm 13:00h
2:00pm 14:00h
3:00pm 15:00h
4:00pm 16:00h
5:00pm 17:00h
6:00pm 18:00h
7:00pm 19:00h
8:00pm 20:00h
9:00pm 21:00h
10:00pm 22:00h
11:00pm 23:00h
12:00am 24:00h
 Loading...