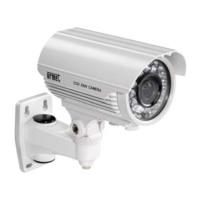
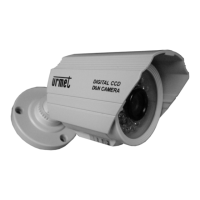
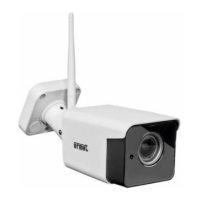
This document describes the Urmet Domus Mod. 1092/204A Mini Day & Night Camera with IR LED.
Function Description
The Urmet Domus Mod. 1092/204A is a mini day and night camera equipped with IR LEDs, designed for surveillance applications. It automatically switches between day (color) and night (black and white) modes based on ambient light conditions. The camera features a CDS sensor that activates the IR LEDs when the light intensity drops below approximately 10 LUX, enabling clear vision in low-light or complete darkness up to a range of 30 meters. An automatic white balancing circuit is integrated to correct color tones as environmental light conditions change, ensuring consistent image quality.
Important Technical Specifications
- Sensor Type: 1/3" Sony CCD - Day & Night
- Sensitive Element: 512 pixels (horizontal) x 582 pixels (vertical)
- Optics: Varifocal - f4-9 mm - F2
- Frame Angle: Approximately 33° to 70°
- Scanning System: 2:1 interlaced - CCIR - V: 50 Hz - H: 15.625 kHz
- Horizontal Resolution: 420 lines
- Synchronisation: Internal
- Shutter Control: 1/50 ~ 1/100,000 sec (AUTO)
- Back-lighting Compensation: AUTO
- White Balancing: AUTO
- Gain Control: AUTO
- Minimum Luminosity: 0.3 Lux with F2 IR Off (0 Lux with IR on)
- Number of LEDs: 42 (19 LEDs ±60° / 23 LEDs ±45°)
- IR Light Maximum Range: Approximately 30 m
- Video Output: Composite output 1 Vpp, 75 Ohm
- S/R Ratio: >48 dB (AGC OFF)
- Power: 12 VDC (±10%)
- Consumption: 90 mA (with IR off) / 480 mA (with IR on)
- Degree of Protection: IP66
- Working Temperature Range: -20 to 50°C
- Storage Temperature Range: -40 to 60°C
- Weight: 400 gr
- Dimensions: 84 mm (width) x 142 mm (depth) x 177 mm (height, including bracket)
Usage Features
Installation:
- Ensure all units to be connected are unpowered before installation.
- Mount the mini camera on its supporting bracket. The bracket should not be disconnected from the camera body to avoid damaging the internal cable.
- Position the bracket to achieve the desired image frame and fasten it securely to a wall or other flat surface.
- Connect the video output to the intended display or recording device.
- Power on the mini camera.
Lens Adjustment:
The camera features a varifocal lens with two adjustment rings:
- VARIFOCAL adjustment ring (B): Turn clockwise or anticlockwise to move the subject closer or further away.
- Focus adjustment ring (A): Turn clockwise or anticlockwise to adjust the focus for nearby or faraway subjects.
Operational Precautions:
- Avoid pointing the lens directly at the sun or intense light sources, even when the camera is off, and ensure the subject is not backlit.
- Do not point the camera towards reflective objects.
- Be aware that some colored fluorescent lights may distort colors.
- Install a suitable circuit breaker and fuse upstream of the device.
- Verify that the rating plate data matches the power specifications before connecting to the mains.
- Do not rotate the camera body through 360 degrees on the bracket, as this may damage the internal cable.
- When adjusting the horizontal/vertical position, only loosen the hex screw; do not unscrew it completely.
Environmental Precautions:
- Despite its IP66 protection, certain environments (e.g., seashores, harbors, dusty areas like quarries or mines) can accelerate corrosion or compromise optimal operation.
- To prevent overheating, install the device in a well-ventilated area.
- Avoid installing near heat sources (radiators, warm air ducts), in direct sunlight, or in areas with excessive dust, mechanical vibrations, or impacts.
- Consider the operating temperature range (-20°C to +50°C) when choosing the installation location. Do not install the unit above another heat-generating device.
- After transporting the device from a cold to a warm place (or vice versa), wait approximately three hours before powering it on to allow it to adapt to the new environment (temperature, humidity).
Accessories Provided
- 1 Supporting bracket
- 1 Allen wrench
- Instruction manual
Note: Product specifications and accessories may be subject to change without prior notice.
Maintenance Features
Cleaning the Device:
- Gently rub the device with a dry cloth to remove dust and dirt.
- If dirt persists, use a cloth dampened with a neutral detergent.
- Do not use volatile liquids (such as petrol, alcohol, solvents, etc.) or chemically treated cloths to clean the device, as this may cause deformation, deterioration, or scratches to the surface finish.
General Maintenance:
- Ensure the device is intact after unpacking.
- Disconnect the device from the mains before any cleaning or maintenance. Do not use spray products for cleaning.
- Check that the operating temperature is within the specified limits and that the environment is not excessively humid.
- In case of malfunction, disconnect the power using the main switch.
- Only qualified technical personnel should open the device.
- For repairs, contact an authorized service center.