Ussc 3
ASSEMBLY
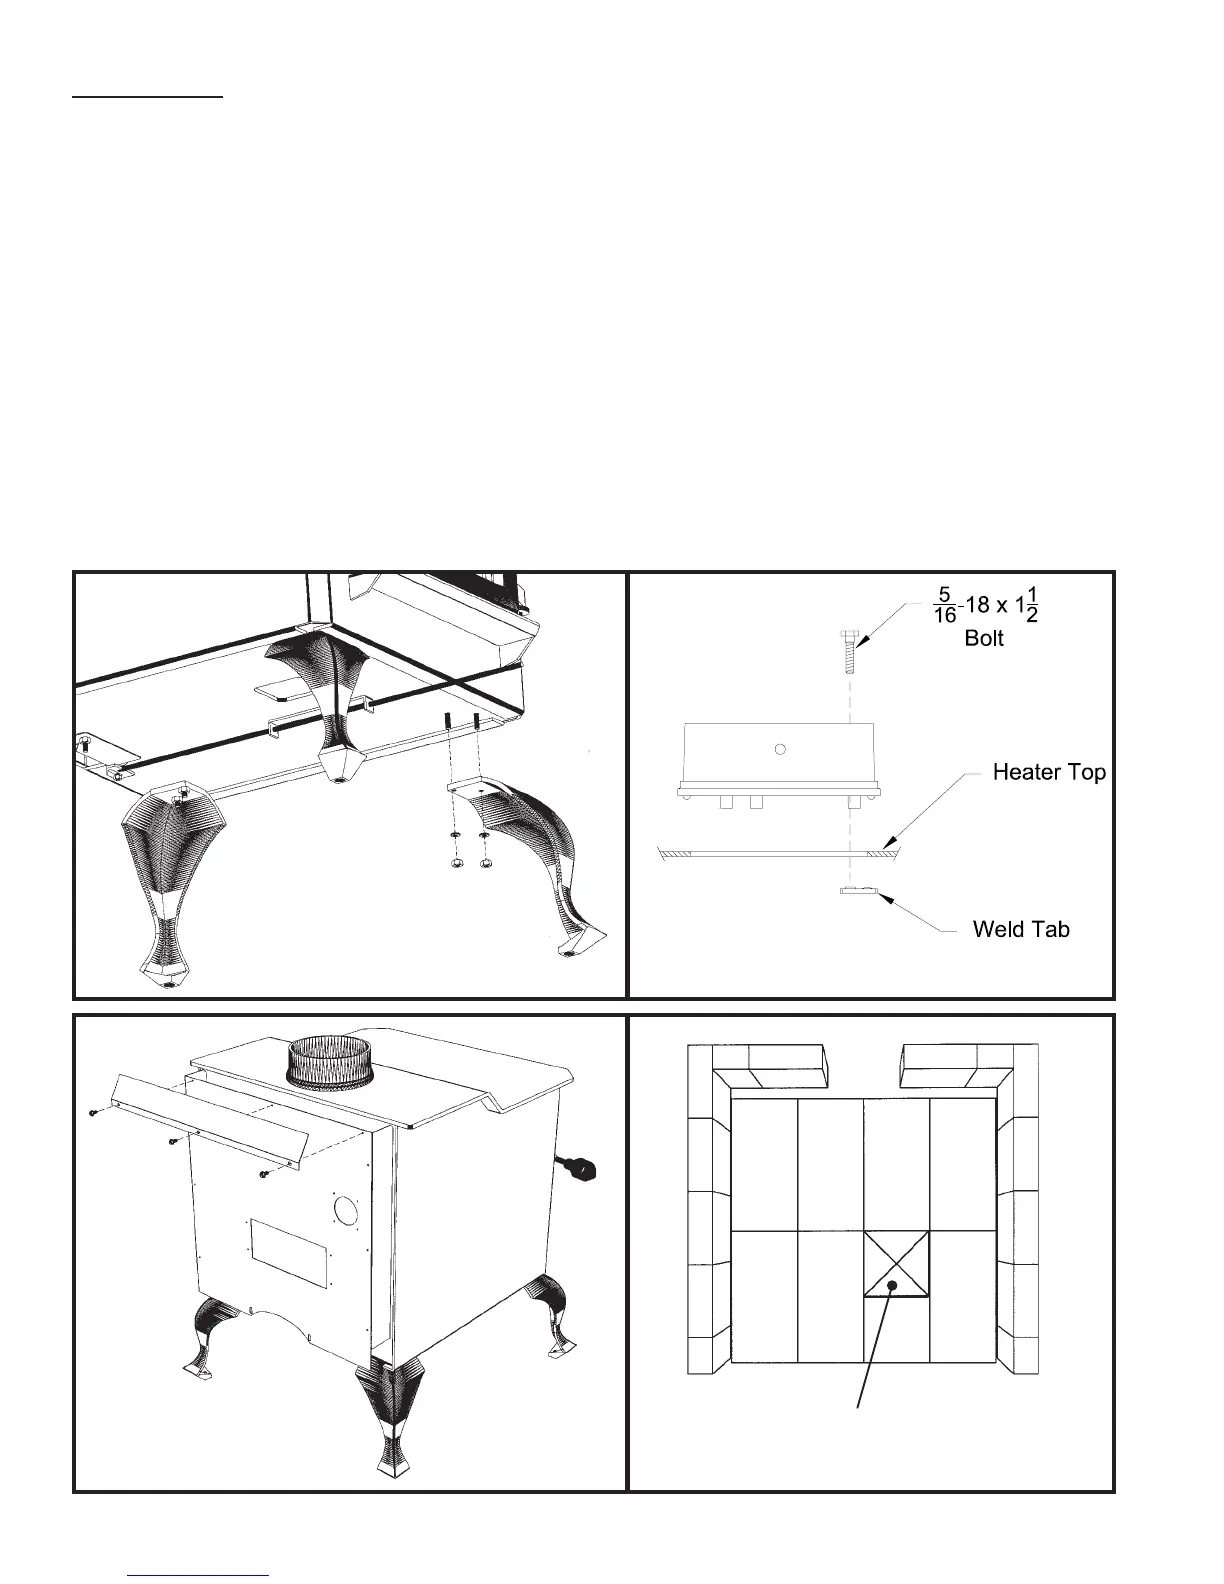
Leg Assembly:
1.
Remove the firebrick form the unit. Tilt the unit on its side. DO NOT tilt the unit on its
back, this could
possibly bend or distort the blower chute on the back of the unit.
2. Remove the four(4) Lag Screws holding the two boards to the unit.
3. Mount the legs to the bottom of the unit using the eight bolts, nuts, and washers provided in the parts bag.
4. Carefully stand the unit up onto the legs.
Flue Collar Assembly:
1. Mount the flue collar to the top of the unit as shown using the (3)
5/16-18 x 1-1/2 bolts, (3) washers, and (3) weld
tabs
provided in the parts box.
Blower Chute Assembly:
1. Locate the Heat Shield Deflector. Using the three(3) 1/2 Tek Screws provided, mount the deflector to the unit as
shown in the diagram.
Ash Pan Assembly:
1. Locate
the two(2) Ash Pan Supports welded under the
unit, then simply slide the ash pan into place under the unit.
Replace the Fire Brick as shown in the illustration below.
Side view of flue collar
mount to heater top
Ash PLug
Brick Placement