Installation Guide
Roseberry Tall Sit-On Unit
Important Information
• Read the instructions carefully.
• Check the product for any signs of damage and remove any protective film.
• It is recommended that a technically competent installer undertakes installation.
• It is the installer’s responsibility to carry out a thorough assessment of the wall type and the weight of
the cabinet and use appropriate fixings.
• Care should be taken when drilling walls to avoid any hidden wires or pipes.
• To prevent the cabinet falling down this product must be fixed using the wall attachment device
provided.
Installation
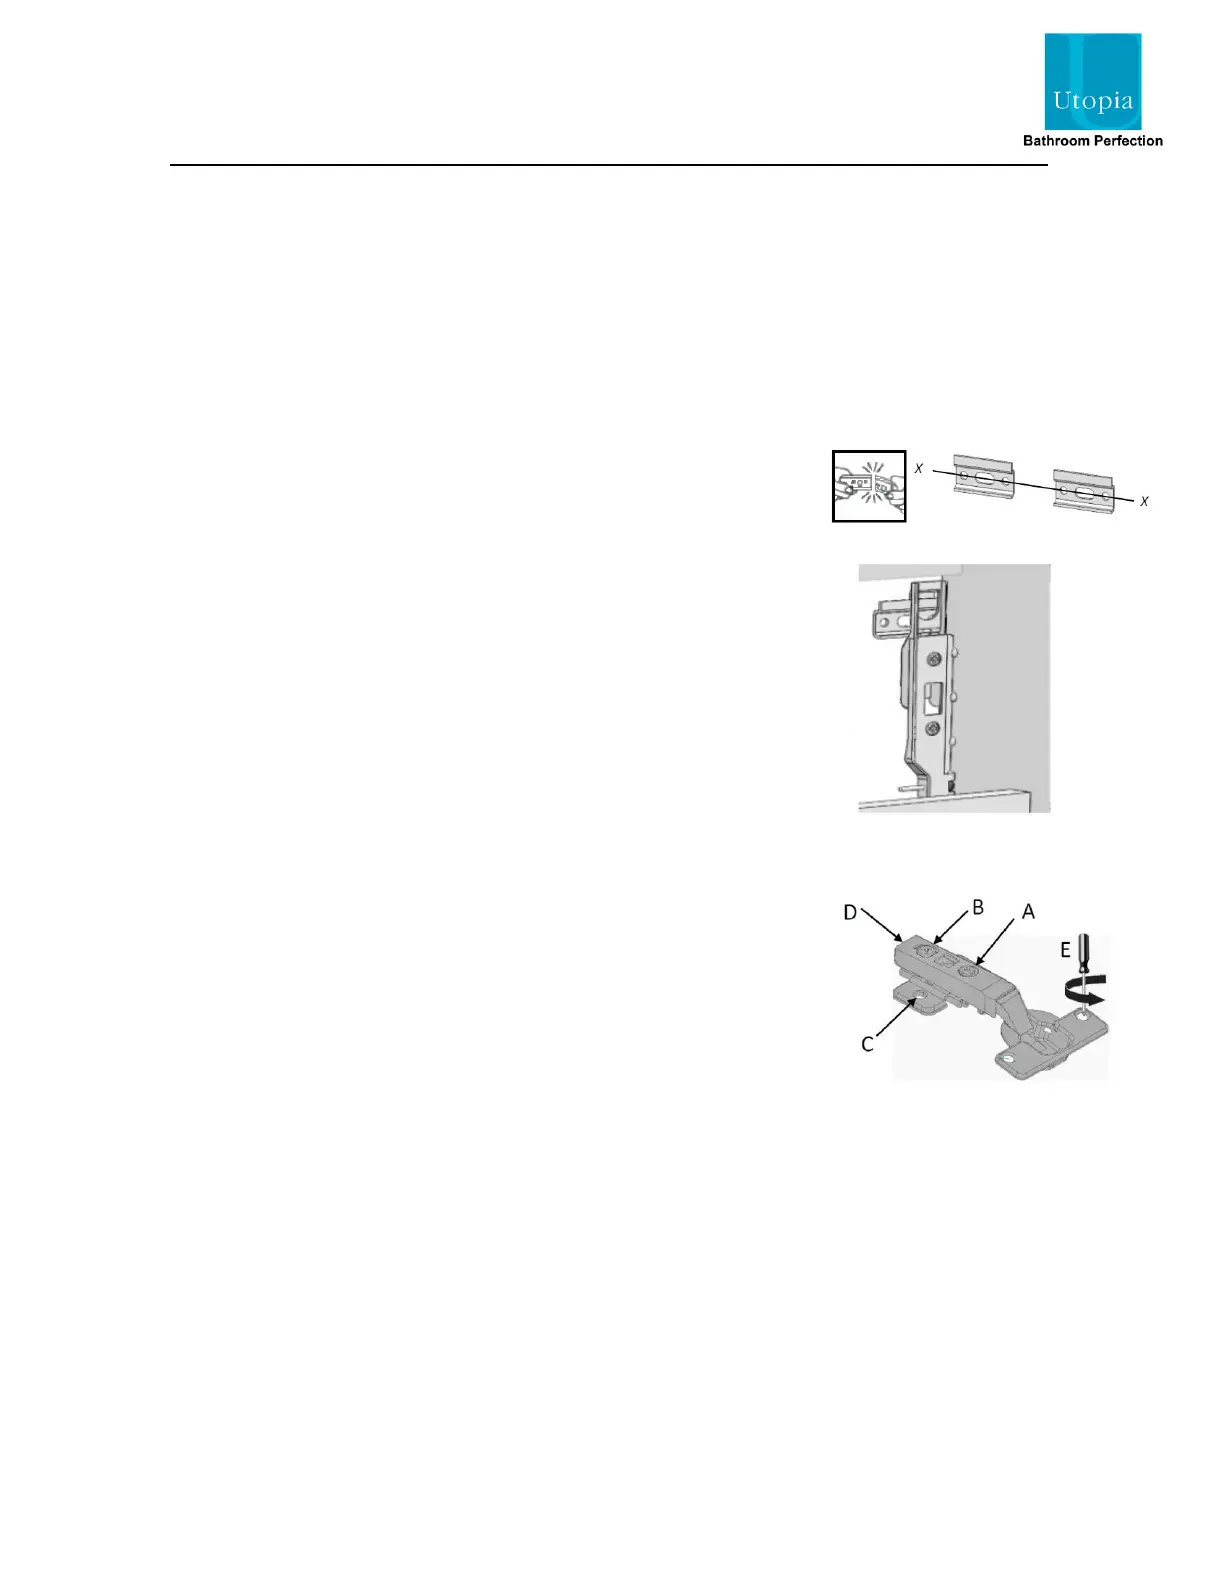
It may be necessary to snap the wall plate in half at the marked line
to create two wall brackets. Mark a horizontal line on the wall at the
required height X---X. Ensure that the wall brackets will fit inside the
width of the cabinet and are equally spaced to ensure even distribution
of weight. Secure the wall brackets to the wall using suitable fixings.
Hook the unit onto the wall brackets ensuring that the brackets
are securely located.
To adjust the position of the cabinet on the wall, use the two screws
in each hanging bracket. The top screws will move the cabinet
closer to or further away from the wall. The lower screws will move
the cabinet up and down.
If this cabinet is being fitted in a run, secure the units together with suitable
fixings through the gables. Try to hide the fixings where possible behind
shelves or hinge plates.
A securing screw should be fitted through the back of the unit through
the fixed back rail of the cabinet and into the wall. This will help to
stabilise the unit.
Door hinge adjustment
• To square the door against the cabinet, adjust screws A.
• To adjust the door closer to or further away from the cabinet,
adjust screws B.
• To adjust the door vertically, slacken screws C. Re-tighten
once the door is adjusted as required.
• To remove the door hinges from the cabinet press button D.
• To remove the door from the door hinges, loosen screws E.
Care & Maintenance
Furniture should be regularly dusted with a soft cotton or micro-fibre cloth. For more thorough cleaning,
occasionally wipe your furniture with a soft cloth dampened with a mild detergent solution. Surfaces should
be thoroughly dried with a lint free cloth to prevent watermarks. Under no circumstances should solvent
cleaning agents, bleach or abrasive cleaning agents or cloths be used. Glass or mirrored panels should be
cleaned using a non-solvent based glass cleaner and a soft cloth. Spills should be removed immediately
using a clean cloth. All bathroom furniture will deteriorate through prolonged periods of exposure to high
levels of condensation so bathrooms must be adequately ventilated using suitable extraction. Failure to
ensure adequate ventilation may invalidate your guarantee. If it required to use the touch-up paint, ensure
that the surface is dry and clean and free from dust or oils. The paint should be applied using a slightly damp
sponge. Carefully dap the paint onto the required area and leave it to dry. Multiple coats may be required to
build-up the paint to give the required finish.
 Loading...