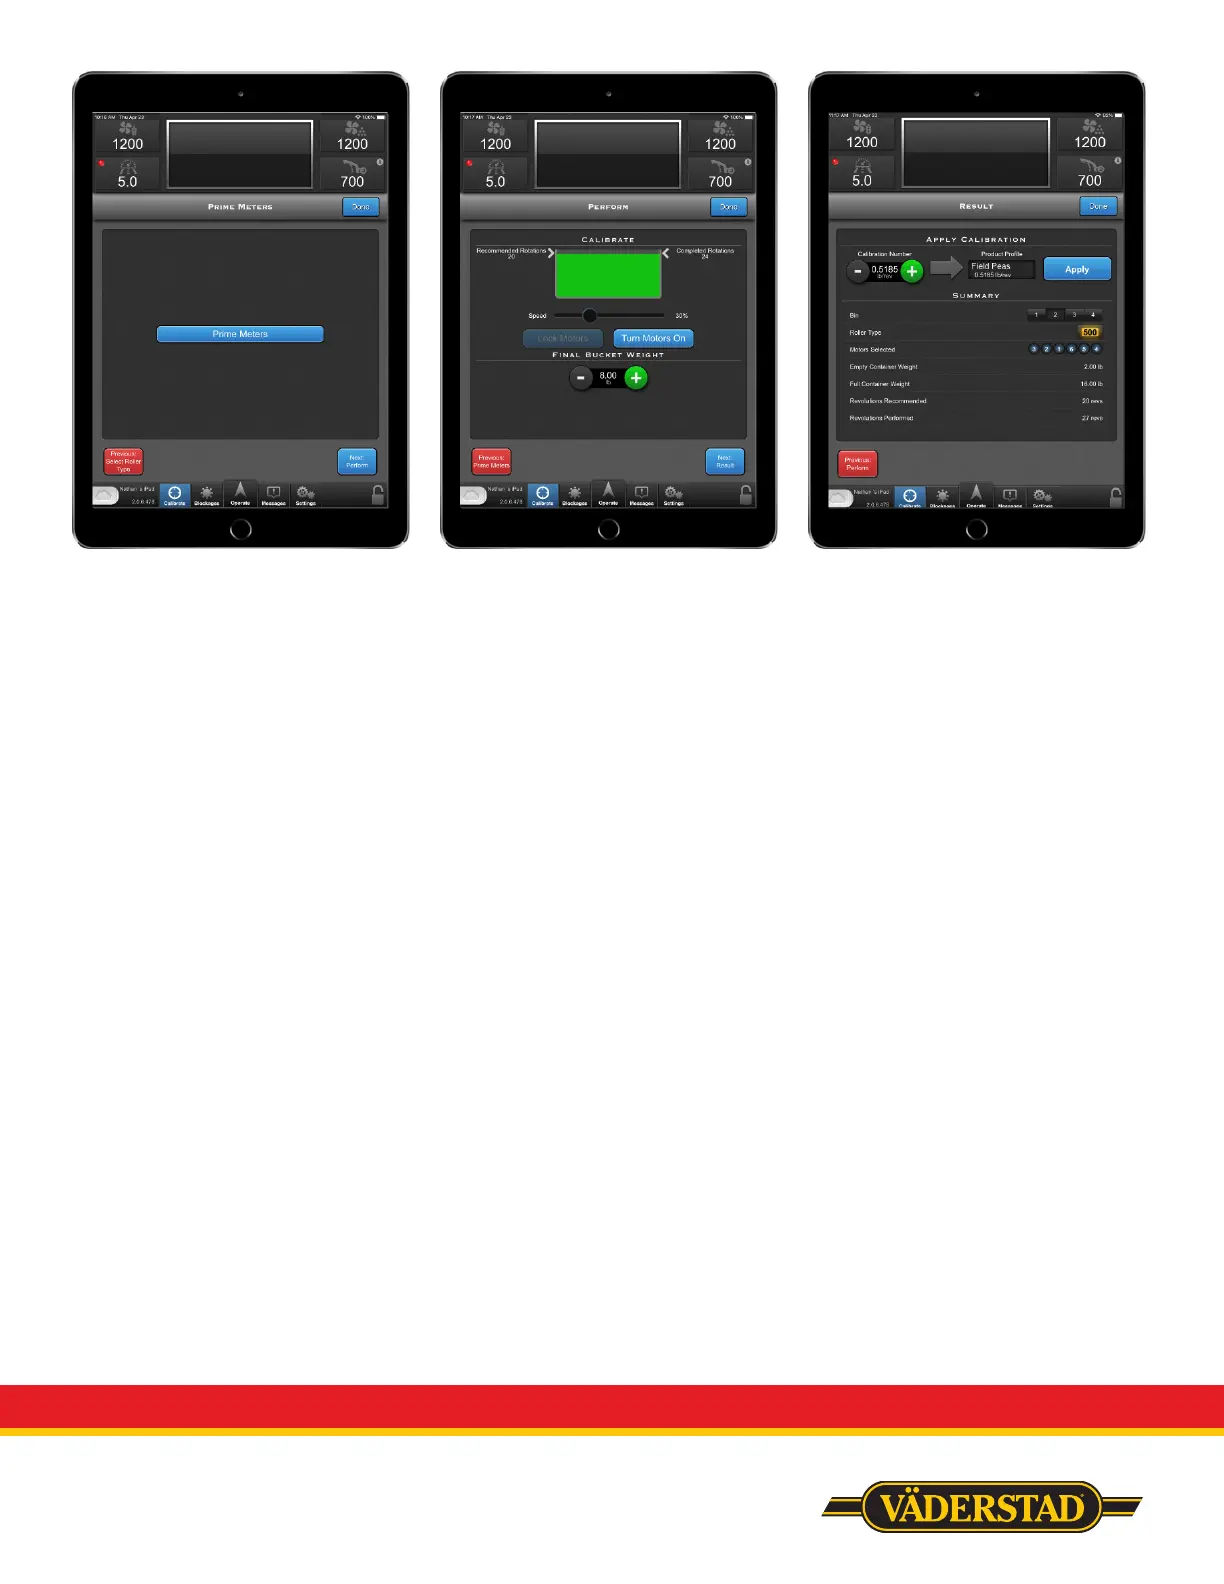
Remove the meter diverter plate
and install calibration bucket on the
bottom of meters you are calibrating.
Push “Prime Meters”, the meters will
turn 2 revolutions and stop.
Remove the calibration bucket, empty
and re-install onto meter.
Select “Next: Perform”
General recommended roller speed is
30%.
Push and hold “Turn Motors On”,
if you wish to not have to hold the
button, push “Lock Motors” while
holding “Turn Motors On”.
Product will now collect in calibration
bucket. Allow the Calibrate bar to fill
and turn green prior to stopping the
calibration.
To stop the calibration, either let go
of “Turn Motors On”, or touch “Turn
Motors On” if motors were locked.
Remove and weigh calibration bucket
and enter number into “Final Bucket
Weight”
Select “Next: Result”
On the “Results” screen, you will see
your Calibration Number on the upper
left portion.
To apply this to a product, touch the
box below “Product Profile”.
From here you can select your
product type. If you do not want
to apply it to a generic profile, you
will still have to select the generic
profile, but press “New” instead of the
product name. You can then enter the
specific name and select done.
It is not important to modify the
application rate or calibration number
when initially selecting. You should
now see the name of the product in
the box under “Product Profile”.
Push “Apply”, you should now see the
lb/rev number in the product profile
box change to the calibration number
from the left portion of screen.
Once completed, push “Done”
 Loading...