5 8
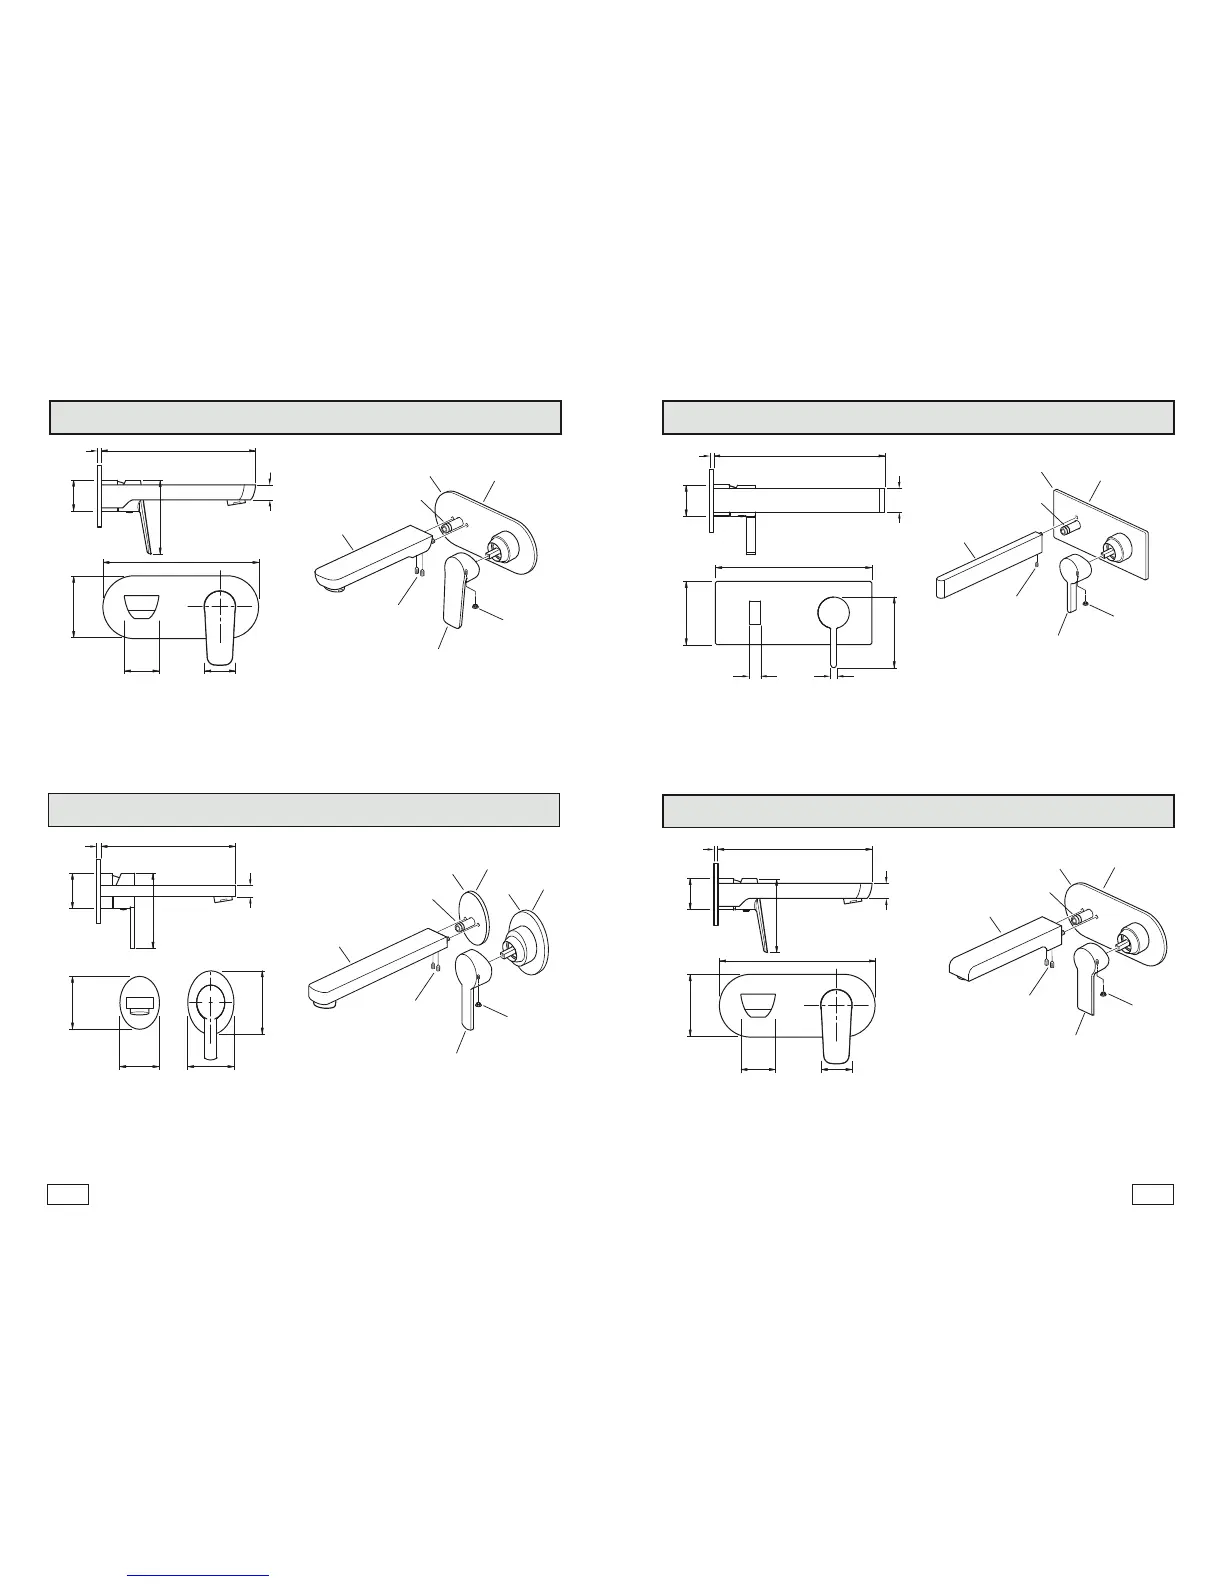
Photon installation
Remove the backing paper from the seal on the back of the cover. Slide the cover over the valve,
push onto the wall until it makes contact.
Carefully slide the control handle onto the valve and secure in position with the grub screw
within the handle using the hexagonal key supplied, replace the screw cover.
Push the spout over the connecting tube, secure using the grub screws on the underside.
Apply a small bead of silicone around the plate to seal against the tile.
Cover
Grub
screw &
cover
Handle
Seal
Grub
screws
200mm
200mm
80mm
40mm44mm
20mm
40mm
95mm
Spout
5mm
Edit installation
Remove the backing paper from the seal on the back of the cover. Slide the cover over the valve,
push onto the wall until it makes contact.
Carefully slide the control handle onto the valve and secure in position with the grub screw
within the handle using the hexagonal key supplied, replace the screw cover.
Push the spout over the connecting tube, secure using the grub screw on the underside.
Apply a small bead of silicone around the plate to seal against the tile.
220mm
200mm
80mm
7mm14mm
30mm
40mm
90mm
5mm
Ion installation
Remove the backing paper from the seal on the back of the cover. Slide the cover over the valve,
push onto the wall until it makes contact.
Carefully slide the control handle onto the valve and secure in position with the grub screw
within the handle using the hexagonal key supplied, replace the screw cover.
Push the spout over the connecting tube, secure using the grub screws on the underside.
Apply a small bead of silicone around the plate to seal against the tile.
Soho installation
Slide the cover over the valve, push onto the wall until it makes contact.
Carefully slide the control handle onto the valve and secure in position with the grub screw
within the handle using the hexagonal key supplied, replace the screw cover.
Slide the cover over the connecting tube, Push the spout over the connecting tube, secure
using the grub screws on the underside.
Apply a small bead of silicone around the plate to seal against the tile.
Cover
‘O’ ring
Grub
screws
196mm
55mm 65mm
75mm
90mm
16mm
40mm
106mm
Spout
6mm
Cover
‘O’ ring
Grub
screw &
cover
Handle
Connecting tube
Cover
Grub
screw &
cover
Handle
Seal
Grub
screw
Spout
Connecting tube
Cover
Grub
screw &
cover
Handle
Seal
Grub
screws
186mm
200mm
80mm
40mm38mm
20mm
40mm
93mm
Spout
5mm
Connecting tube
Connecting tube

 Loading...