EasyManua.ls Logo

Valencia Euro EP60M8SX - User Manual

Valencia Euro EP60M8SX
11 pages
Print Icon
To Next Page IconTo Next Page
Loading...
Built-In Electric Oven
User Manual
EP60M8SX
Question and Answer IconNeed help?

Do you have a question about the Valencia Euro EP60M8SX and is the answer not in the manual?

Summary

Acknowledgment

General Safety Warnings

Initial Smell on First Use

Oven may emit an initial unpleasant smell due to bonding agent, which is normal and temporary.

Hot Surfaces Warning

Appliance and accessible parts become hot during use; avoid touching heating elements.

Child Safety Precautions

Keep children away unless supervised; not for unsupervised use by persons with reduced capabilities.

Cleaning Glass Safely

Do not use abrasive cleaners or sharp metal scrapers on oven glass to prevent damage.

Grill Operation Safety

Keep children away from the oven during operation, especially when the grill is on.

Electrical Safety During Lamp Change

Ensure the oven is off before replacing the lamp to avoid electric shock.

Pyrolytic Cleaning Hot Surfaces

Accessible parts may be hotter during pyrolytic cleaning; keep young children away.

Additional Safety Precautions

Footwear and Wet Contact

Avoid using the oven barefoot or with wet hands/feet. Do not touch hot surfaces.

Oven Door During Cooking

Do not open the oven door frequently during the cooking period.

Installation Responsibility

Installation by an authorized technician is required; producer not liable for unauthorized installation damage.

Door Stability

Do not place items on an open oven door or drawer to prevent unbalancing or breakage.

Cooling Before Touching

Wait for hot parts to cool down before touching them directly.

Long Term Storage

Advised to unplug the appliance if it will not be used for an extended period.

Damaged Cord Safety

A damaged supply cord must be replaced by the manufacturer or qualified personnel.

Pre-Cleaning Steps

Remove all accessories and excess spillage from the oven before cleaning.

Steam Cleaner Prohibition

Steam cleaners are not to be used for cleaning the oven.

Kitchen Unit Fitting

Oven Placement and Fixing

Fit oven into a work top or cupboard, securing with fixing holes in the frame.

Ventilation Requirements

Ensure adequate ventilation by observing measurements and distances when fixing the oven.

Important Kitchen Unit Considerations

Heat Resistance of Materials

Kitchen housing panels must be heat resistant (120°C); glues must withstand heat.

Electrical Insulation and Guards

Electrical parts must be insulated. Guards must be fixed securely and require special tools.

Air Circulation Gap

Remove kitchen unit back for air circulation; hob needs a rear gap of 45 mm.

Declaration of Compliance and Packaging

Damage Check and Professional Contact

Check for damage after unpacking; contact a professional if in doubt. Do not use if damaged.

Packaging Material Safety

Keep packing materials away from children as they are dangerous.

Product Description and Controls

Control Panel Overview

Overview of buttons like K1, K2, Remind, Start, Time, Stop for oven operation.

Oven Lamp Function

Enables observation of cooking progress without opening the door.

Defrost Function

Circulates air at room temperature for quicker thawing of frozen food.

Bottom Heat Function

Provides concentrated heat to the base for slow cooking dishes, ideal for crispy bases.

Convectional Cooking

Both heating elements work for convectional cooking, ideal for single items like large cakes.

Conventional with Fan

Combines fan and heating elements for even heat, saving energy and browning dishes lightly.

Double Grilling with Fan

Inside radiant and top elements work with a motor fan for double grilling.

Double Grilling

Inside radiant and top elements work with the fan for double grilling.

Fan Forced Function

Element around fan provides heat for convection cooking, improving air circulation and evenness.

Radiant Grilling

Infrared elements are working for radiant grilling.

Operation Instructions - Clock and Function Setting

Clock Setting Procedure

Steps to set the hour and minute figures for the oven clock using buttons K1 and K2.

Function Setting Steps

How to select cooking functions, adjust temperature, and start cooking using buttons.

Cooking Time Adjustment

Details on adjusting cooking time in steps of 1 minute or 5 minutes.

Temperature Adjustment

Details on adjusting temperature in 5°C steps, and 30°C for grill function.

Lamp Setting

How to select and activate the oven lamp function.

Inquiring Function

How to check the current time during cooking.

Child Lock Function

Instructions to lock and unlock the child lock feature using button combinations.

Operation Instructions - Reminders and Controls

Reminder Function Setup

How to set a reminder for cooking, up to 9 hours, using setting buttons and K2.

Start;Pause;Cancel Function

Instructions on how to start, pause, resume, and cancel cooking processes.

Energy-Saving Function

How to activate energy-saving mode and how it works.

General Operation Notes

Notes on oven lamp, buzzer sounds, programme cancellation, and child lock reminder.

Oven Accessories

Wire Shelves

For grill dishes, cake pans, roasting and grilling.

Slider Brackets

Shelf support rails for cleaning oven walls.

Universal Pan

For cooking large quantities, collecting spillage or juices.

Shelf Placement Safety

Ensure correct shelf placement for safety and to prevent hot food sliding out.

Oven Bulb Replacement

Bulb Specifications

The bulb is a special high-temperature resistance type (240V~25W).

Replacement Procedure

Disconnect power, unscrew glass, replace bulb, and screw glass back.

Oven Door and Inner Glass Removal

Oven Door Removal

Step-by-step guide to remove the oven door by manipulating hinge toggle covers.

Inner Glass Removal

Instructions on how to detach and remove the inner glass pane for cleaning.

Oven Door Reassembly and Glass Cleaning

Middle Glass Removal;Assembly

Procedure for removing and reassembling middle glass layers from the oven door.

Inner Glass Reinstallation

Guidance on reinserting the inner glass and ensuring clip springs are secured.

Door Reassembly

Steps to reassemble the oven door, including hinge covers and closing the door.

Securing Oven to Cabinet

Cabinet Fitting

Fit oven into the cabinet recess and open the door.

Securing Method

Secure oven to kitchen cabinet using distance holders 'A' and wood screws 'B'.

Oven Connection

Installation Dimensions

Cleaning and Maintenance

General Cleaning

Clean regularly with damp cloth, soft brush, or sponge. Use hot water for heavy soiling.

Oven Door Glass Cleaning

Do not use abrasive cleaners or sharp metal scrapers on oven glass.

Stainless Steel Care

Never leave acidic substances like lemon juice or vinegar on stainless steel parts.

High Pressure Cleaner Warning

Do not use a high pressure cleaner for cleaning the unit.

Baking Pan Cleaning

Baking pans may be washed in mild detergent.

Environmental Disposal (WEEE)

Correct Disposal

Dispose of appliance correctly to prevent negative environmental/health consequences.

Recycling Collection Point

Product marked WEEE; hand over to applicable collection point for recycling.

Overview

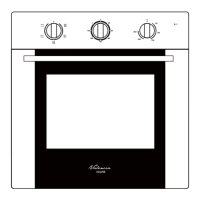
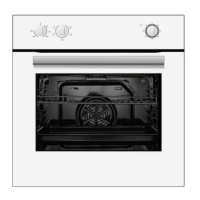
This document serves as the user manual for the Valencia Euro EP60M8SX Built-In Electric Oven, providing comprehensive instructions for its operation, maintenance, and safety.

Function Description

The oven offers a variety of cooking functions, each designed for specific culinary needs:

  • Oven Lamp: Illuminates the oven interior, allowing users to monitor cooking progress without opening the door.
  • Defrost: Utilizes room temperature air circulation to quickly thaw frozen food without heat. This gentle method is suitable for speeding up defrosting times for ready-made dishes and cream-filled products.
  • Bottom Heat: A concealed element at the bottom of the oven provides concentrated heat to the base of food without browning. This function is ideal for slow-cooked dishes like casseroles, stews, pastries, and pizzas where a crispy base is desired. The temperature can be set between 60°C and 120°C, with a default of 60°C.
  • Convectional Cooking: Both heating elements work to provide convectional cooking. The oven needs to be pre-heated to the required temperature and is ideal for single items, such as large cakes. Best results are achieved by placing food in the center of the oven. The temperature can be set between 50°C and 250°C, with a default of 220°C.
  • Conventional with Fan: This function combines the fan with both heating elements for more even heat penetration, saving up to 30-40% energy. Dishes are lightly browned on the outside while remaining moist on the inside. It is suitable for grilling or roasting large pieces of meat at higher temperatures. The temperature can be set between 50°C and 250°C, with a default of 220°C.
  • Double Grilling with Motor Fan: The inside radiant element and top element work in conjunction with the motor fan. The temperature can be set between 180°C and 240°C, with a default of 210°C.
  • Double Grilling: The inside radiant element and top element operate with the fan. The temperature can be set between 180°C and 240°C, with a default of 210°C.
  • Fan Forced: An element surrounding the convection fan provides an additional heat source for convection-style cooking. In this mode, the fan automatically activates to improve air circulation within the oven, creating even heat distribution for cooking. The temperature can be set between 50°C and 240°C, with a default of 180°C.
  • Radiant Grilling: The infrared elements are engaged for grilling. The temperature can be set between 180°C and 240°C, with a default of 210°C.

Usage Features

The oven incorporates several user-friendly features for convenient operation:

  • Clock Setting: Upon connecting the oven to power, "0:00" will display. Users can set the 24-hour clock by pressing the remind button, rotating K2 to adjust hours (0-23) and minutes (0-59), and then pressing the start button to confirm. If the clock is not set, the oven will not function, and "0:00" will remain displayed.
  • Function Setting: To select a cooking function, rotate K1. The corresponding indicator will illuminate. Rotate K2 to adjust the temperature. Press the start button to confirm and begin cooking. If temperature adjustment is skipped, pressing the start button will initiate cooking at the default temperature. Temperature adjustments are in 5°C increments (30°C for grill function). Cooking time can also be adjusted by rotating K1 during cooking.
  • Lamp Setting: Rotate K1 to select the lamp function, and the corresponding icon will illuminate. Press the start button to turn on the lamp.
  • Inquiring Function: During cooking, users can check the current time by pressing the remind button. If the clock was set, pressing the stop button will display the current time.
  • Child Lock Function: To activate the child lock, press the remind and stop buttons simultaneously for 3 seconds until a long "beeping" sound is heard and the lock icon illuminates. To deactivate, press the same buttons simultaneously for 3 seconds until a long "beeping" sound indicates release. A quick press of the stop button during working mode will stop cooking; a long press is invalid.
  • Reminder Function: The oven has a 9-hour reminder function to prompt users to start cooking at a specific time. This can only be set when the oven is in standby mode and the clock is set. Press the reminder setting button, rotate K2 to set the hour and minute, then press the start button to confirm. After the set time, the oven buzzer will sound 10 times, and the reminder symbol will disappear. The reminder can be canceled by pressing the stop button during setting.
  • Start/Pause/Cancel Function: If cooking time is set, press the start button to begin or resume cooking. During cooking, press the pause button once to pause, and twice to cancel cooking.
  • Energy-Saving Function: In waiting or reminding states, pressing the start button for three seconds will turn off the LED display and activate energy-saving mode. If no operation occurs for 10 minutes in waiting state, the LED display will automatically turn off and enter energy-saving mode. Any key press or encoder rotation will exit energy-saving mode.
  • General Notes: The oven lamp is on for all functions. The buzzer sounds when the knob is turned initially. If a cooking program is set but the start button is not pressed within 5 minutes, the current time will display or the oven will return to waiting state, canceling the setting. The buzzer sounds upon effective key presses; no response if not effectively pressed. The buzzer will sound five times when cooking is finished. When opening the oven door, always hold the handle in the center and avoid touching the child lock stud.

Maintenance Features

Regular maintenance ensures the oven's good appearance, reliability, and longevity:

  • General Cleaning: Before any maintenance or cleaning, disconnect the power and set all controls to the OFF position. Wait until the oven interior is warm (not hot) for easier cleaning. Clean surfaces with a damp cloth, soft brush, or fine sponge, then wipe dry. For heavy soiling, use hot water with a non-abrasive cleaning product.
  • Oven Door Glass Cleaning: Do not use abrasive cleaners or sharp metal scrapers on the oven door glass, as these can scratch the surface or cause permanent damage.
  • Stainless Steel Parts: Never leave acidic substances (lemon juice, vinegar) on stainless steel parts.
  • High-Pressure Cleaners: Do not use high-pressure cleaners for cleaning the unit.
  • Baking Pans: Baking pans can be washed with mild detergent.
  • Accessory Removal: Before cleaning, remove all accessories and excess spillage from the oven.
  • Steam Cleaner: A steam cleaner is not to be used.
  • Oven Door Removal: The oven door is removable, and the inner glass is also removable for thorough cleaning.
    1. Open the oven door to its maximum position.
    2. Stir the toggle cover of the door hinge.
    3. Close the door until it touches the toggle cover.
    4. Hold the sides of the oven door with two hands and raise it 2-3mm vertically.
    5. Turn the oven door in the direction shown in the manual to remove it from the hinge socket.
    6. Place the oven door horizontally on a table.
  • Inner Glass Removal:
    1. Pull the inner glass downward while applying upward force.
    2. Use the other hand to press on the outer glass until the clip spring of the inner glass comes out of the socket.
    3. Remove the inner glass for cleaning. Be careful of the clip spring to avoid injury.
  • Middle Glass Removal (if applicable): The oven may have two layers between the door bracket and rubber bumper for a middle glass.
    1. Remove the middle glass in layer 1 first, then layer 2.
    2. After cleaning, reassemble layer 2, then the rubber bumper, and finally layer 1.
    3. Ensure bumpers are well-positioned. If there's only one middle glass, assemble it in layer 1.
  • Inner Glass Reinstallation: After cleaning, insert the inner glass from the oven door top cover, pressing it into position until the clip spring is fully inserted into the socket.
  • Oven Door Reassembly: Assemble the door back onto the oven, stir the toggle cover of the hinges back, and close the oven door.
  • Bulb Replacement: The oven uses a special high-temperature bulb (240V~25W).
    1. Disconnect power from the mains outlet or switch off the circuit breaker.
    2. Unscrew the covering glass.
    3. Replace the bulb with a new one of the same type.
    4. Screw the covering glass back in place.

The manual also includes important safety hints, fitting instructions for installation into a kitchen unit, and a declaration of compliance with European directives regarding waste electrical and electronic equipment (WEEE).

Valencia Euro EP60M8SX Specifications

General IconGeneral
Width60 cm
Thermostat range50 - 250 °C
Voltage220-240 V
Frequency50 Hz
Oven lightYes
TimerYes
Dimensions (HxWxD)59.5 x 59.5 x 56.5 cm

Related product manuals