The Valkyrie Vind SL125 / DL125 is an air cooling unit designed for computer processors, offering efficient thermal management for various Intel and AMD platforms. This installation guide details the components, setup procedures, and wiring instructions for both the SL125 and DL125 models.
Function Description:
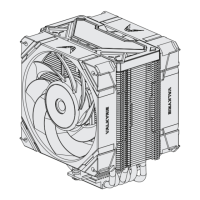
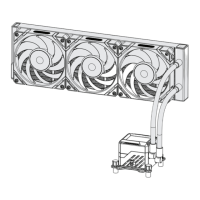
The Valkyrie Vind SL125 / DL125 serves as a CPU air cooler, designed to dissipate heat generated by the processor to maintain optimal operating temperatures. It achieves this through a combination of a heatsink, fans, and thermally conductive silicone grease. The cooler is compatible with a range of Intel and AMD sockets, including Intel LGA1200/1700, LGA2011/2066, and AMD AM4/AM5. The SL125 model features a single fan setup (one forward curved fan and one backward curved fan), while the DL125 model utilizes a dual fan configuration (two forward curved fans). The fans are secured to the heatsink using cable clips, and their direction is crucial for optimal airflow. The cooler also includes an A-RGB connector for customizable lighting, which can be connected to a 5V 3PIN A-RGB header on the motherboard.
Important Technical Specifications:
General Components (Common to SL125 and DL125):
- Intel Backplate: 1x (for Intel LGA1200/1700)
- Intel/AMD Bolts: 4x (used for both Intel and AMD platforms)
- Nuts: 4x
- LGA2011 Bolts: 4x (specific for Intel LGA2011/2066)
- Nut Socket: 1x (tool for tightening nuts)
- Intel Brackets: 2x (for Intel LGA1200/1700 and LGA2011/2066)
- AMD Brackets: 2x (for AMD AM4/AM5)
- Patented Magnetic Logo: 1x
- Thermally Conductive Silicone Grease: 1x (pre-applied on the coldplate)
- Extension Cord: 1x (for fan wiring)
- Cable Clips: 4x (for securing fans)
SL125 Specific Components:
- Air Cooling Unit: 1x
- Forward Curved Fan: 1x
- Backward Curved Fan: 1x
DL125 Specific Components:
- Air Cooling Unit: 1x
- Forward Curved Fan: 2x
Usage Features:
Installation Process (General Steps):
- Bracket Installation:
- For Intel LGA1200/1700: Align the backplate to the corresponding platform holes on the back of the motherboard. Use the inner mounting holes for 1200 (115X) and outer for 1700.
- For Intel LGA2011/2066: Install LGA2011 bolts directly into the motherboard.
- For AMD AM4/AM5: Remove the original bracket and bolts from the motherboard, but keep the original backplate.
- Screw Installation: Install Intel/AMD bolts into the backplate (or motherboard for LGA2011/2066), ensuring the larger end of the screw faces down.
- Bracket Mounting: Place the appropriate Intel or AMD brackets onto the installed bolts and tighten them with nuts using the provided nut socket.
- Protective Cover Removal: Carefully remove the protective cover from the cooler's coldplate.
- Cooler Installation: Align the cooler with the bracket holes and screw it securely onto the brackets. Exercise caution not to touch the pre-applied thermal grease on the coldplate.
- Fan Installation:
- For SL125: Install one forward curved fan and one backward curved fan. Pay close attention to the fan's direction and ensure the Valkyrie logo (wing LOGO) is oriented as shown in the manual. Use the cable clips to secure the fans to the cooler.
- For DL125: Install two forward curved fans. Again, observe the fan's direction and logo orientation. Secure with cable clips.
- Wiring:
- Connect the 4PIN fan cable(s) to the CPU_FAN header on the motherboard.
- Connect the A-RGB connector of the fans and the main body to a 5V 3PIN A-RGB header on the motherboard for lighting control.
- SL125: Utilizes a forward/backward curved fan setup. Correct fan direction is essential for optimal airflow and cooling.
- DL125: Utilizes a dual forward curved fan setup. Correct fan direction is also critical for performance.
Customization:
- The upper cover of the cooler can be removed and replaced, allowing for personalization with different styles. To remove, start from the middle of the cover.
- A-RGB lighting on the fans and main body provides aesthetic customization options, controlled via the motherboard's 5V 3PIN A-RGB header.
Maintenance Features:
- The manual emphasizes the importance of checking all received parts to ensure completeness before installation, which is a key step in preventing installation issues and ensuring proper functionality.
- The pre-applied thermally conductive silicone grease on the coldplate simplifies the installation process by eliminating the need for users to apply their own thermal paste, though caution is advised not to touch it during installation.
- The design allows for easy removal and replacement of the upper cover, which could facilitate cleaning or aesthetic modifications.