--- 4 ---
A. Detailed table of contents
A. Detailed table of contents
Serial numbers of your tractor 1..................
Main table of contents 2..........................
To the operator 3................................
A. Detailed table of contents 4....................
B. Safety precautions 6..........................
B 1. Safety rules 6...............................
B 1.1. Roll Over Protective Structures 9............
C. General description 10.........................
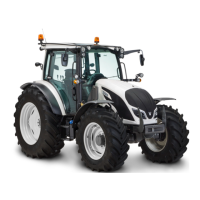
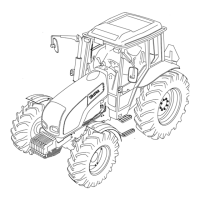
C 1. Illustrations Valtra A75n ---A95n, A75L --- A95L 10...
C2.Service 15..................................
C3.Engine 15...................................
C 4. Power transmission 15........................
C4.1.Clutch 15................................
C4.2.Gearbox 16...............................
C4.3.Rearaxle 16..............................
C 4.4. Power shuttle 16..........................
C 4.5. Powered front axle 16......................
C 4.6. Power take---off 17.........................
C 5. Brake system 17.............................
C 6. Steering system 17...........................
C 7. Hydraulic system 18..........................
C7.1.Hydrauliclifts 18..........................
C 7.2. Val ves for auxiliary hydraulics 18.............
D. Instruments and controls 19....................
D 1. Illustrations 19...............................
D 1.1. Controls on front 19........................
D 1.2. Instrument panel 20.......................
D 1.3. Controls on right hand side 21...............
D 1.4. Controls on left hand side 22................
D 1.5. Rear side controls 23......................
D 1.6. Roof console 23...........................
D 1.7. Driver’s seat 24...........................
D1.8.Othercontrols 25..........................
D 2. Instruments and controls, more detail 25.........
D 2.1. Controls on frontside 25....................
D 2.2. Instrument panel 27.......................
D 2.2.1. Front panel of instrument panel 27........
D 2.2.2. Instrument panel 28.....................
D 2.2.2.8. Agroline---instrument panel (alternat ive),
L C D --- d i s p l a y u n i t 2 9...............
1. Continuously shows a display that cannot be cho-
senwithaswitch 30...................
2. Displays chosen with change over switch 30..
3. Setting mode 31..........................
Changing the Agroline tyre/tire parameters for diffe-
rent tyres/tires 32..................
4. Change over switch for LCD---display unit in Agro-
line instrument panel 33................
D 2.2.3. Side panel of instrument panel 33.........
D 2.3. Controls on right hand side 34...............
D 2.3.1. Driving 34.............................
D 2.3.1.4. HiShift 34...........................
D 2.3.2. Rear linkage (electrohydraulically controlled
lift) 37..................................
D 2.3.3. Rear linkage (mechanically controlled hydrau-
lic lift) 39...............................
D 2.3.4. Rear power take---off 40.................
D 2.3.5. Auxiliary hydraulic 40...................
D 2.3.6. Other controls 41.......................
D 2.4. Controls on left hand side 43................
D 2.5. Controls on rear side 44....................
D 2.6. Roof console 44...........................
D2.7.Seat 46..................................
D 2.7.1. Cab models 46.........................
E. Starting and running 48.........................
E 1. Points to note during the first 50 hours running 48.
E2.Start 48.....................................
E 2.1. Normal start/cold start 48...................
E 2.1.1. Cold start, special instructions 48..........
E 2.2. Starting aerosol 49.........................
E 2.3. Starting with auxiliary batteries 49............
E3.Driving 49...................................
E 3.1. Changing gear 49.........................
E 3.2. Differential lock 50.........................
E 3.3. Powered front axle 50......................
E 4. Stopping 50.................................
E 5. Action to be taken during using 51..............
E 5.1. Permitted driving inclinations for a tractor on a
slope 51.................................
E 5.2. Use of snow chains 51.....................
E 5.3. Front mudguards 51.......................
E 5.4. Towing the tractor 51.......................
E 5.5. Fold down Rops 51........................
F. Operating instructions 52.......................
F 1. Use of power take --- off 52......................
F2.Trailer 53....................................
F 3 . T h r e e --- p o i n t l i n k a g e 5 4.......................
F 3.1. Lifting links 54.............................
F 3.2. Check links 54............................
F 3.3. Telescopic lower links 55....................
F 3.4. Quick couplings for lower links, extra
equipment 55.............................
F 4. Using the hydraulic lift 56......................
F 4.1. Using the mechanically contr olled hydraulic lift 56
F 4.1.1. Position lever 56........................
F 4.1.2. The floating position 56..................
F 4.1.3. Draft control and automatic weight transmissi-
on 57..................................
F 4.1.4. Adjustment of lowering speed 57..........
F 4.2.1. Lift/stop/lower switch (Autocontrol switch) 58
F 4.2.2. Activating the linkage 58.................
F 4.2.3. Position control 58......................
F 4.2.4. Setting transport height 58...............
F 4.2.5. Floating position 59.....................
F 4.2.6. Draft control 59.........................
F 4.2.7. Lowering speed control 59...............
F 4.2.8. Passing switch for position control knob = for-
ced lowering switch 59...................
F 4.2.9. Drive balance control switch 59...........
F 5. Operation of auxiliary hydraulics 60.............
F 5.1. Valves adjusting for single--- or double acting 60
F 5.2. Action to be taken during operation 61........
F5.3.Hydraulicmotor 61........................
F 6. Attaching implements 61......................
F 6.1. Using PTO shafts 61.......................
F7.Useoftoplink 62.............................
G. Maintenance schedule 63.......................
G1.Service 63..................................
G 2. Recommended fuel and lubricants 64...........
G 2.1. Oil recommendations according to outdoor tem-
perature 64...............................
G 2.2. Quality requirements of engine fuel 65........
G 2.2.1. Fuel 65...............................
G 2.2.2. Fuel storage 65........................
G 2.2.3. Filter system 65........................
G 2.2.4. Biodiesel fuel 65........................
G3.Grease 66..................................
G 4. Maintenance schedule 66.....................
H. Periodic maintenance 69........................
H 1. General 69..................................
H1.1.Airfilters 69...............................
H 2. Maintenance daily at least every 10 hours 70.....
H 3. Maintenance weekly at least every 50 hours 71...
H 4. Maintenance every 500 hours 75...............
H 5. Maintenance every 1000 hours or yearly 80......
H 6. Maintenance every 2000 hours or every other
year 85.....................................
I. Checks and Adjustments 88.....................
I1.Engine 88....................................
I 1.1. Bleeding fuel system 88.....................
 Loading...