I N S T A L L A T I O N
©Vantage, 11/6/2014 / IS-0602-A InFusion Controller II — MODEL: IC-36-II & IC-24-II page 6 of 7
Connecting Design Center With Security Enabled
1. If the Security Level is set to None, connecting to
controller proceeds normally.
2. If the Security Level is
set to Remote, local
connections proceed
normally while remote
connections require
proper credentials.
3. With security enabled
Design Center prompts
for a user name and
password.
a. Entering an Incorrect user name
and/or password results in an
Invalid Credentials message.
4. If authentication is accepted, the
username and password are not required again while the
project is open and the IP address remains the same.
Ethernet Connection
5. The dealer will be allowed to choose if they want a secure
connection or an unsecured connection. For remote
connections forward ports to the IP address of the
InFusion Controller.
a. Secured ports (SSL) are: 2010, 3010
b. Standard ports are: 2001 and 3001
Temporary Security Override
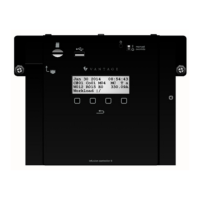
1. A Security override feature exists on the controller
through the panel buttons on the front of the Controller.
a. From controller press Exit until
the controller is back to screen 1,
the Home page. From the Home
page press and hold Exit for
about 6 seconds – until the screen changes.
b. Press Adj to change security setting to None or
Remote. Press Set to commit change. The change
will be active until system is reprogrammed. Pressing
the Exit button without making changes cancels the
controller screen without saving changes.
c. NOTE: If security has not already been programmed
on the controller, adjusting the security setting via
the controller buttons does not do anything.
BACKUP AND RESTORE
Using backup and restore
The backup and restore feature requires that one or more
controllers on the system contain a micro SD Card.
• Recommendation: The Controller used to connect Design
Center contains the system’s micro SD card.
• Recommendation: Install one micro SD card per system.
Backup and Restore From Design Center
1. In Design Center click on System | Backup And Restore
and select from:
a. Full System Backup
b. Full System Restore
c. Restore Equinox Data From Backup.
i. Option “c”, restores Equinox profile information
on controller and opens programming screen.
2. If Backup is selected the system writes the current
controller programming to the micro sd card.
3. If Restore is selected the system opens a selection menu.
a. Last Week
b. Last Month
c. Last Quarter
d. User Initiated (only
shows when a
manual backup
operation has
been selected)
e. Choose Backup by Date
4. Choose Backup by Date
opens a complete
history.
5. These same operations
may be performed from
the controller via the
front panel buttons. See
InFusion Controller
Front Panel Button
Operation (above).
ENHANCED EMAIL
Expanded Email Options
1. Design Center 3.3 comes with new controller firmware
containing enhanced email support.
a. Gmail c. Outlook.com
b. Yahoo d. Etc.
NOTE: IC-1 and IC-II could differ in email support – IC-1 has
a smaller OpenSSL library do to memory restrictions. Test
to verify email operation on all email services.
2. In Design Center click on
Settings and select
Project Information.
3. In the Project Information window, select the Email tab to
open the email setup window.
4. The Server Address is the SMTP server information, for
example, smtp.gmail.com. The correct SMTP server
information is needed for the Email service being used.
Please check with the email service provider for the
specific SMTP Server information.
5. The User Name is the user name used when setting up an
email account, for example, myname@gmail.com.
6. Finally the Password is the password required to access
your email account.
7. Click OK when finished.
8. Tasks may be assigned to send emails as part of their
execution process. NOTE: Email setup in any Design
Center project helps the project be future ready for new
features.
9. In Design Center select Communication | Messaging | Send
Email.
 Loading...