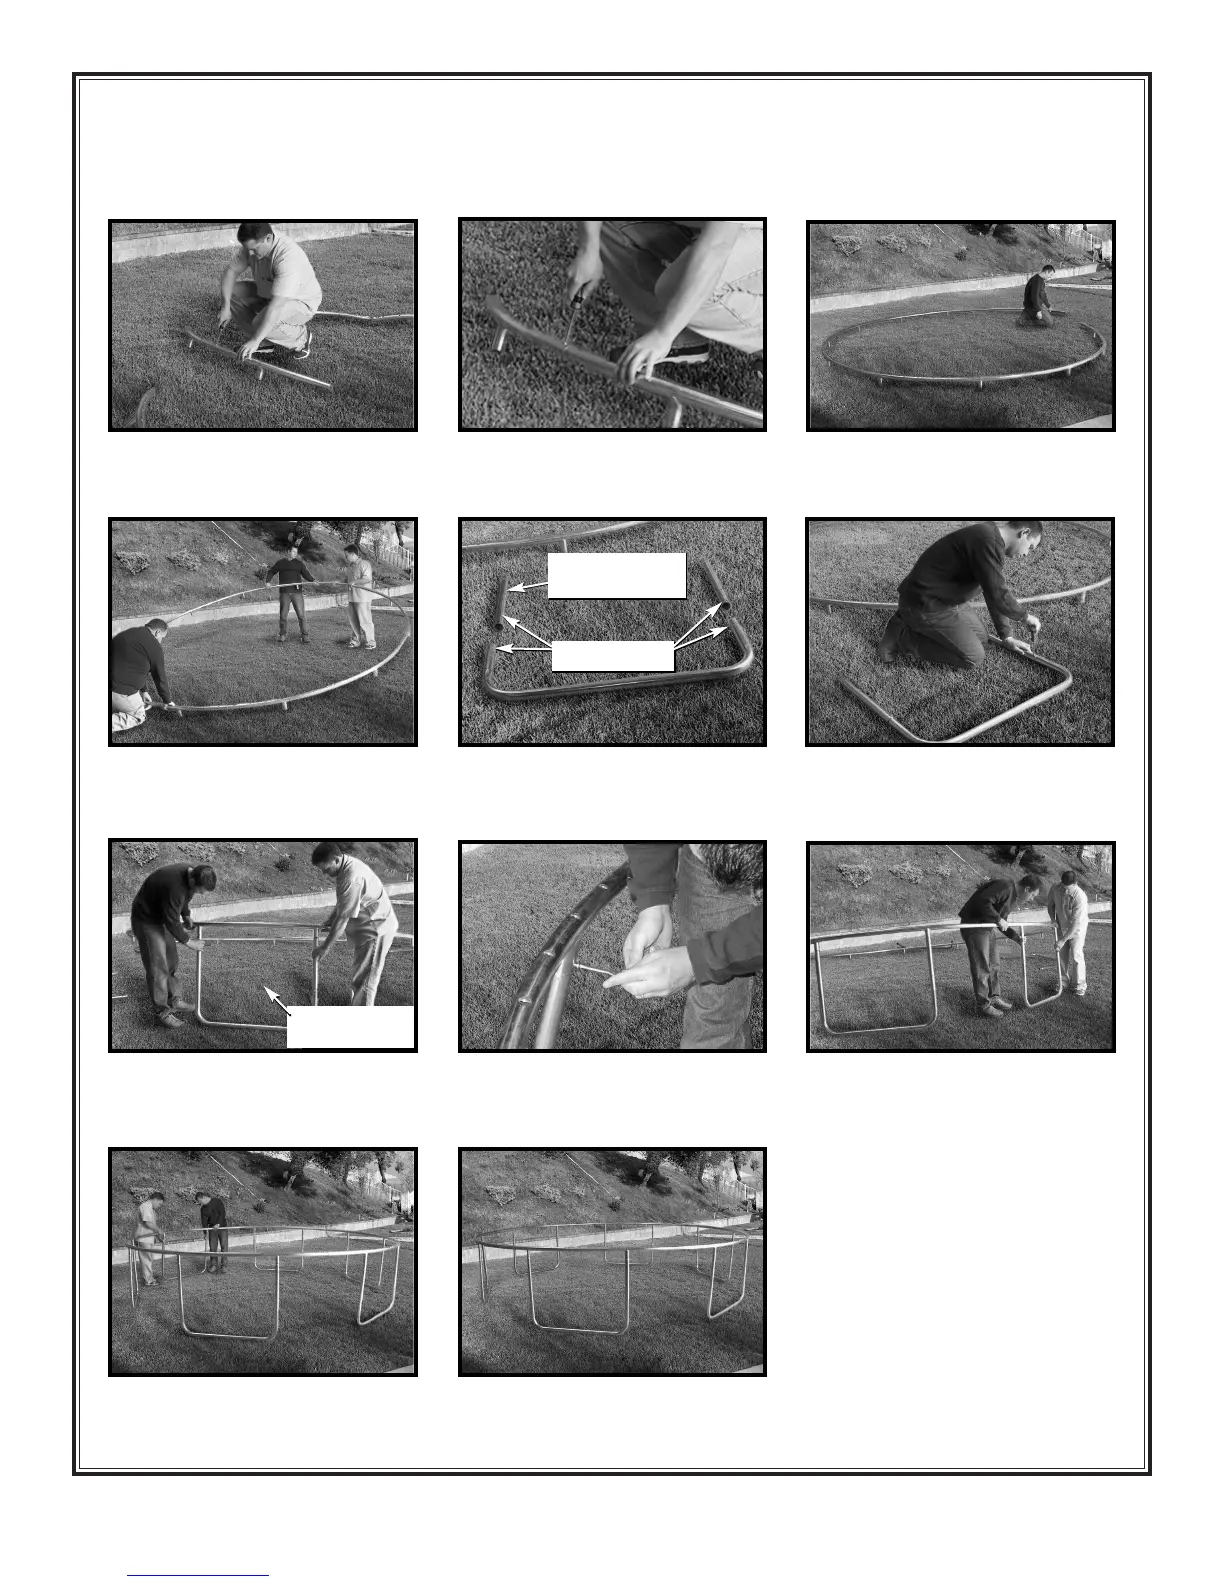
SET SCREW HOLES
(facing up)
PLUGGED HOLES ON
THIS SIDE ONLY
(facing down)
5
FRAME ASSEMBLY
Refer to PARTS LIST for identification of parts.
1 Connect two top rails together with
set-screw.
2 Align the holes, insert set-screw and
tighten with provided screwdriver.
3 Continue aligning the remaining ten
top rails and secure each connection
with a set-screw.
5 Lay one U-shaped leg piece and two
leg extensions on the ground.
WARNING: 3 adults in good physical condition are required for the following assembly. Wear proper shoes and maintain balance to
prevent a fall. Failure to follow all instructions and warnings exactly may result in serious injury.
4 Bring both sides of the circle firmly
together and secure with a set-screw.
A 3rd person may be required to hold
the other end down.
6 Connect both extensions to U-shaped
piece as shown. Align the set-screw
holes, insert screw and tighten.
7 Tu rn U-leg so plugged holes are on
right side. Attach the U-leg assembly
to the top rail as shown.
8 Secure U-leg to top rail with set-
screws on each side.
9 Repeat procedure for each U-leg and
attach to top rail with set-screws.
11 Make sure all set-screws are tight.
Frame is now complete.
10 Continue until all six U-leg sections
are in place.
PLUGGED HOLES
ON THIS SIDE ONLY
(facing out)
(Plugged holes are for optional Safety Enclosure.)