This document outlines the deboxing, installation, and maintenance procedures for VAULT Professional Series Custom Built Cabinets. These cabinets are designed for durability and precision, featuring robust construction and adjustable components to ensure a perfect fit and long-lasting performance.
Function Description:
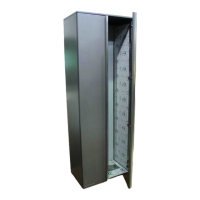
VAULT cabinets are high-quality storage units designed for professional environments. They are shipped in sturdy wooden crates to ensure protection during transit and are equipped with features that facilitate easy installation, precise alignment, and straightforward maintenance. The cabinets are designed to be installed as part of a larger cabinetry system, offering adjustable elements to achieve seamless integration and a polished aesthetic.
Important Technical Specifications:
- Shipping Protection: Cabinets are shipped in massive wood crates with thick foam insulation, specifically designed to protect them from damage during transport.
- Leg Levelers: Each cabinet frame is equipped with leg levelers that can be screwed into the bottom of the frame. These levelers allow for precise height adjustment to ensure the cabinet is level with the floor and adjoining cabinets.
- Drawer Construction: Drawers are designed for easy removal, facilitating cleaning and maintenance. They feature a slide mechanism with stainless steel ball bearings.
- Hinges: All VAULT cabinets utilize fully adjustable Blum hinges, an industry leader, for doors. These hinges allow for adjustments in three directions: height, side, and depth.
- Protective Film: Cabinets are covered with a protective vinyl film on many surfaces to prevent damage during manufacturing and scratches during assembly and transit.
Usage Features:
- Deboxing Process:
- Uncrating: The initial step involves removing the metal bands securing the crate using shears.
- Lid Removal: The lid of the crate is removed by unscrewing all screws with a portable drill.
- Side Panel Removal: The front side of the crate is removed first, followed by both remaining sides, to fully access the cabinet.
- Installation Process:
- Leg Leveler Installation: A pallet jack is used to raise the cabinet, allowing the leg levelers to be screwed into the bottom of each frame.
- Positioning: With the leg levelers installed, the cabinet is raised on the pallet jack and moved into its desired position.
- Leveling: Using a level, the leg levelers are adjusted (raised or lowered) until the cabinet is perfectly level with the floor and any adjoining cabinets.
- Protective Film Removal:
- Purpose: The protective vinyl film serves to protect metal parts during manufacturing and prevent scratches during assembly and transit.
- Technique: To facilitate removal, it is recommended to remove large sections of the film rather than small ones. Users should start from a corner, crumple the film until it bunches up, and then pull sections that are 12 inches or wider. Pulling large sections makes the film detach more easily; small sections tend to break off, requiring the process to be restarted.
- Drawer Operation and Adjustment:
- Removal: Drawers can be easily removed by pulling them open and then lifting them up and outward. This design simplifies cleaning.
- Installation: To install a drawer, the rear drawer tabs are positioned into the rear slide pockets, and the front tabs are guided into the front pockets. The drawer is then pushed firmly into place, ensuring the cut-out tabs on the drawers fit snugly into the drawer pockets.
- Permanent Fixing (Not Recommended): While drawers can be permanently fixed using a screw through the front pocket hole or by bending a locking tab, this is not recommended as it is unnecessary and permanently alters the cabinets, potentially voiding warranties.
- Addressing Misadjustment: Drawer bodies may rattle or become misadjusted during transportation. If this occurs, reinstalling the drawer as described above should resolve the issue.
- Door Adjustment:
- Hinge System: VAULT cabinets feature fully adjustable Blum hinges, allowing for precise door alignment.
- Adjustment Directions:
- Height Adjustment: Two specific screws on the hinge allow for adjusting the height of the doors and aligning the top and bottom edges.
- Side Adjustment: A dedicated screw adjusts the gap between doors, walls, and other cabinets for parallel alignment.
- Depth Adjustment: Another screw brings the door into alignment with neighboring cabinet doors or drawers.
- Important Note: There are two screws that mount the door hinge to the cabinet frame. These screws are NOT meant to be adjusted, and doing so can void the warranty. Users should only adjust the specific screws designated for height, side, and depth adjustments.
- Technical Support: If additional technical support is needed for adjusting Blum hinges, users can contact the manufacturer directly at (800) 438-6788.
Maintenance Features:
- Drawer Slide Lubrication: If drawer slides do not operate smoothly, a small amount of White Lithium Grease (non-aerosol) should be applied to the stainless steel ball bearings and the ridge of their travel. The slide should then be operated back and forth until the entire travel area is liberally covered with grease and operates smoothly.
- Easy Drawer Removal for Cleaning: The design allows for easy removal of drawers, making the cleaning process more accessible and thorough.
The VAULT Professional Series Custom Built Cabinets are engineered for precision, durability, and ease of use, ensuring a high-quality installation and long-term performance in any professional setting.