69
P age 69, L :\Owne r's Manu al\Nv\Speedster-VX220 \Maste r\KT A2 399-5\VML\SK IPOM.fm R HD, Vaux Edit ion 9.3 .0 5
This m ust be done with ex treme care. Any
deviation from the following instructions
could lead to personal injury or dama ge
resulting from battery explosion, as well as
to d amage to the electrical system s in both
vehic les.
z Never expose the battery to naked
flam es or sparks.
z Do not allow battery fluid to contact
eye s, skin, fabrics or painted surfaces .
The f luid con ta ins s u lp huric ac id wh ich
can cause injuries and damage in the
event of direct contact.
z To lessen the risk of injury wear eye
protection when working near any
battery.
z Make sure tha t the ba ttery providing the
jump start has the sam e voltag e as the
battery in your vehicle (12 V). Its
capacity (Ah) must not be substantia lly
lower than that of the discharged
battery. The voltage and c apacity a re
given on the batteries.
z Do not d isconnect the discha rg ed
battery from the vehicle.
z Switch off all unnecessary electrical
lo ad s.
z Do not lean over the battery during jump
startin g.
z Do not allow the terminals of one lead to
touch those of the other lead.
z Ap ply hand brak e. Place gear lever in
ne u t ra l.
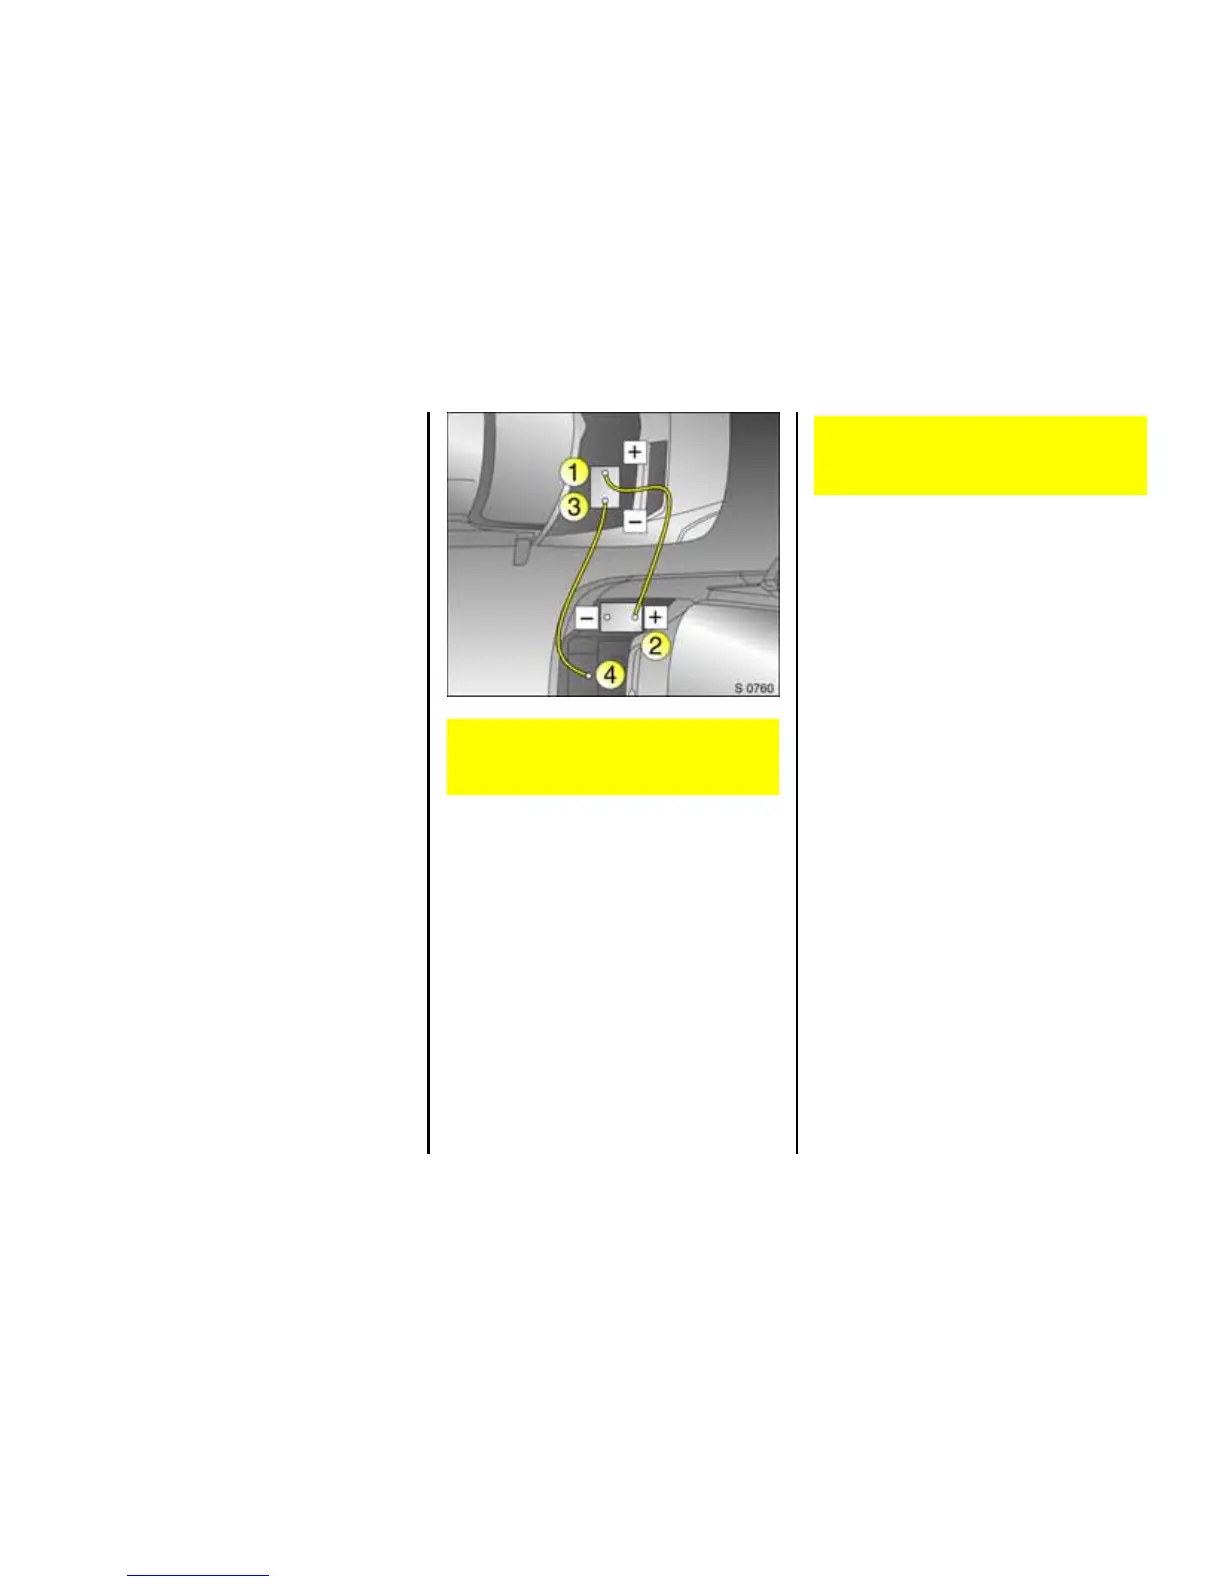
1. Remove the rubber cover and connect
one end of the first jump lead to the
positive terminal 1 of the dis charged
battery (identified by “+” sign on battery
case or terminal).
2. Connec t the other end of this lead to the
positive terminal 2 of the battery
providing the jum p start (“+” sign).
3. Connect the first end of the second jump
lead to the negative terminal 3 of the
discharged battery ("-" sign).
4. Connect the other end of this jump lead
4 to ground on the vehicle providing the
jump start, e.g. engine b loc k or screw
connection in engine suspension.
z Do not connect the lead to the negative
terminal of the battery on the vehicle
providing the jump start! The c onnec tion
point should be as far away from the
battery as possible.
z The connection point should be as far
away from the discharged battery as
possible.
z Route the leads so that they cannot
catch on rotating parts in the engine
compartment.
z The e ng ine of the v ehicle prov iding the
jum p sta rt should be allowed to run
during starting. Attempts to start the
engine of the ve h ic le with the disc harg ed
battery should be made at intervals of
one minute a nd should not last longer
than 15 seconds. After starting, allow
both engines to idle for approx. 3
minutes with the leads still connected.
z Reverse above sequence exactly when
removing leads and replace the rubber
cover on the positive terminal.
Slide wind screen wash bottle upwards to
rem ove. Connect the leads in the order
shown in the picture:
Care must be taken to ensure that the
leads do not inadvertently contac t metal
surfaces within the com partment area.
 Loading...