DVM8020 Rev. 02
14.03.2011 ©Velleman nv
5
• Only use the device for its intended purpose. Using the device in an
unauthorised way will void the warranty.
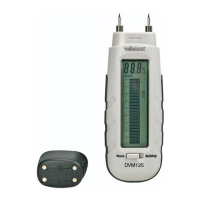
4. Features
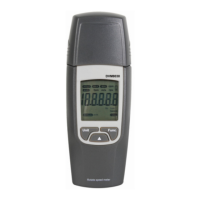
• 4 digits LCD
• auto power-off
• comes with: storage box, wristlet, batteries, user manual
• optional telescopic tripod (not incl.): CAMB17
5. Use
Refer to the illustrations on pages 2 and 3 of this manual.
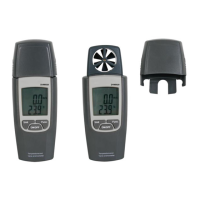
• Remove the sensor cover [1] by releasing the screw at the back of the
device and sliding the cover upwards.
• Press the ON/OFF button to switch the device on. Press again to switch
it off.
• The device powers off automatically after ±20min. To disable auto-power
off, press and hold the ON/OFF button until AP ON is displayed. Press
the Unit button to toggle between AP ON and AP OFF and press the
Func. button to confirm. To re-enable auto-power off switch the device
off and repeat this procedure.
• Hold the anemometer perpendicular to the air flow; the wind must pass
through the wind sensor [2] from the rear to the front.
Note: holding the anemometer not perpendicular to the wind will result in
wrong measurements.
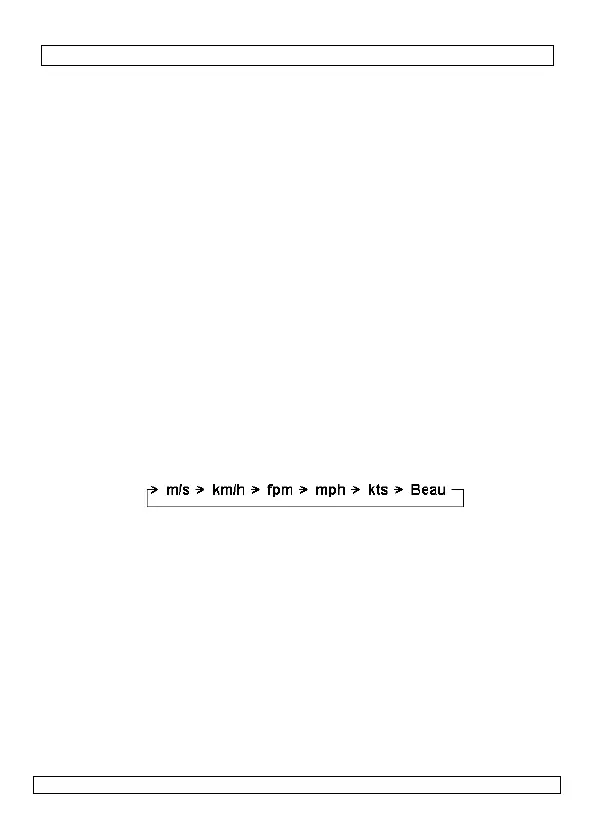
• Press the Unit button multiple times to scroll through the different speed
measuring units [F]:
• Press and hold the Unit button for ±2s to change the temperature unit
[G].
• Press the Func. button shortly to go into hold-mode [A]. The current
measurement remains on the display.
• Press the Func. button again shortly to go into max-mode [B]; only the
highest measured value is shown. Press the Func. button again shortly to
go into min-mode [C]; only the lowest measured value is shown.
• To reset the maximum and minimum values, while in min-mode, press
and hold the Func. button for ±2s.
• While in normal measuring mode, press and hold the Func. button ±2s
to switch on the backlight. Press and hold again ±2s to switch the
backlight off.
• When the battery indicator [H] is shown, replace the batteries (see §8
).
• Always place the sensor cover [1] back when the device is not in use.