SOL10UC3
V. 01 – 27/03/2017 7 ©Velleman nv
7. Setting
7.1 Load Work Mode
When the regulator is switched on, press the setting button to control the
load output.
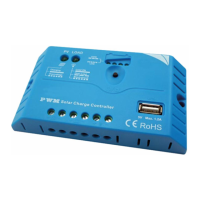
Note that the USB output is switched on only when the regulator is switched
on.
7.2 Battery Type Setting
Hold the setting button pressed for 5 seconds. The battery status LEDs
(LEDs 1 to 3, from left to right) will be flashing correspondingly. Next, press
the setting button to select the battery type. The setting is confirmed when
the LEDs stop flashing.
8. Troubleshooting
The solar panel is exposed properly to sunshine but the charging LED is
off.
o The input voltage of the solar panel is lower than the battery
voltage. Check the input voltage of the solar panel.
o The battery voltage is lower than 6 V. The minimum start-up
voltage is 6 V.
o Disconnected wiring. Check if the wiring is connected properly.
The charging LED is flashing rapidly.
o Battery voltage exceeds the overvoltage disconnect (OVD) values.
Disconnect the solar panel and check the battery voltage.
LED1 is flashing slowly/rapidly.
o Battery voltage too low/discharged. Check the battery voltage.
The load status LED is flashing slowly.
o Overload. Reduce the load and press the setting button once.
The load status LED is flashing rapidly.
o Short-circuit. The regulator automatically resumes after
10 seconds. When a second short-circuit occurs, press the setting
button once.
 Loading...