VTSS4NU
V. 01 – 30/05/2013 4 ©Velleman Inc.
3. General Guidelines
Refer to the Velleman® Service and Quality Warranty on the last pages of this manual.
Indoor use only. Keep this device away from rain, moisture, splashing and dripping
liquids. Never put objects filled with liquids on top of or close to the device.
Keep this device away from dust and extreme temperatures. Make sure the ventilation
openings are clear at all times.
Protect this device from shocks and abuse. Avoid brute force when operating the device.
Familiarize yourself with the functions of the device before actually using it.
All modifications of the device are forbidden for safety reasons. Damage caused by user modifications
to the device is not covered by the warranty.
Only use the device for its intended purpose. Using the device in an unauthorized way will void the
warranty.
Damage caused by disregard of certain guidelines in this manual is not covered by the warranty and
the dealer will not accept responsibility for any ensuing defects or problems.
Do not switch the device on immediately after it has been exposed to changes in temperature.
Protect the device against damage by leaving it switched off until it has reached room temperature.
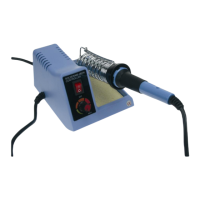
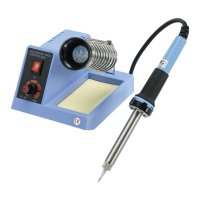
4. Features
for general electronics applications and repair
with on/off switch with LED indication
standard tip: Ø 0.04".
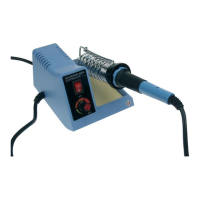
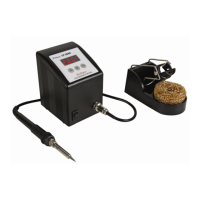
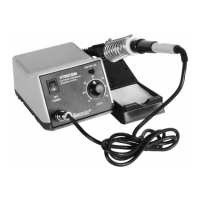
5. Overview
Refer to the illustrations on page 2 of this manual.
6. Instructions
6.1 Preparation
1. Put the soldering iron holder in the corresponding hole in the casing of the soldering station.
2. Make sure the sponge is completely saturated with clean water and let it drip off before you put it in
the sponge tray.
3. Put the soldering tip into the shaft and attach it to the soldering iron with a coupling nut. Only
change a soldering tip when the soldering iron has cooled down. Loosen the coupling nut and gently
pull out the soldering tip. Check the screw fitting regularly and tighten it when necessary.
Warning: Never use the soldering iron without the soldering tip.
6.2 Electrical Connection
Put the on/off switch in the O position (off) and connect the device to a 110 Vac power supply. The
soldering station is now ready for use.
6.3 Temperature setting
Switch on the soldering station by putting the on/off switch in the I position (on) (the red switch will
light). You can set the temperature between 302 °F and 842 °F.
6.4 Operation
Prerequisite for clean joints is the use of suited solder and a correct use of the soldering station. We
recommend the use of solder with a resin flux core. Halogen containing solder should not be used in
any case. Before the first uses, you should tin the new soldering tip. Switch on the soldering station
and apply some solder to the soldering tip at a temperature of 390 °F. Perfect joints are only possible