24 EN
PUTTING INTO OPERATION
!
Attention! Make sure the device is switched off and the power plug is discon-
nected before you start!
1 Unpack the appliance, set it up and use the transport castors 14 to move it to
the place you want. To do this, lift slightly on the right-hand side. Remove battery
protection and protective foil from remote control 13.
2 Open filter compartment7 and remove coarse dust filter 9.
3 Remove and open HEPA filter10.
4 Re-insert opened HEPA filter 10 and coarse dust filter 9 and close filter compart-
ment 7.
5 Open evaporator compartment 3 and remove water tank 4.
6 Open water tank 4 and fill up to the MAX marker with cold water.
7 Close water tank4 securely and place into water tray 6, close evaporator com-
partment 3.
8 Adjust display 1 to the position you want (3 positions possible).
9 Adjust cable connector to the length you want by winding/unwinding in cable com-
partment 11. Connect power plug to mains and switch appliance on using on/off
switch 2 or remote control 13.
i
It can take approx. 60 seconds for the appliance to start up and the red light
on the display to go out. You will be able to hear a noise (gurgling), which is not a
quality defect.
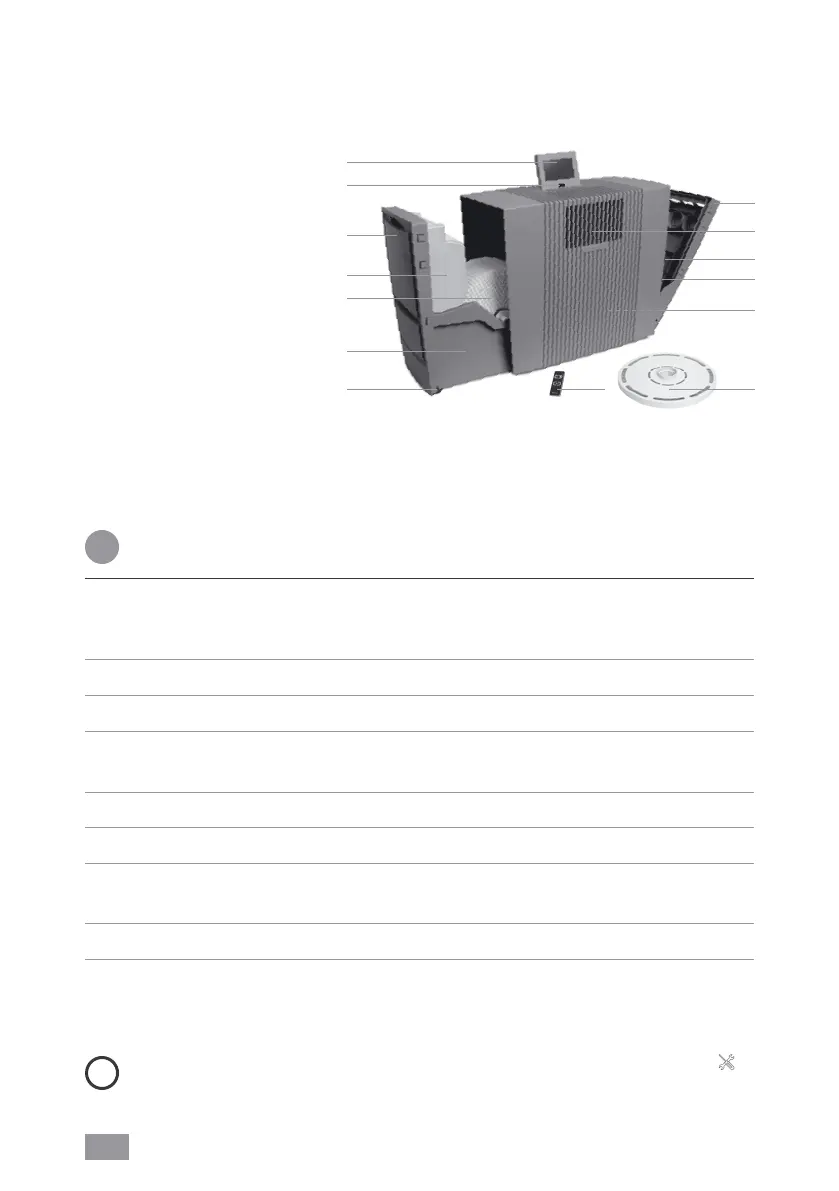
1 Display
2 On/off switch
3 Evaporator compartment
4 Water tank
5 VentWave disk stack
6 Water tray
7 Filter compartment
8 UVC lamp (pre-installed)
9 Coarse dust filter
10 HEPA filter
11 Cable compartment
12 Hygiene disk (pre-installed)
13 Remote control
14 Transport castors
OVERVIEW
1
2
3
4
5
7
11
6
14 12
13
9
8
10
AH902