When using the Emlid Reach system
To post process your images using an Emlid Reach PPK/RTK system, we recommend using .
You also need the Emlid ReachView app on your tablet or mobile phone.
RedToolBox
Before you can use your Emlid Reach system you will need to perform the initial setup procedure as
described here: https://docs.emlid.com/reach/common/quickstart/first-setup/
After completing a survey mission flight please complete the following steps:
Step 1: Power off and on your base station and browse to the address as shown in the ReachView app.
Step 2: Download the UBX file corresponding to your flight, call this file "base.zip"
Step 3: Power on your UAV and browse to the address as shown in the ReachView app.
Step 4: Download the UBX file corresponding to your flight.call this file "rover.zip"
Step 5: Extract both base and rover files in a separate folder.
Next you can process the data inside RedToolBox
Step 1: Open RedToolBox by running the RedToolBox-V2.exe file and choose your desired output
Step 2: Open the Import tab and select all pictures from your mapping mission.
Step 3: Click on the "Import Rinex ..." button under the GNSS section and select your rover UBX file
Step 4: Click on the "Import Rinex ..." button under the BASE section and select your base UBX file
Step 5: click "Run mapping"
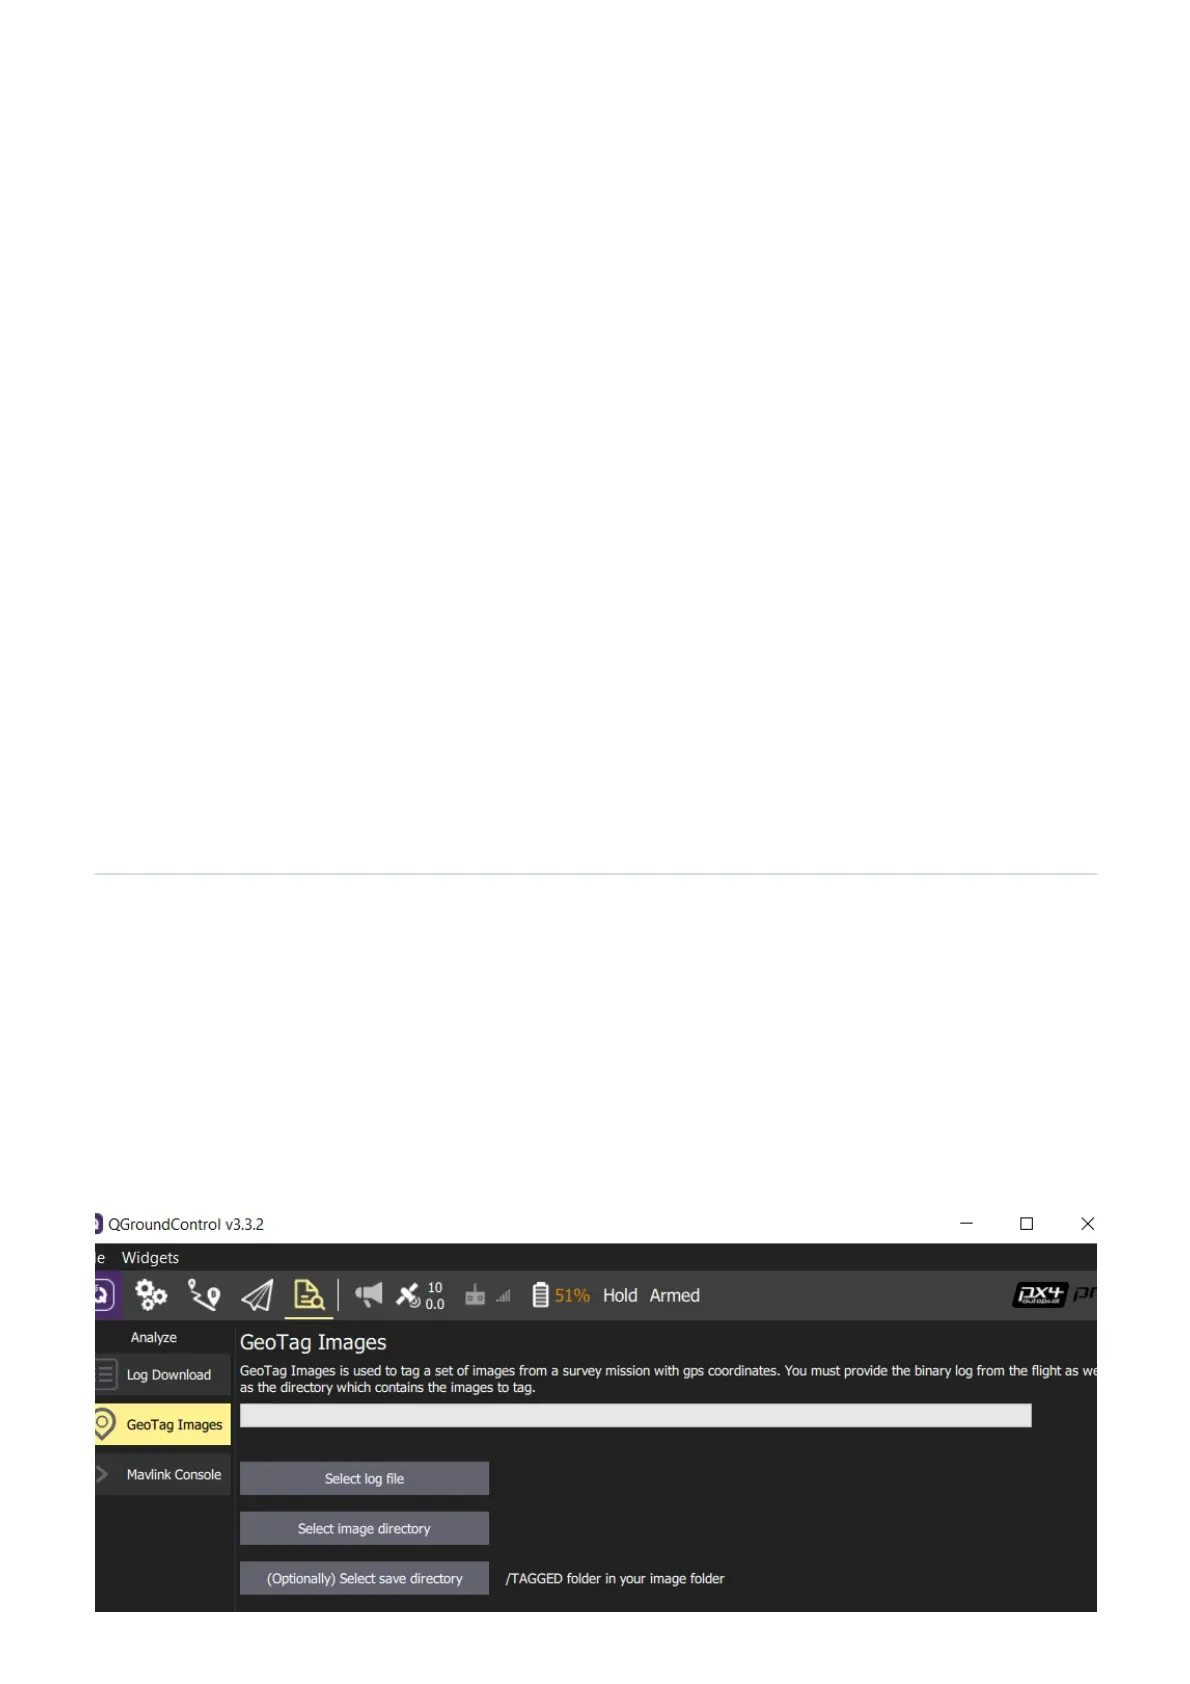
When using onboard log files
To Georeference the images you can remove the sd-card from the flight controller to copy the logfile from the
flight. The logfile will be stored in the 'logs' subfolder under the date & time of the flight. To process the
images QGroundControl should be installed on a PC or MAC computer.
Download/copy the logfile and images from the flight and point QGroundControl to them. Then click on
"Start Tagging".
 Loading...