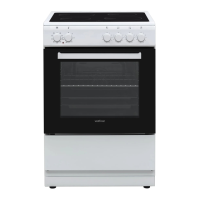
The Vestfrost GE 56 EX is a free-standing cooker designed for domestic use, featuring both a gas hob and an electric oven. This manual provides comprehensive information on its installation, operation, and maintenance.
Function Description
The appliance includes a gas hob with four burners and an electric oven with multiple cooking functions.
Gas Hob:
The hob features three different burner sizes:
- Rapid/Wok Burner: 22-26 cm diameter for quick heating and large pots.
- Semi-rapid Burner: 14-22 cm diameter for general cooking.
- Auxiliary Burner: 12-18 cm diameter for simmering and small pots.
Each burner is controlled by a dedicated knob with three positions: off (0), maximum (large flame symbol), and minimum (small flame symbol). Ignition can be manual (using a lit match or taper) or electrical (via the control knob, which activates a spark plug). The hob is equipped with a flame safety device that automatically blocks gas flow if a flame is accidentally extinguished, preventing unburned gas accumulation. A 90-second wait is recommended before re-igniting an extinguished burner.
Electric Oven:
The oven offers various cooking functions, each controlled by a function control knob and a thermostat knob to set the desired temperature. The thermostat light indicates when the oven is heating or maintaining temperature.
- Oven Lamp: Illuminates the oven interior for the duration of cooking.
- Defrost Function: Activates the fan and warning lights to defrost frozen food. It is recommended to place food on the third shelf from the bottom with a tray underneath to catch water. This function does not cook or bake.
- Static Cooking Function: Uses both upper and lower heating elements, along with the thermostat and warning lights, for even cooking. Ideal for pastries, cakes, baked pasta, lasagna, and pizza. Preheating for 10 minutes and using a single shelf are recommended.
- Fan Function: Activates upper and lower heating elements, the fan, thermostat, and warning lights. This function provides air circulation for a slightly grilled effect, suitable for baking pastry and even cooking. Preheating for 10 minutes is recommended.
- Lower Heating and Fan Function: Uses the lower heating element and fan, along with the thermostat and warning lights. Ideal for baking food like pizza, ensuring even cooking in a short time. Preheating for 10 minutes is recommended.
- Grilling Function: Activates the grill heating element, thermostat, and warning lights for grilling and toasting on the upper shelves. Lightly oil the wire grid and place food in the center, with a tray underneath to catch drips. The oven door must be closed, and the temperature set to 190°C. Preheating for 10 minutes is recommended.
- Faster Grilling Function: Activates the grill and upper heating elements, thermostat, and warning lights for quicker grilling of larger surface area foods. Use the upper shelves, lightly oil the wire grid, and place food in the center with a drip tray. The oven door must be closed, and the temperature set to 190°C. Preheating for 10 minutes is recommended.
- Double Grill and Fan Function: Activates the grill, upper and lower heating elements, and fan, along with the thermostat and warning lights. Suitable for faster grilling of thicker and larger foods. Use the upper shelves, lightly oil the wire grid, and place food in the center with a drip tray. The oven door must be closed, and the temperature set to 190°C. Preheating for 10 minutes is recommended.
Digital Timer:
The digital timer allows for time adjustment, audible warning settings, semi-automatic cooking period adjustment, semi-automatic finishing time adjustment, and fully automatic programming.
- Time Adjustment: Set the current time (0:00 to 23:59) by pressing "+" and "-" keys simultaneously, then adjusting the time.
- Audible Warning Time Adjustment: Set a warning time (0:00 to 23:59) for notification purposes only; this does not activate oven operation.
- Semi-automatic Time Adjustment (Cooking Period): Set a cooking duration (0 to 10 hours). The oven will switch off and an audible warning will sound when the timer reaches zero.
- Semi-automatic Time Adjustment (Finishing Time): Set a desired finish time (up to 10 hours after the current time). The oven will automatically start and finish cooking at the set time.
- Full-automatic Programming: Combines cooking period and finishing time settings to start cooking after a set period and for a set duration (up to 10 hours after the current time).
Important Technical Specifications
Oven:
- Model: GE 56 EX
- Oven Type: Electric
- Mass: 39.0 kg
- Energy Efficiency Index (Normal Mode): 106.1
- Energy Efficiency Index (Fan-assisted Mode): 94.5
- Energy Class: A
- Energy Consumption (Normal Mode): 0.82 kWh/cycle
- Energy Consumption (Fan-assisted Mode): 0.73 kWh/cycle
- Number of Cavities: 1
- Heat Source: Electric
- Volume: 53 L
- Compliance: EN 60350-1
Hob:
- Hob Type: Gas
- Number of Cooking Zones: 4
- Technology (Burner 1 - Auxiliary): Gas, 12-18 cm, Energy Efficiency: N/A
- Technology (Burner 2 - Semi-rapid): Gas, 14-22 cm, Energy Efficiency: 59.0%
- Technology (Burner 3 - Semi-rapid): Gas, 14-22 cm, Energy Efficiency: 59.0%
- Technology (Burner 4 - Rapid/Wok): Gas, 22-26 cm, Energy Efficiency: 57.0%
- Hob Energy Saving: 58.3%
- Compliance: EN 30-2-1
Injector Table (Gas):
- G30 28-30mbar (LPG):
- Large Burner: Injector 85 (1/100mm), Nominal Rating 3 kW, Consumption 218.1 g/h
- Medium Burner: Injector 65 (1/100mm), Nominal Rating 1.75 kW, Consumption 127.2 g/h
- Small Burner: Injector 50 (1/100mm), Nominal Rating 1 kW, Consumption 72.7 g/h
- G20 20mbar (NG):
- Large Burner: Injector 115 (1/100mm), Nominal Rating 2.75 kW, Consumption 291.9 l/h
- Medium Burner: Injector 97 (1/100mm), Nominal Rating 1.75 kW, Consumption 166.7 l/h
- Small Burner: Injector 72 (1/100mm), Nominal Rating 1 kW, Consumption 95.2 l/h
Usage Features
- Pan Selection: Use flat-bottomed pans with thick bases, ensuring the flame does not extend beyond the pan's circumference. Recommended pan diameters are provided for each burner size to optimize energy efficiency.
- Oven Shelves: Trays and wire grids can be positioned on levels 1 to 5. Telescopic rails can be positioned on T1, T2, 3, 4, 5. Level 3 is recommended for single-level cooking, and T2 for telescopic rails.
- Accessories: The appliance comes with an EasyFix wire rack, a deep tray (best for stews), a shallow tray (best for baking pastries), and a wire grid (for grilling or oven-friendly containers). A flap drawer is included for storing accessories.
- First Use: Upon first use, a slight smell from insulation materials is normal. It is recommended to run the empty oven at maximum temperature for 45 minutes in a well-ventilated room.
- Safety during Use: Always use oven gloves when handling hot items. Do not line the oven with aluminum foil. Avoid placing dishes directly on the oven base. Do not leave the cooker unattended when cooking with oils or fats. Never use water to extinguish oil fires; switch off the appliance and cover the flame. Ensure control knobs are in the "0" position when not in use.
Maintenance Features
General Cleaning:
- Always switch off the appliance and allow it to cool before cleaning.
- Use cream or liquid cleaners without abrasive particles. Avoid caustic creams, abrasive powders, rough wire wool, or hard tools, as they can damage surfaces.
- Do not use steam cleaners on any part of the appliance.
- Clean up liquid spills immediately to prevent damage.
Inside of the Oven:
- Enamelled oven interiors are best cleaned when warm.
- Wipe with a soft cloth soaked in soapy water after each use, then rinse with a wet cloth and dry.
- Occasional use of liquid cleaning material may be necessary for thorough cleaning.
Gas Hob:
- Regularly clean the gas hob.
- Remove pan supports, caps, and crowns. Wipe the hob surface with a soft cloth soaked in soapy water, then rinse and dry.
- Wash and rinse burner caps, ensuring they are dry before re-assembly.
- Ensure all parts are correctly re-assembled.
- Avoid using metal sponges.
- Prevent water from entering the burners to avoid injector blockage.
Hotplate Heater (if available):
- Regularly clean the hotplate heater.
- Wipe with a soft cloth soaked in water, then run the hotplate briefly to dry it completely.
Glass Parts:
- Regularly clean glass surfaces with a glass cleaner, then rinse and dry.
Enamelled Parts:
- Regularly clean enamelled parts with a soft cloth soaked in soapy water, then rinse and dry.
- Do not clean when hot.
- Avoid leaving acidic substances (vinegar, lemon juice) or salty liquids (milk, coffee, salt water, tomato juice) on enamel for prolonged periods.
Stainless Steel Parts (if available):
- Regularly clean stainless steel parts with a soft cloth soaked in water, then dry thoroughly.
- Do not clean when hot.
- Avoid leaving acidic or salty liquids on stainless steel for prolonged periods.
Oven Door Removal:
- To clean the oven door glass, open the door, open the locking catches (using a screwdriver), then close the door until it almost reaches the fully closed position, and pull it towards you to remove.
Wire Shelf Removal:
- Pull the wire rack as shown in the figure, release from clips, and lift it up.
Oven Lamp Replacement:
- Switch off the appliance and allow it to cool.
- Remove the glass lens, then the bulb.
- Insert a new bulb (230V, 15-25W, Type E14, resistant to 300°C).
- Replace the glass lens. The lamp is designed for cooking appliances, not household room illumination.
Other Controls:
- Periodically check the expiration date of the gas connection pipe.
- If any defect is found in the gas connection pipe or control knobs, contact an authorized service provider for replacement or repair.
Installation and Safety Warnings:
- Installation must be carried out by an authorized service person or qualified technician according to local regulations.
- Ensure proper ventilation requirements are met based on room volume (e.g., 100 cm² permanent ventilation for rooms < 5 m³).
- The appliance must be earthed.
- Check that local distribution conditions (gas type, pressure, electricity voltage, and frequency) match appliance specifications.
- Do not use adapters, multiple sockets, or extension leads.
- Ensure the supply cord is not trapped or damaged.
- The appliance feet are adjustable up to 30 mm for leveling.
- Do not store flammable materials in the storage drawer.
- Do not climb or sit on the open oven door.
- In case of hotplate glass breakage, immediately shut off all burners and electrical heating elements, isolate the appliance from power, do not touch the surface, and do not use the appliance.