Do you have a question about the VEVOR M1B-LS-3305 and is the answer not in the manual?
Take measures for hearing protection if sound pressure exceeds 85dB(A).
Cluttered areas increase the risk of accidents and injuries.
Avoid damp areas, rain, and explosive environments. Ensure good lighting.
Avoid contact with earthed surfaces like pipes and radiators.
Do not allow onlookers to touch the tool or extension cord.
Store tools in a dry place out of children's reach when not in use.
Use the tool at its designed rate for better and safer work.
Use tools only for their intended purpose and don't overpower them.
Avoid loose clothing/jewelry. Wear non-slip shoes and a hair net if needed.
Wear safety glasses and a dust mask if dust is generated.
Never carry by the cable; don't pull to disconnect. Keep away from heat/sharp edges.
Secure workpiece with a stand for safety and free hands.
Maintain firm footing and good balance while working.
Keep tools sharp, clean, lubricated, and check cords.
Unplug before service, maintenance, or accessory changes.
Remove all tools before starting the power tool.
Keep finger off switch when connected; ensure switch is OFF before plugging in.
Use only extension cords approved for outdoor use.
Be careful, use common sense, and don't use when tired.
Connect and use dust extraction equipment correctly if provided.
Inspect parts for damage or incorrect fitting before use. Repair or replace if necessary.
Wear safety glasses and avoid sending wood into the outfeed side.
Ensure all screw connections are properly tightened before use.
Let the feed mechanism do the work; never insert objects in the outfeed.
Clean rollers to ensure proper workpiece infeed and prevent injury.
Avoid planing workpieces with many knots or sprigs.
Stand in front of the machine, by the side of the infeed table.
Remove nails, screws, and metal from wood before machining.
Ensure the blades are correctly installed.
Handle blades carefully to avoid injury and property damage.
Never start planing until the blade shaft has reached full speed.
Never use blunt blades to avoid kickback risk.
Always replace or sharpen all blades simultaneously, ensuring same size/weight.
Never insert fingers into the chip outlet side – DANGER.
Ensure the recoil claw is in the correct position.
If infeed is not smooth, check machine for problems instead of forcing wood.
Do not wear gloves when planing wood.
Avoid planing wet wood to prevent feed roller slip and machine damage.
Avoid planing very hard wood to prolong knife blade life.
Do not plane wood too long to prevent overloading and affect surface finish.
Tool designed for planing dry wood; forbidden for other materials. Household/professional use.
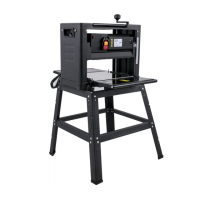
Identification of key parts of the thicknesser through a diagram and labels.
Advice on wearing ear protection, safety glasses, and dust masks during operation.
Carefully unpack the machine and recycle packaging according to regulations.
Assemble the machine according to the requirements before use.
Connect a vacuum cleaner to the dust hood for dust extraction.
Fit rubber feet into the bottom holes if not using a foot frame.
Mount the depth adjustment handle on the shaft and secure it with a screw.
Learn how to correctly adjust the depth using the handle for safe operation.
Understand the two-speed function and how to change speed levels.
Plane wood a few times for surface accuracy and consult width/depth chart.
Measure wood thickness and use the depth label for desired planer depth.
Guidelines for cutting depth based on wood width for optimal results.
Warning regarding minimum wood length (153mm) and thickness (10mm).
How to turn the machine ON by pressing "I" and OFF by pressing "O".
Using coarse planing to create a reference surface for machining.
Factors affecting surface finish: wood properties, blade sharpness, direction.
Removing material to achieve desired thickness and machine opposite surface.
Steps for dismantling cover, fitting new brushes, and replacing cover.
Correct use, reset procedure, and replacement of the overcurrent device.
Procedure for replacing or adjusting the machine's blades.
Steps for installing the knife blade, aligning holes, and tightening bolts.
Steps for cleaning the machine, rollers, and plastic parts with appropriate methods.
| Brand | VEVOR |
|---|---|
| Model | M1B-LS-3305 |
| Category | Power Tool |
| Language | English |