5
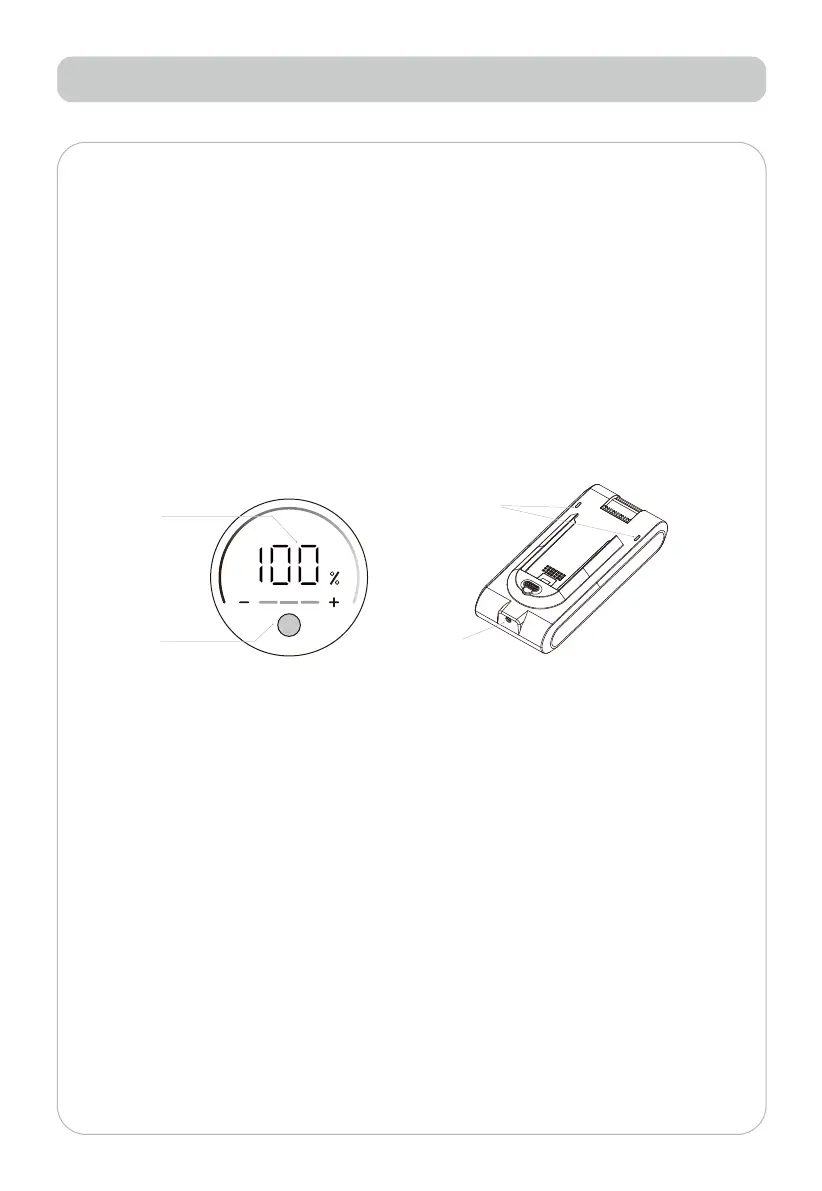
Real-time battery display
E
Instructions for use
Charging
During the working process of the machine, when the power of the LED display module shows
LWSURPSWVWKDWWKHSRZHULVLQVXƋFLHQWDQGLWQHHGVWREHFKDUJHG
(1). Please use the charger that equipped with this machine for charging.
(2). Disconnect the power, then plug the adapter into the charging.
(3). The LED display module displays the real-time power, and the LED light on the battery pack
ƊDVKHVLQGLFDWLQJWKDWWKHFKDUJLQJLVQRUPDO
7KH/('GLVSOD\PRGXOHGLVSOD\VUHDOWLPHSRZHU7KHƊDVKLQJ/('OLJKWRQWKHEDWWHU\SDFN
indicates that the charging is normal.
(4). The LED display module shows 100%, and the LED light on the battery pack is always on and
stops blinking, it means that the charging is complete.
:KHQFKDUJLQJSUHVVDQGKROGWKLVNH\GIRUVHFRQGVWRWXUQRƈWKHFKDUJLQJDWPRVSKHUH
light.
Warning:
'RQWWXUQRQWKHYDFXXPFOHDQHUZKLOHFKDUJLQJ'RQRWUHPRYHWKHEDWWHU\SDFNZKHQ
FRQQHFWLQJWRWKHKRVWIRUFKDUJLQJ
7KHEDWWHU\FDQRQO\EHFKDUJHGDWDQDPELHQWWHPSHUDWXUHEHWZHHQs&DQGs&([FHVVLYH
heat or cold may prolong the time required for charging and even damage the battery.
3. The normal charging of this product takes 4-6 hours. It is best to perform 1-3 full charge and
GLVFKDUJHSURFHVVHVEHIRUHWKHƉUVWXVHVRWKDWWKHEDWWHU\DFWLYLW\FDQEHIXOO\DFWLYDWHG
4. If the product is not used for a long time, it is recommended to fully charge and discharge the
machine once every 3 months or so, so as to avoid passivation of the battery electrodes due to
ORQJSHULRGVRIQRQXVH
Battery pack indicator LED lights
Charging port