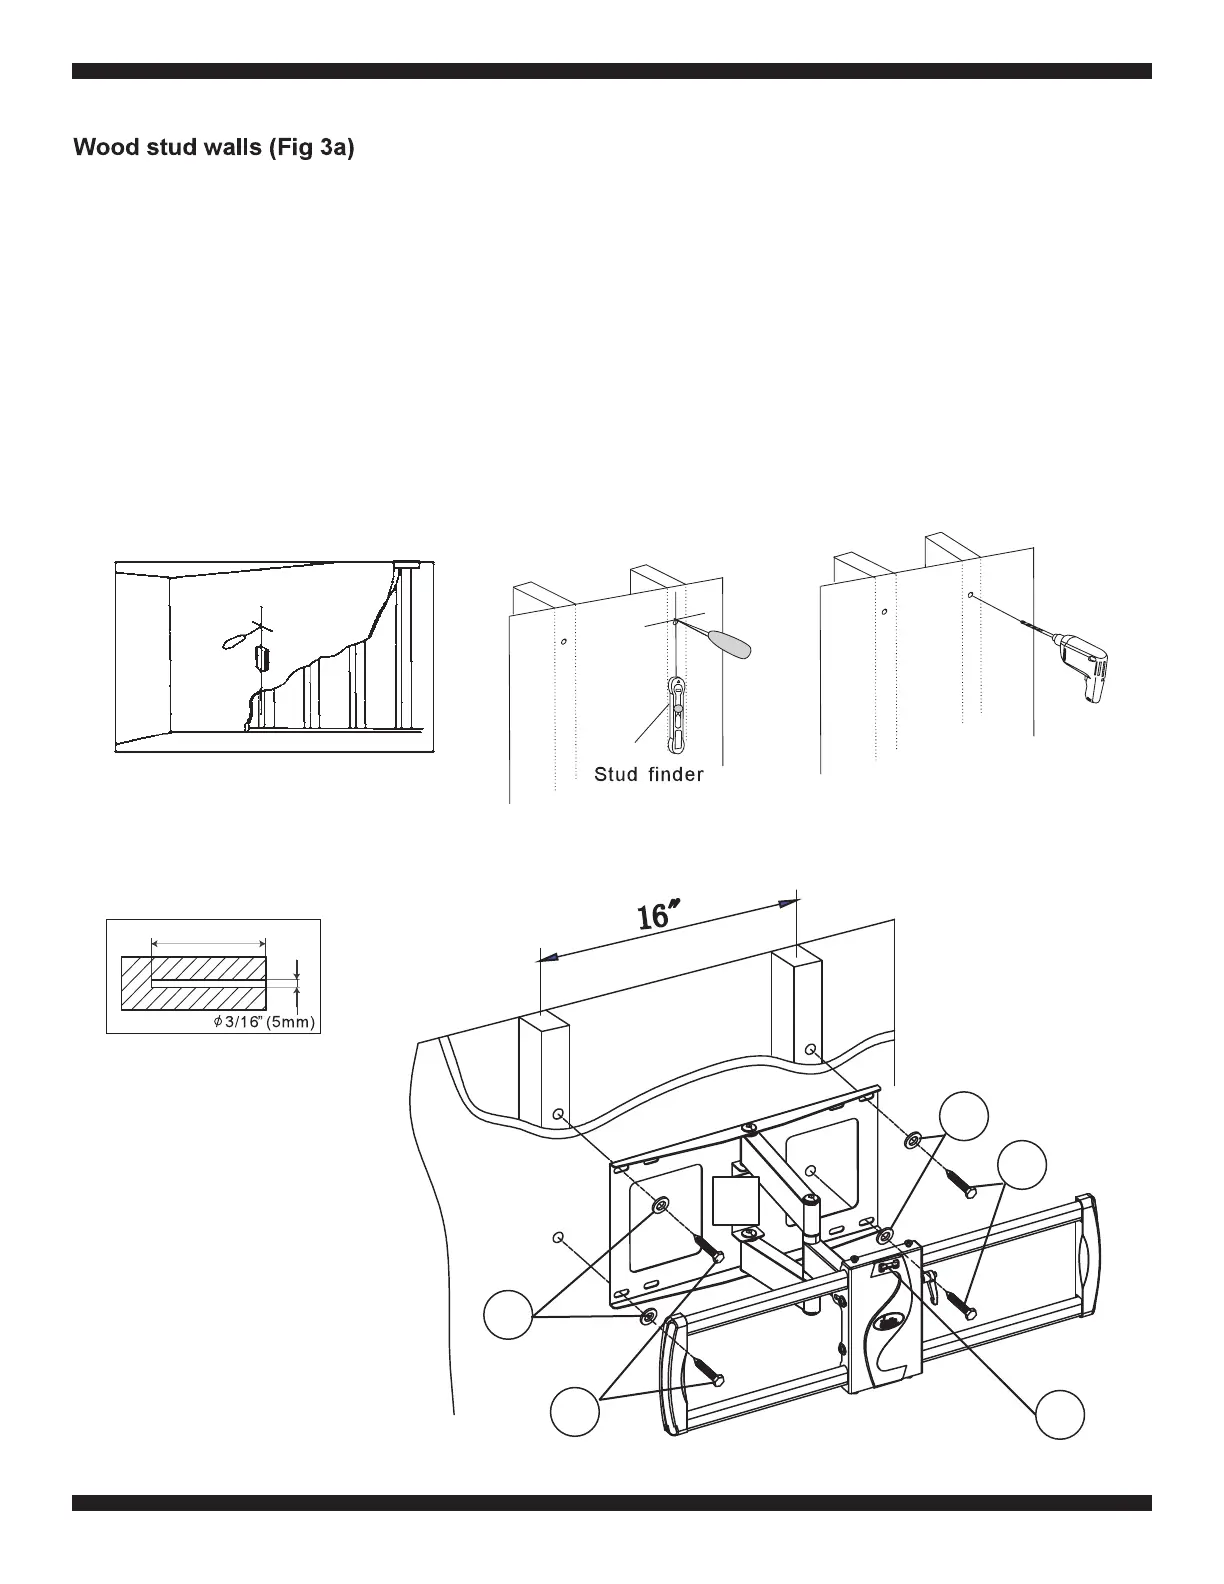
Fig. 3a
2-1/2” (65mm)
Fig. 3b
Fig. 3c
8
1. Use a pencil, awl, or a nail to mark the location of the wall stud centers (Fig 3a) after locating the
stud with an electronic stud locator. The distance between the marks should not be less than 16
inches (Studs must not be less than 16 inches (40.6cm)
2. Place the Wall Mount (1) flat against the wall with the center of the mount in the desired location,
aligning the holes in the mount with the studs (Fig 3b). Use the wall mount plate as a template to
mark the location of the four mounting holes on the wall. Make sure that the mounting holes are
level and are parallel using the built-in level on the front of the Wall Mount (1).
3. Use 3/16” (5mm) drill bit to pre-drill holes at least 2.5” (65mm) deep at the marked locations.
4. Use a wrench, the four Long Bolts (A), and Washers (C) to attach the wall mount to the wall. Do not
use wall anchors in wood stud walls.
5. Use the Level (R) placed on the front of the mounting plate to level the wall mount, repositioning as
necessary, then firmly tighten the bolts. Do not overtighten.
1
C
C
A
A
R


 To Next Page
 Loading...
