19EN___User manual |
EN User manual
1 Introducon
6 Please read this instrucons manual carefully in order to
operate the machine properly.
Keep this manual handy for future reference.
Thank you for purchasing this Semi-Auto Washing Machine.
This product has been designed with a special patent
technology of cabinet integraon. The enre body casing is
made of plasc which ensures that your semi-auto washing
machine will never rust. The washer is relavely lighter and
space saving as compared to other twin-tub washing machines.
Through the integraon of new technology, its large wave
pulsator and new water ow feature will not only produce less
twisng of clothing but also provide beer cleaning and
washing eect. The water inlet, sprinkling, spin-dry, and water
ow funcons are also made available to save me, labor, and
water usage.
We trust that you will nd the purchase of this beaufully
designed and funconal semi auto washing machine
sasfactory.
2 Symbol claricaon
See image 1
1. WEEE with bar.
2. CE logo.
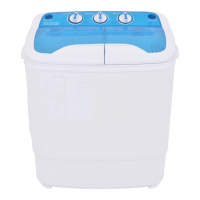
3 Parts list
See image 2
1 Spin cap 9 Boom
2 Spin tub 10 Wash mer switch
3 Spin cover 11 Wash and drain selector switch
4 Water inlet 12 Spin mer switch
5 Control panel 13 Drain hose
6 Pulsate 14 Power wire
7 Wash cover 15 Back Cover
8 Cabinet
4 Operaon Guide
4.1 Preparaon
1. The machine should be placed on at ground.
2. The plug seat should have a safety ground connecon.
3. Lay down the overow hose.
4. Use the water inlet hose to connect the water tap to the
water inlet.
5. Adjust the water level based on the type of clothing
material and its weight.
6. Tum on the power.
4.2 Washing
1. Set the “wash and drain selector switch” according to the
material type and weight of clothes.
2. Set the “wash and drain selector switch” to the wash
posion.
3. Set the “wash mer” and place the clothes into the tub.
Adjust the water level to the proper posion and put in the
right amount of detergent.
4. Set the “wash mer” and the machine will start to wash.
5. Aer washing, set the “wash and drain” selector switch to
the drain posion to drain o the water.
4.3 Spinning
1. Aer spinning, posion the water inlet hose to the spin tub
water inlet for 20 to 30 seconds.
2. According to the “spin mer” process, spin the clothes for l
to 5 minutes. Repeat once or twice.
4.4 Rinsing
1. Aer spinning, the spin tub will stop. Open the spin cover
and transfer the clothes to the wash tub to prepare for
rinsing.
2. Repeat the washing process but do not add any detergent.
5 Addional informaon
Wiring diagram
See image 3
1 Brown 9 Grey
2 Pink 10 Green
3 Spin Timer 11 Purple
4 Security Switch 12 Wash Drain Selector Switch
5 Yellow 13 Wash Motor
6 Wash Timer 14 Spin Motor
7 Red 15 Blue
8 White
6 Cauon: Before checking for trouble or repairing, unplug
and touch both the plug pin and earth wire to prevent the
breakdown caused by stac electricity.