7
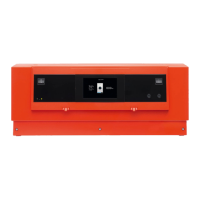
12. Die Fahrdrähte hängen Sie ein, indem Sie
deren Ösen seitlich neben dem oberen bzw.
unteren Arm des Auslegers positionieren.
Durch seitliches Verschieben der Oberleitung
und gleichzeitigem Gegendrücken des Aus-
legers rastet die Öse am unteren Ausleger-
arm ein. Am oberen Auslegerarm ist die Öse
in Längsrichtung (Fahrtrichtung) auf dem Aus-
legerarm verschiebbar, dadurch gleichen sich
Längenunterschiede aus.
12. Hang the catenary wires by positioning the
eyelets at the side next to the upper or lower
arm of the beam. By sliding the catenary wire
sideways while applying counterpressure to
the beam, the eyelet latches onto the lower
beam. On the upper beam, the eyelet can be
slid lengthwise (travel direction) on the beam
to compensate for the dierences in length.
Fig. 8
Abb. 8
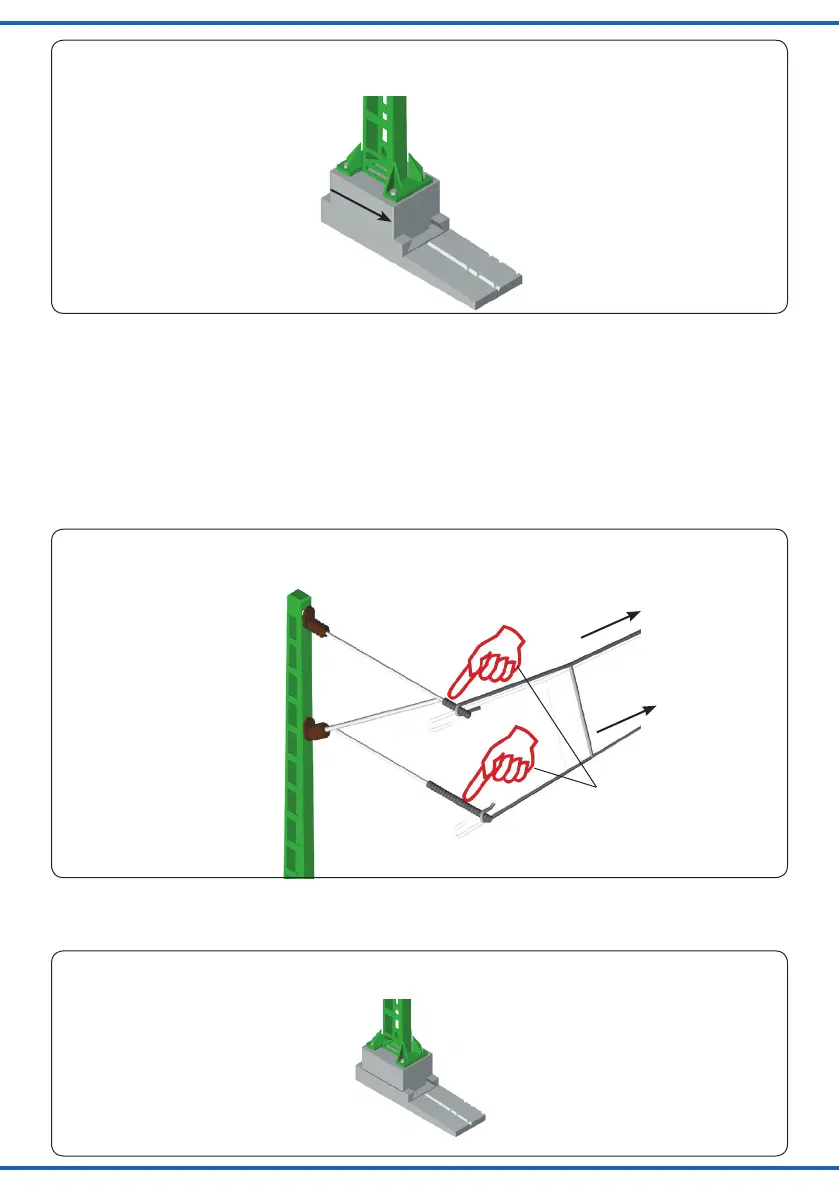
Streckenmast nach innen schieben
Slide the standard mast to the inside
Fig. 9
Abb. 9
Einhängen des Fahrdrahtes
Hanging the catenary wires
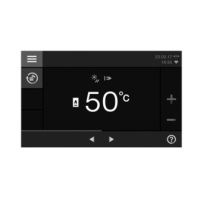
13. Anschließend schieben Sie die Strecken-
masten auf ihre Endposition, womit Sie gleich-
zeitig die Oberleitung spannen.
13. Then slide the standard masts to the end po-
sition, simultaneously tightening the catenary
wire.
Fahrdraht in diese Richtung ziehen.
Pull the catenary wire in this direction.
Hier gegendrücken.
Bear against here.
Fig. 10
Abb. 10
Streckenmast auf die Endposition schieben
Slide the standard mast to the nal position