Standard Equipment
5285 483 v1.3 01/2009
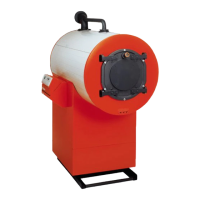
Vertomat, VSB-17 to 89
Vitocrossal 300, CT3-17 to 89
• Insulated cast-iron safety header complete with air vent and pressure gauge
+ Connect plastic hose of PVC piping to condensate neutralizing containerm (when required) or to floor drain directly. DO NOT KINK OR BEND SHARPLY.
Ensure that condensate does not accumulate in boiler. Install P trap to avoid flue gas spillage.
**Field-supplied connection.
For additional information, refer to the Installation Instructions.
Model
VSB/CT3
Size
-17
-22
-28
-37
-46
-57
-72
-89
1/2"
1/2"
1/2"
1/2"
1/2"
1/2"
1/2"
1/2"
(A)
Nipple
1/2" x 4"
1/2" x 4"
1/2" x 4"
1/2"
x 4"
1/2"
x 4"
1/2"
x 4"
1/2"
x 4"
1/2"
x 4"
(A1)
Bushing
1 1/2" x 1"
(A2)
Safety
Header
1 1/2"
(A3)
Plug
3/4"
3/4"
(A4)
Te e
2 1/2" x 1 1/2" x 3/4"
3" x 3"
x 1
"
4 x 4
x 1
1/
4"
5"
x 5" 1 1/
2"
5"
x 5" x 2
"
(B1) Field supplied
Bushing
1/2" x 1"
(A5)
Val
ve
Inlet
3/4"
1"
1 1/
4"
1 1/
2"
2"
(B2)
Flange
2 1/2"
3"
4"
5"
5"
(BS1)
Flange
1 1/4"
2"
2 1/
2"
2 1/
2"
(BS2)
Flange
Flange
(BR2)
Nipple
1"
(DR)
1 1/2" x 1"
1 1/
2" x
1"
1 1/2" x
1"
1 1/
2" x
1"
1 1/
2" x
1"
1 1/
2" x
1"
1 1/
2" x
1"
1 1/2"
1 1/2"
1 1/
2"
1 1/
2"
1 1/
2"
1 1/
2"
1 1/
2"
3/4"
3/4"
3/4"
3/4"
3/4"
3/4"
1/2" x 1"
1/2" x 1"
1/2"
x 1
"
1/2"
x 1
"
1/2"
x 1
"
1/2"
x 1
"
1/2"
x 1
"
2 1/2" x 1 1/2" x 3/4"
4 x 4
x 1
1/
4"
4 x 4
x 1
1/
4"
3/4"
1 1/
4"
1 1/
4"
2 1/2"
4"
4"
1 1/4"
2"
2"
2"
2 1/2"
3"
5"
5"
(BR1)
2 1/2"
4"
4"
4"
2"
2"
2"
3"
3"
3"
4"
4"
1"
1"
1"
1"
1"
1"
1"
Viessmann Manufacturing Company Inc.
750 McMurray Road
Waterloo, Ontario • N2V 2G5 • Canada
1-800-387-7373 • Fax (519) 885-0887
www.viessmann.ca • info@viessmann.ca
Viessmann Manufacturing Company (U.S.)Inc.
45 Access Road
Warwick, Rhode Island • 02886 • USA
1-800-288-0667 • Fax (401) 732-0590
www.viessmann-us.com • info@viessmann-us.com
Standard Equipment and Connections
Safety and Installation Requirements
Air vent
Pressure
gauge
Pressure relief valve
must be installed
within first
12” / 30 cm of piping.
Pressure relief valve
Install low water cut-
off in boiler supply or
boiler return with min.
height at boiler supply.
Sensor well
Safety supply
Alternate
pressure relief
valve location
and additional
boiler supply
Low temperature
heating loop
High temperature
heating loop
Boiler supply
Safety return
Boiler return 2
Boiler return 1
Vent pipe
Drain
Drain valve
Automatic
fill (observe local and
plumbing code
requirements)
Attention:
For feed water observe the
guidelines for water quality as
published in service instruction
manual.
1“ tee
1” short nipple
1” ball valve
boiler drain
Standard Equipment
1/2”
condensate
drain
Attention:
Always pipe discharge
pipe of pressure relief
valve to or into
vacinity of floor drain.
Please ensure that these instructions are read and understood before installation. Failure to comply with the instructions listed below can cause product/property damage,
severe personal injury, and/or loss of life.
Working on the equipment
The installation, adjustment, service, and maintenance
of this product must be done by a licensed professional
heating contractor who is qualified and experienced in
the installation, service, and maintenance of hot water
boilers. There are no user friendly parts on the boiler,
burner or control.
Ensure main power supply to equipment, the heating
system, and all external controls has been deactivated.
Take precautions to avoid accidental activation of
power during service work.
It is not permissible to perform service
work on any component part without
ensuring safe operation of the heating system.
When replacing parts, use original Viessmann or
Viessmannapproved replacement parts.