33
Safety valve
The DHW cylinder must have a safety valve to protect
against unduly high pressure.
Recommendation: Install safety valve above top edge
of cylinder. This means the DHW cylinder will not need
to be drained when working on the safety valve.
CH: According to W3 "Principles for creating potable
water installations", safety valves must be drained
directly via a visible unrestricted drain or via a short
outlet line to the drain network.
Drinking water filter
According to DIN 1988-2, a drinking water filter must
be installed in systems with metal pipework. Viess-
mann also recommends the installation of a drinking
water filter when using plastic pipes to DIN 1988 to
prevent contaminants entering the DHW system.
Automatic thermostatic mixing valve
With appliances that heat DHW to temperatures above
60 °C, an automatic thermostatic mixing valve must be
installed in the DHW line as protection against scald-
ing.
This also particularly applies when connecting solar
thermal systems.
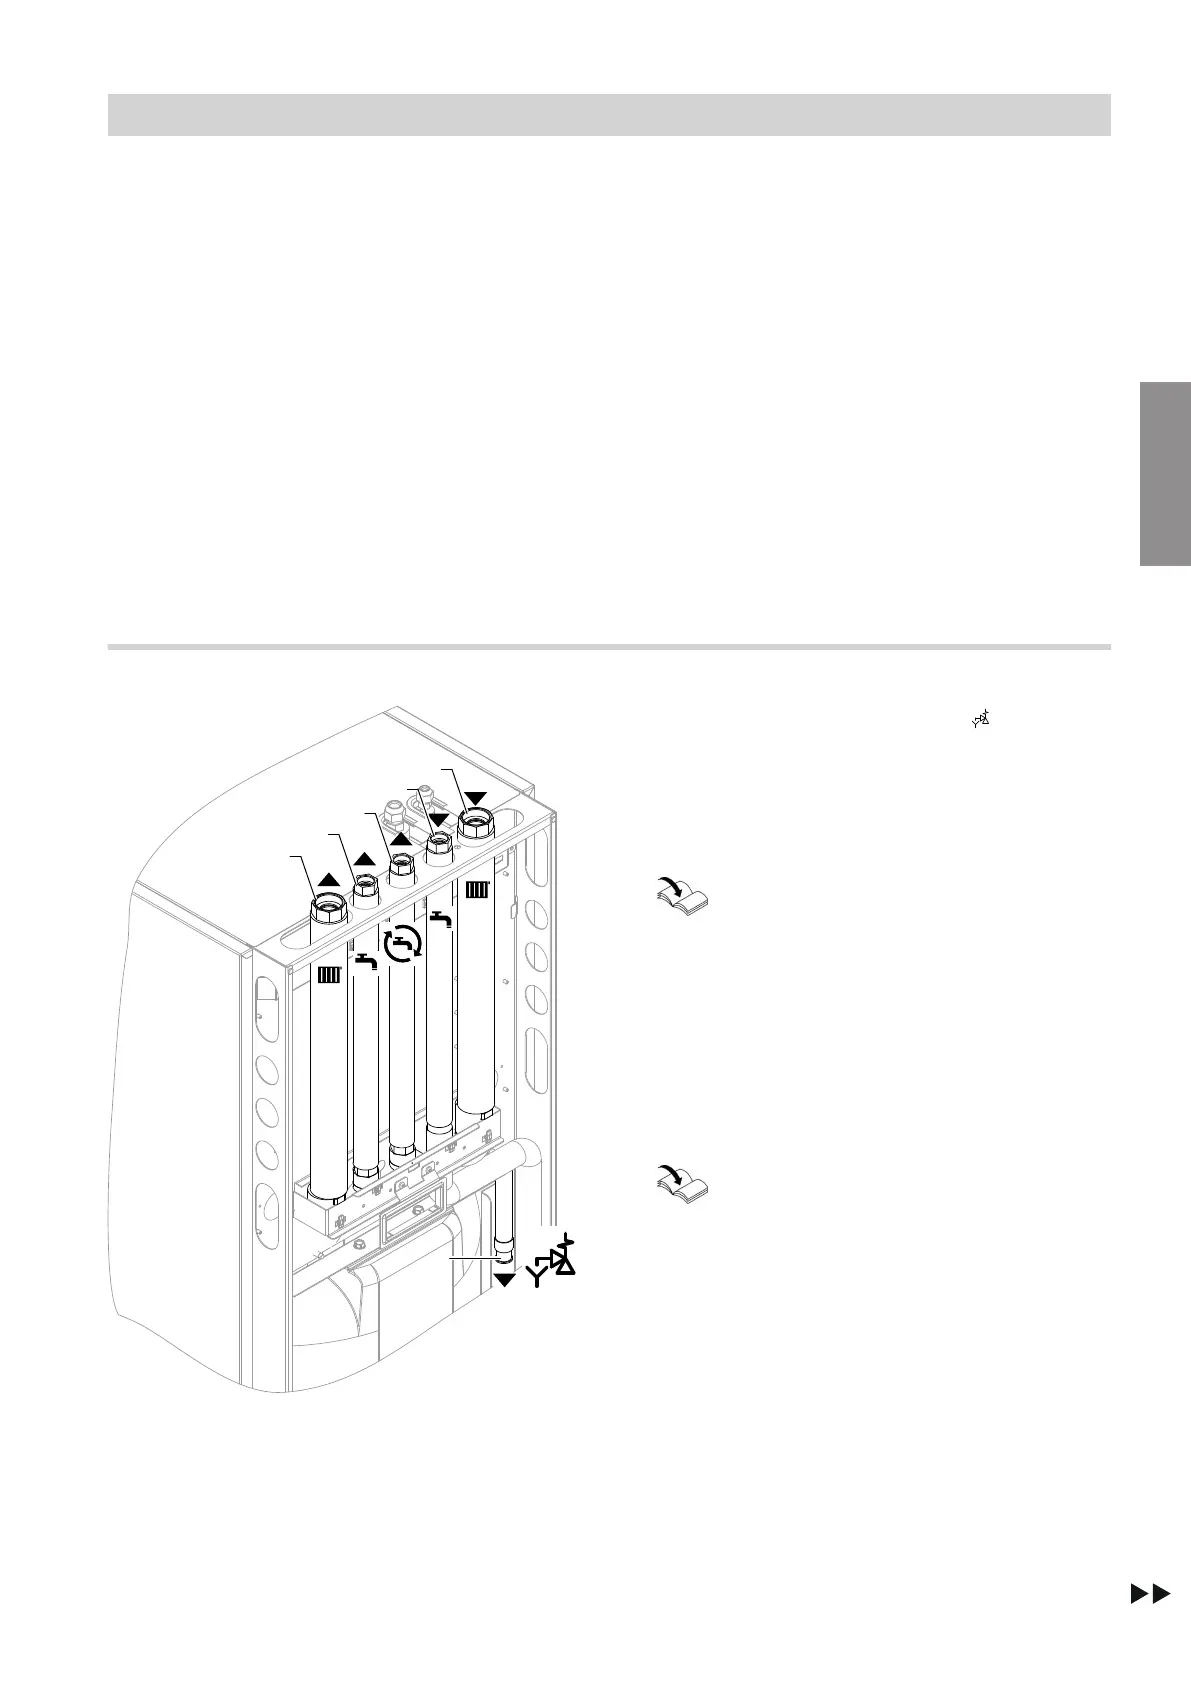
Connecting the secondary side
Fig. 25
A
Heating water flow: G 1¼ (female thread)
B
DHW: G ¾ (female thread)
C
DHW circulation: G ¾ (female thread)
D
Cold water: G ¾ (female thread)
E
Heating water return: G 1¼ (female thread)
F
Safety valve drain hose
1.
Connect safety valve drain hose
F
to the drain
network with a fall and a pipe vent.
2. Connect the "hydraulic connection set, heating cir-
cuit for installation on finished walls" (required
accessories) to the heat pump.
Separate installation instructions
Note
If the DHW circulation pipe is not required, tightly
seal the connection to the heat pump.
3. Only for systems with 2 heating circuits and without
heating water buffer cylinder:
For the heating circuit with mixer, fit the "installation
kit with mixer" (accessories) in the heat pump.
Separate installation instructions
4. Connect the hydraulic lines to the heat pump.
!
Please note
Hydraulic connections subjected to mechani-
cal loads lead to leaks, vibrations and appli-
ance damage.
Connect on-site lines so that they are free of
load and torque stress.
5. Thoroughly flush the heating system.
Installation sequence
Connecting the secondary circuit (cont.)
6199592
Installation
 Loading...