EasyManua.ls Logo

ViewSonic PJD5353LS - User Manual

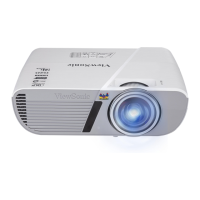
ViewSonic PJD5353LS
84 pages
To Next Page IconTo Next Page
Loading...
PJD5353LS/PJD5553LWS
DLP Projector
User Guide
Model No. VS15875/VS15876
IMPORTANT: Please read this User Guide to obtain important information on installing
and using your product in a safe manner, as well as registering your product for future
service. Warranty information contained in this User Guide will describe your limited
coverage from ViewSonic Corporation, which is also found on our web site at http://

box in the upper right corner of our website. “Antes de operar su equipo lea cu
idadosamente las instrucciones en este manual”
Questions and Answers:

ViewSonic PJD5353LS Specifications

General IconGeneral
TV Tunerno
White Brightness3200 lumens
Native Resolution1024 x 768
Contrast Ratio20, 000:1
Aspect Ratio4:3
Throw Ratio Range0.61:1
3 Chip Technologyno
Keystone Effectyes
3Dyes
Minimum Screen Size50 inches
Maximum Screen Size250 inches
Digital Zoomyes
Minimum Distance2 feet
Maximum Distance10.12 feet
USB Ports1
Video Inputs-video
Inputs3.5mm audio
Remote Controlyes
OS Compatibilitymac
Weight and Dimensions IconWeight and Dimensions
Depth8.98 inches
Height4.08 inches
Width12.44 inches
Net Weight5.51 pounds

Summary

Compliance Information

FCC Compliance Statement

Statement regarding adherence to FCC rules for digital devices and potential interference.

CE Conformity for European Countries

Declaration of conformity with EU directives for EMC and Low Voltage.

Declaration of RoHS2 Compliance

Indian Restriction of Hazardous Substances

Compliance statement for hazardous substances according to Indian E-waste Rule 2011.

Important Safety Instructions

Copyright Information

Product Registration

Introduction

Projector Features

Lists key features and capabilities of the projector, such as dynamic mode, power saving, and connectivity.

Shipping Contents

Standard Accessories

Lists items included as standard accessories with the projector.

Optional Accessories

Lists optional accessories available for purchase with the projector.

Projector Exterior View

Front;Upper Side Diagram

Identifies external controls and connectors on the front and top of the projector.

Rear;Lower Side Diagram

Identifies external controls and connectors on the rear and bottom of the projector.

Projector Controls and Functions

Remote Control Functions

Using the Remote Mouse Control

Remote Control Effective Range

Replacing Remote Control Batteries

Positioning Your Projector

Choosing a Location

Guidance on selecting the optimal placement for the projector based on room layout and screen.

Projection Dimensions

PJD5353 LS Dimensions

Tables detailing projection distance, height, and offset for various screen sizes for PJD5353LS.

PJD5553 LWS Dimensions

Tables detailing projection distance, height, and offset for various screen sizes for PJD5553LWS.

Connection

Connecting a Computer or Monitor

Connecting a Computer

Instructions for connecting the projector to a computer via VGA or USB for mouse control.

Connecting a Monitor

Instructions for connecting an external monitor to the projector's MONITOR OUT port.

Connecting Video Source Devices

Connecting HDMI Device

Connecting Component Video Source Device

Connecting S-Video Source Device

Connecting Composite Video Source Device

Using the Cable Management Cover

Operation

Starting Up the Projector

Step-by-step guide for powering on the projector and initial setup.

Using the Menus

Utilizing the Password Function

Setting a Password

Procedure for setting a password to prevent unauthorized use of the projector.

If You Forget the Password

Explains consequences and options if the projector password is forgotten.

Password Recall and Management

Switching Input Signal

Changing HDMI Input Settings

Adjusting the Projected Image

Adjusting Projection Angle

How to adjust the projector's tilt using the adjuster foot for image height.

Auto-adjusting the Image

Using the Auto Sync function to optimize picture quality by re-adjusting clock and frequency.

Image Fine-Tuning

Fine-tuning Image Clarity

Instructions for sharpening the image by rotating the focus ring.

Correcting Keystone Effect

Methods for correcting trapezoidal distortion caused by projector angle.

Magnifying and Searching Details

Using zoom and pan functions to examine projected image details.

Selecting the Aspect Ratio

Aspect Ratio Settings

Options for scaling the projected image to fit different aspect ratios like 4:3, 16:9, 16:10.

Optimizing the Image

Selecting a Picture Mode

Choosing from preset picture modes like Brightest, Dynamic, Standard, Movie for optimal viewing.

Picture Modes by Signal Type

Details on how picture modes vary based on the type of input signal used.

Screen Color Adjustment

Fine-Tuning Image Quality

Adjusting Brightness

How to increase or decrease image brightness for optimal contrast.

Adjusting Contrast

Adjusting the peak white level and overall contrast for clear images.

Adjusting Color

Controlling color saturation to prevent overpowering or washed-out colors.

Adjusting Tint

Adjusting the color tint to correct red or green color casts in the image.

Adjusting Sharpness

Controlling image sharpness to enhance detail or soften the picture.

Advanced Image Adjustments

Adjusting Brilliant Color

Enhancing color vibrancy and brightness using a color processing algorithm.

Reducing Image Noise

Minimizing electrical noise in the image caused by media players.

Selecting Gamma Setting

Adjusting the relationship between input source and picture brightness.

Color Temperature Settings

Adjusting the color temperature (Cool, Neutral, Normal, Warm) for white balance.

Color Management

Setting the Presentation Timer

Hiding the Image

Locking Control Keys

Operating in High Altitude Environment

Using the CEC Function

Using the 3 D Functions

Using the Projector in Standby Mode

Adjusting Sound Settings

Muting the Sound

Instructions for turning the projector's audio output on or off.

Adjusting Sound Level

How to control the volume of the projector's built-in speaker.

Power On;Off Ring Tone

Setting to enable or disable the startup and shutdown sound notification.

Shutting Down the Projector

Menu System

DISPLAY Menu

Accesses settings related to screen color, aspect ratio, keystone, zoom, etc.

PICTURE Menu

Accesses settings for color modes, brightness, contrast, tint, sharpness, and gamma.

SOURCE Menu

Options for selecting input signals, quick auto search, 3D settings, and standby behavior.

SYSTEM SETTING: BASIC Menu

Configuration for language, projector position, menu display, blank timer, and splash screen.

SYSTEM SETTING: ADVANCED Menu

Advanced settings including high altitude mode, DCR, audio, lamp, filter, remote control, security, and reset.

INFORMATION Menu

Displays current system status, signal source, color mode, resolution, and lamp/filter hours.

Maintenance

Care of the Projector

General guidelines for cleaning and maintaining the projector's components.

Using the Dust Filter (Optional Accessory)

Installing the Dust Filter

Steps for attaching and installing the dust filter, including initial setup.

Obtaining Filter Hour Information

How to check the accumulated hours of dust filter usage.

Cleaning the Dust Filter

Procedure for cleaning the dust filter using a vacuum cleaner or soft brush.

Resetting the Filter Timer

Resets the dust filter usage timer after cleaning or replacement.

Lamp Information

Getting to Know the Lamp Hour

Information on how the projector tracks and displays lamp usage hours.

Extending Lamp Life

Settings and modes to maximize the operational lifespan of the projector lamp.

Timing of Replacing the Lamp

Replacing the Lamp

Indicators

Troubleshooting

Specifications

Projector Specifications

Detailed technical specifications including resolution, lamp, electrical, and input/output terminals.

Dimensions

Ceiling Mount Installation

Timing Chart

Appendix

IR Control Table

Table mapping remote control keys to their corresponding IR command codes.

RS232 Command Table

Customer Support

Limited Warranty

Mexico Limited Warranty

Contact Information for Sales & Authorized Service in Mexico