- 58 –
ViewSonic Corporation
Confidential - Do Not Cop VA1703w/VA1703wb
9. Disassemble Process
9.1 Units Disassemble Process
9.1.1
Tools
Glove
Big cross screwdriver
Small cross screwdriver
Prize equipment or abandoned IC card
Screw box
Cushion
Six angle sleeve spanner
9.1.2 Disassemble process
1
、
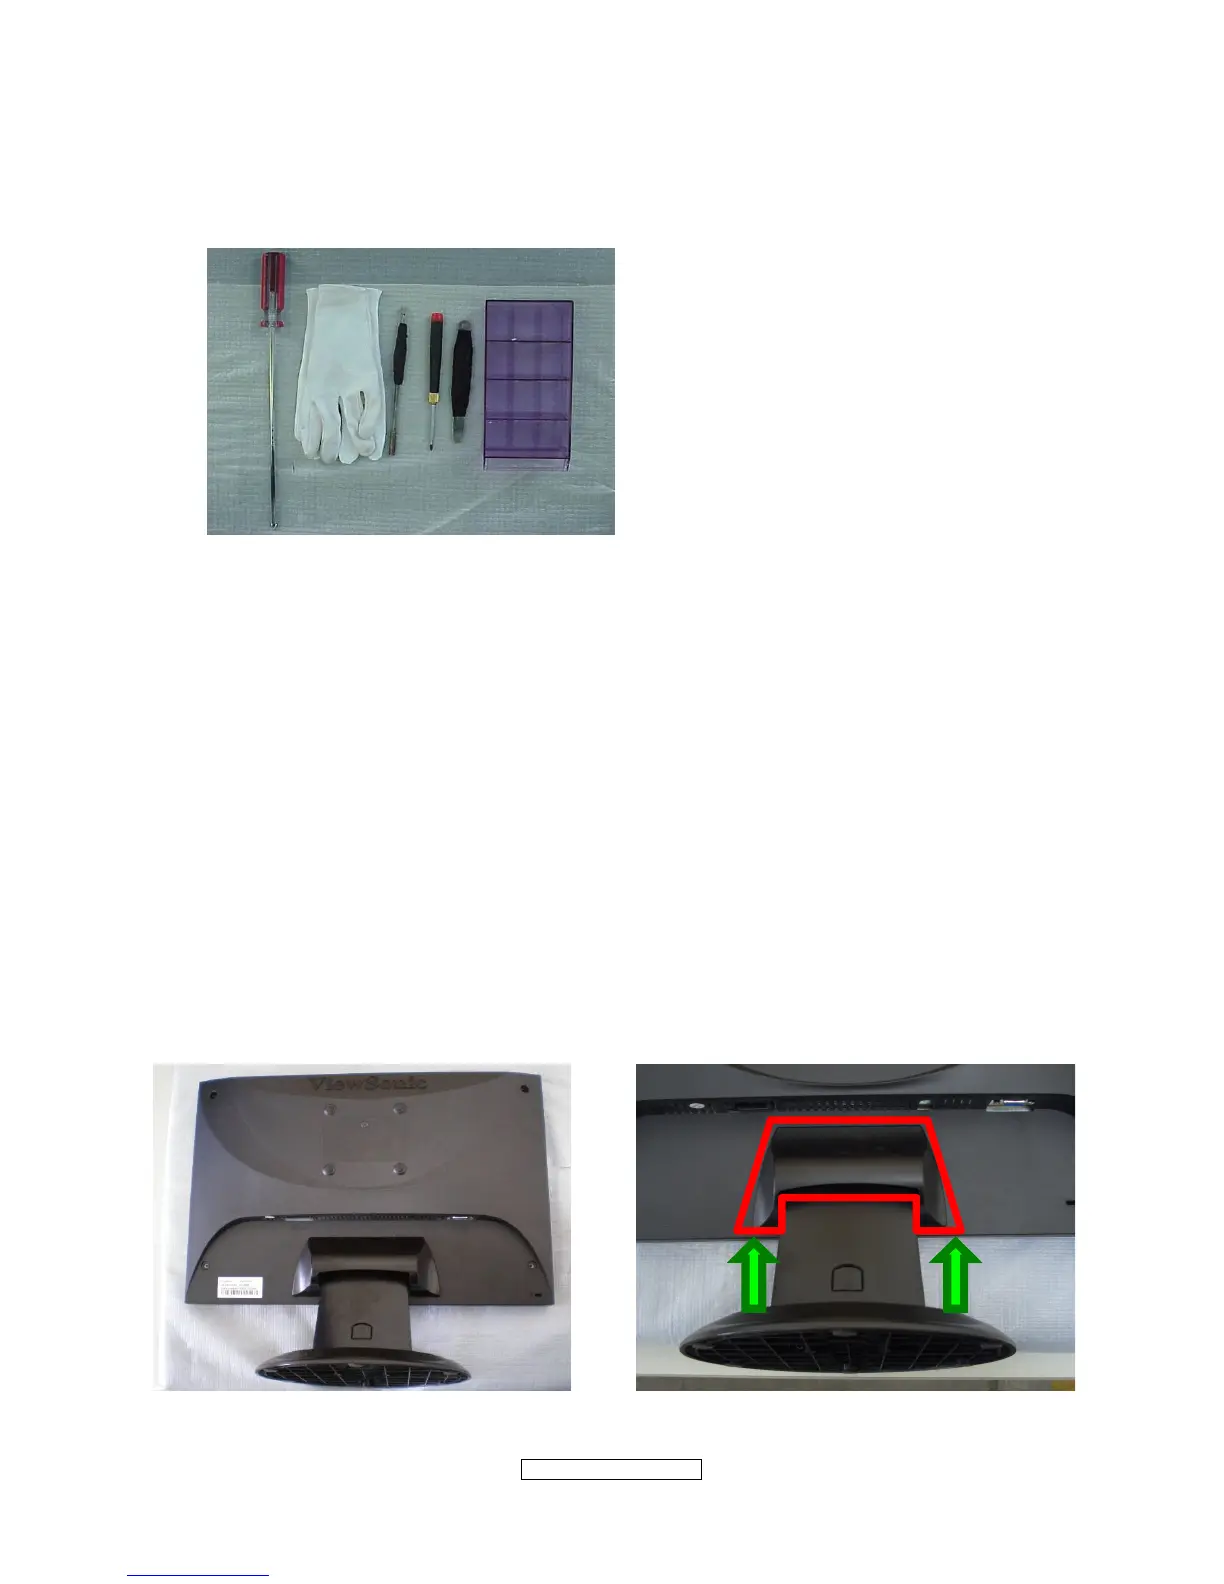
Tide up the worktable, spread straight cushion, put the monitor on it, the front side
adown.(Picture 1)
2
、
Remove the decorate slice of the back cover.(Picture 2, 3)
3
、
Disassemble the 4 screws that fix the stand, remove the stand.(Picture, 4)
4
、
Disassemble the 5 screws of the back cover.
(
Picture 5
)
5
、
Use equipment or abandoned IC card to prize up the bezel through the bottom flute,
and rip up the bezel downwards.( as showed in the following the picture 6,7,8)
6
、
Disassemble the 2 screws and 1 pins of the Key board, remove the Key board. ( as
showed in the following the picture 9,10)
7
、
Remove the back cover, refer to the following picture 11,12.
8
、
Peel of the AL foil and disassemble the 2 pins of the backlight, as showed in the
following the picture 13,14,15.
9
、
Disassemble the 4 fixed screws of the panel, as showed in the following the
picture16,17
10
、
Lift up the main frame and lift down the LVDS connectors according to the direction of
the arrowhead, refer to the following picture 18,19.
11
、
That’s all. The disassemble process of the unit is over.
9.1.3 Show pictures
:
(
Picture 1
)
(
Picture 2
)