EasyManuals Logo

Viking Electronics PA-2A User Manual

Viking Electronics PA-2A
2 pages
To Next Page IconTo Next Page
Page #1 background imageLoading...
Page #1 background image
How to Configure Viking PA-2A Overhead Paging System
To configure Viking PA-2A overhead paging system, turn on DIP switch 4 and connect the phone line to 8x8 adapter.
Learn more.
Objective
Configuring a Viking PA-2A overhead paging system for 8x8 services.
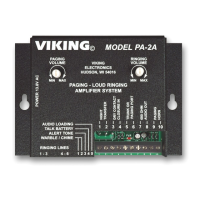
Applies To
Viking PA-2A overhead paging system
Procedure
1. Turn ON DIP Switch 4 (OFF by default). DIP Switch 5 is ON by default.
2. Connect the phone line or RJ11 cable to your 8x8 adapter.
3. Use a wire cutter to strip the other end of the cable and attach the wires to the corresponding pins on the PA-2A:
Red Wire (Ring): Pin 5
Green Wire (Tip): Pin 6
Note: The black and yellow wires of the cable are not used.
4. Connect the speaker or paging horn to Pins 9 and 10 on the PA-2A.
https://support.8x8.com/equipment-devices/overhead-paging/how-to-configure-viking-pa-2a-overhead-paging-system
Updated: Sat, 22 Feb 2020 21:51:07 GMT
Powered by
1

Questions and Answers:

Question and Answer IconNeed help?

Do you have a question about the Viking Electronics PA-2A and is the answer not in the manual?

Viking Electronics PA-2A Specifications

General IconGeneral
Power Output2 Watts
Input Impedance10k Ohms
Power Supply12 VDC
Signal to Noise Ratio60 dB
TypeAmplifier
Weight1 lb