This document provides a user manual for Viking Security Safe models, including key storage and depository safes.
Function Description
The Viking Security Safes are designed for secure storage of keys and valuables. The models covered include:
- VS-51KS, VS-100KS, VS-144KS: LCD Electronic Safes for storing keys. These models likely feature multiple hooks or compartments for organizing and securing a large number of keys.
- VS-40DS, VS-48DS: Medium and Large LCD Electronic Depository Safes. These safes are designed for depositing items without needing to open the main compartment, offering a secure way to drop in cash, checks, or small valuables.
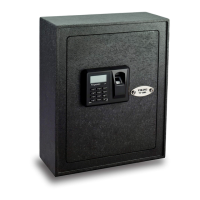
All models feature an LCD electronic lock for secure access, complemented by a high-security override key for emergency access. The electronic lock allows users to set and manage personal identification number (PIN) codes.
Important Technical Specifications
The manual highlights several key technical aspects:
- Power Source: The safes are powered by 4 AA batteries. The manual specifies that the display will show "LO-BAt" when the batteries need changing, indicating a low battery warning.
- Locking Mechanism: The safes utilize an electronic lock with a keypad for PIN entry. In addition, a concealed override keyhole provides mechanical backup access.
- Security Features:
- PIN Codes: The safes support two sets of default PIN codes (Employee PIN Code 8888 and Master PIN Code 0000), which users are strongly advised to change immediately for enhanced security.
- Lockout Mode: If an incorrect PIN code is entered 3 times consecutively, a warning beep will sound, and the safe's functions will be disabled for 1 minute, displaying "Error" on the screen.
- Locking Bolts: The safes are equipped with locking bolts (labeled F in the overview diagram) that secure the door when locked.
- Display: An LCD display (labeled A) provides visual feedback for operations, including PIN entry, status messages ("SET CODE," "OLd," "rEPEAT," "good," "NEU," "AgAIN," "ENT CodE," "OPEN," "CLOSE," "LIGHT ON," "SILENT," "bUZZEr," "dP----," "dP CODE," "Error," "LO-BAt"), and battery status.
- Interior Lighting: LED interior lights (labeled D) are included to illuminate the safe's contents, improving visibility.
- Battery Compartment: The battery compartment (labeled E) is located within the safe, accessible for battery replacement.
Usage Features
The manual details various usage features, guiding users through setup and daily operation:
1. Initial Setup:
- Unlocking: The safe is initially unlocked using the high-security override key. Users must slide the Logo Plate, insert the key, and rotate it clockwise.
- Battery Installation: 4 AA batteries must be installed in the correct direction in the battery compartment.
- Pre-use Testing: It is crucial to test ALL functions of the safe BEFORE mounting it to a permanent location.
2. PIN Code Management:
- Changing Default PIN Codes:
- Employee PIN Code: With the safe unlocked, press '*' and '3' simultaneously. "SET CODE" will appear. Enter a new 3 to 8 digit unique PIN code followed by '#'. "rEPEAT" will show, requiring the user to re-enter the new PIN code and '#'. "good" confirms success. If an error occurs (three short beeps, "Error"), the process must be repeated.
- Master PIN Code: With the safe unlocked, press '*' and '4' simultaneously. "OLd" will appear. Enter the default Master PIN code (0000) followed by '#'. "NEU" will show, and two beeps will sound. Enter a new 3 to 8 digit unique PIN code followed by '#'. "AgAIN" will show, requiring re-entry of the new PIN code and '#'. "good" confirms success.
- Important Note: When entering PIN codes, pressing '*' can delete a mistakenly input digit.
- Security Reminder: Always remove the override key by turning it counter-clockwise before testing new PIN codes; otherwise, "Error" will display.
3. Daily Operation:
- Unlocking the Safe: Press '', enter the unique PIN, and then '#'. "ENT CodE" will display after pressing ''. "OPEN" will display, and the door will open if the code is correct.
- Locking the Safe: Close the door, then press '*' and '#'. "CLOSE" will display on the screen.
- Activating LED Light: Press '#'. "LIGHT ON" will display on the screen, and the interior lights will activate.
4. Sound and Display Settings:
- Turning Sounds On/Off: Press and hold '*' and '2' simultaneously. "SILENT" will display when sound is off, and "bUZZEr" will display when sound is on.
- Showing/Hiding PIN Code Digits: Press and hold '*' and '1' simultaneously. "dP----" will display when digits are hidden, and "dP CODE" will display when digits are visible.
Maintenance Features
The manual outlines essential maintenance aspects to ensure the safe's longevity and security:
- Battery Replacement: The safe will indicate "LO-BAt" when batteries are low. Replacing the 4 AA batteries is straightforward, as described in the initial setup.
- PIN Code Retention: When new batteries are installed, existing PIN codes are saved. However, sound and display functions are reset to default settings (PIN digits visible, sound on).
- Override Key Management: Do not lock the override keys inside the safe. For security, the key cannot be removed when the safe is unlocked using the override key; it must be locked to remove the key.
- Mounting:
- Recommendation: It is highly recommended to bolt down the safe to a permanent location for enhanced security.
- Procedure: Pre-drilled holes are available on the bottom and back of each safe. Use the provided mounting bolts to secure the safe to a solid concrete floor or wall, referring to the provided diagrams.
This comprehensive manual ensures users can effectively operate, secure, and maintain their Viking Security Safe.