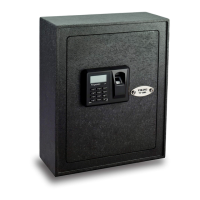
The Viking Security Safe is a robust storage solution designed to protect valuables using a combination of advanced security features. It offers multiple access methods, including fingerprint, PIN code, and a traditional key, ensuring flexibility and reliability for users. The safe is constructed from steel, providing a durable and secure enclosure for its contents.
Function Description
The primary function of the Viking Security Safe is to secure valuables against unauthorized access. It achieves this through a motorized deadbolt lock system that engages locking bars when the door is closed and locked. The safe's core security relies on its 500 DPI optical fingerprint sensor, which allows for quick and accurate biometric authentication, opening the safe in a fraction of a second. This sensor can store up to 32 unique fingerprints, making it suitable for multiple users or for registering a single user's fingerprint in various positions for enhanced reliability.
In addition to biometric access, the safe supports PIN code entry, allowing users to set a 4-8 digit personal identification number. The system includes a non-volatile memory, which means that all registered PINs and fingerprints are retained even if the batteries are removed or lose power. This ensures continuous security without the need for re-registration after power interruptions. For emergency access or in situations where electronic functions are disabled, the safe is equipped with a high-security key lock, featuring two 4-prong cross keys.
The safe incorporates an LCD display that provides essential information to the user, such as battery level, operation status (OK/Error), and various prompts during setup and use. It also features an optional sound mode, which can be turned on or off, providing audible feedback for operations. A warning beep alerts the user if the door is left unlocked for more than one minute, though this feature is disabled if the safe is unlocked with the key. To prevent unauthorized access attempts, the safe has a time-out feature that puts the operation on hold for 2 minutes if multiple incorrect PINs or fingerprints are entered. An integrated LED light, powered by two independent AA batteries, illuminates the interior of the safe, making it easier to retrieve items in low-light conditions.
Usage Features
Before first use, it is crucial to test all functions of the safe and then bolt it down to a permanent location for maximum security. Initial setup involves unlocking the safe with the key, installing batteries while the safe is in a locked position, and then unlocking it electronically using the default PIN 1234#. Users are strongly advised to change the default PIN immediately to a new, secure PIN to prevent unauthorized access.
Registering fingerprints is a straightforward process. After unlocking the safe electronically, the user briefly presses the Reset button, and once the green light illuminates, places their finger on the glass fingerprint reader. The LCD screen will display "- IN -" to confirm registration. To enhance reliability, users are encouraged to register the same fingerprint multiple times, varying the position (center, left, right, up, down, to the side) on the scanner. This ensures that the safe can be opened even if the finger is not placed perfectly in the same spot each time. The safe does not allow for the removal of individual fingerprints; to clear all registered fingerprints, the safe must be reset to factory default settings.
To change the PIN code, the user enters the current PIN and holds down the '#' button until a series of dashes appears on the LCD. They then enter the new PIN code followed by '#' twice to confirm. The system will display "OK" upon successful registration.
Unlocking the safe with a fingerprint involves pressing the Fingerprint Activation Button, placing a registered fingerprint on the scanner, and waiting for "OPEN" to appear on the LCD. To lock the safe electronically, the user simply closes the door and presses the '#' button. If the safe was unlocked with a key, it must be locked with the key as well, as electronic functions are disabled in this mode.
The safe offers control over its sound settings. Users can turn sounds on by pressing '1' and '' or turn them off by pressing '0' and ''. The warning beep, however, remains active unless the safe is unlocked with the key.
Battery replacement for the main electronic system should be done when the safe is in a locked position. The LCD display will show a low battery icon " " when new batteries are needed. Registered fingerprints and PINs are saved during battery changes due to the non-volatile memory. The internal LED light has its own separate battery compartment, requiring two AA batteries, which need to be installed independently.
Maintenance Features
To ensure optimal security and performance, regular maintenance of the Viking Security Safe is recommended. Keeping the glass fingerprint scanner clean is paramount for accurate and consistent fingerprint recognition. Users should use a dry cloth to remove smudges or prints from the scanner after each use. For a more thorough cleaning of both the safe and the scanner, gentle cleaning agents can be used.
It is advisable to test registered fingerprints and PIN codes every 6 months to ensure they are still functioning correctly. This helps identify any potential issues with the system or changes in fingerprint readability over time.
Users should be cautious to keep liquids away from the control panel, as spills can cause damage and potential electric shock. The safe should always be secured in a proper area to prevent it from falling, which could cause damage or injury. The product is not designed for user disassembly; any repairs should be handled by Viking Security Safe Customer Service.
The manual also provides troubleshooting tips for common issues, such as the key not rotating or electronic functions not working. These tips often guide the user through specific sequences of actions, such as resetting the safe to factory default or ensuring the safe is in the correct locked/unlocked state for certain operations. For instance, if the key cannot be removed, it indicates the safe is in an unlocked position with the key, and the user must lock the safe with the key to remove it. If electronic functions are disabled, it's likely the safe was unlocked with the key, and the key must be used to lock it before electronic functions can be re-enabled by unlocking with a PIN or fingerprint.
Mounting instructions are provided to secure the safe to a wall or floor, emphasizing the importance of anchoring it to a permanent location for enhanced security. Users are advised to consider load-bearing capacity and to use appropriate tools and eye protection during installation.