EasyManua.ls Logo

Viro Rides VR 550E User Manual

Viro Rides VR 550E
2 pages
To Next Page IconTo Next Page
Page #1 background imageLoading...
Page #1 background image
1 2
3 4
2
1
5 6
Use the included small Allen wrench to remove the three
screws on the side of the deck.
Use the included large Allen wrench to remove the two
screws on the kickstand. Then, remove the kickstand.
TIP: Lay the scooter on its side before removing the
kickstand, or ask an adult to hold the unit upright.
Use the small Allen wrench to unscrew
and remove the battery plate.
Lift o the deck.
Carefully disconnect the battery from the internal wiring by
pressing in the clasp on the connector and pulling apart.
Then, lift out the battery.
On the other side of the deck, remove the
remaining screw with the small Allen wrench.
VR 550E
ELECTRIC SCOOTER
1
2
3
1
2
NOTE: BEFORE BEGINNING, ENSURE THE UNIT IS TURNED OFF.
IMPORTANT: An ADULT must make all repairs. Thoroughly inspect all parts after making modications. DO NOT RIDE until
you are sure the proper repairs have been made and the unit is assembled according to the manufacturer’s specications.
If you are unsure of any repairs, contact consumer service.
Question and Answer IconNeed help?

Do you have a question about the Viro Rides VR 550E and is the answer not in the manual?

Viro Rides VR 550E Specifications

General IconGeneral
ModelVR 550E
TypeElectric Scooter
Max Speed25 km/h
Range6 miles
Motor Power100W
Battery24V
Weight Capacity120 lbs
Weight18 kg
BrakesHand-activated rear brake
Max Load120 lb (54 kg)

Summary

Battery Replacement Procedure

Accessing the Battery Compartment

Steps to remove the scooter deck and kickstand to expose the battery.

Disconnecting the Battery

Unscrew the battery plate and carefully disconnect the battery wiring.

Installing the New Battery and Reassembly

Connecting and Securing the Battery

Place a fresh battery, connect wiring, and secure the battery plate.

Reassembling the Scooter

Replace the deck and reattach the kickstand using the appropriate Allen wrenches.
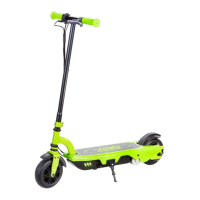