EasyManua.ls Logo

VIRTUFIT Wooden Plyo Box User Manual

VIRTUFIT Wooden Plyo Box
2 pages
To Next Page IconTo Next Page
Page #1 background imageLoading...
Page #1 background image
Wooden Plyo Box
User manual
EN
WARNING:
Before beginning any exercise program consult your physician. This is especially important for people
who are over 35 years old or who have pre-existing health problems. Read these instructions carefully
before using the VirtuFit Wood Plyo Box. You receive important information about the use and safety of
your VirtuFit Wood Plyo Box. VirtuFit takes no responsibility for any injuries or property damage caused
by the use of this fitness equipment.
ATTENTION
TOOLKIT
When you open the carton, and you will find the below parts in the carton:
LARGE PANEL (2X) SMALL PANEL (2X) MEDIUM PANEL (2x) WOOD SCREWS (36x)
Question and Answer IconNeed help?

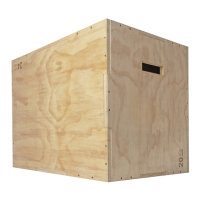
Do you have a question about the VIRTUFIT Wooden Plyo Box and is the answer not in the manual?

VIRTUFIT Wooden Plyo Box Specifications

General IconGeneral
MaterialWood
TypePlyometric Box
Weight Capacity400 lbs
SurfaceNon-slip
Available Heights20 inches, 24 inches
FinishNatural wood finish
Dimensions20" x 24" x 30"

Summary

User Manual

Safety Precautions

Health Warning

Consult a physician before starting any exercise program, especially if over 35 or with pre-existing health issues.

Toolkit Contents

Assembly Instructions

Step 1: Prepare Base

Identify the bottom panel and place it finished side down. Connect one side panel to the base.

Step 2: Attach First Side Panel

Install the second side panel into the base and adjacent side. Secure with screws.

Step 3: Attach Third Side Panel

Repeat the process for the third side panel, ensuring secure connection.

Step 4: Attach Fourth Side Panel

Install the fourth side panel with three screws, including the center bottom connection.

Step 5: Secure All Screws

Use an electric screwdriver to fix all screws securely, ensuring they are flush.

Step 6: Attach Top Panel

Place the top panel and install screws. Install remaining screws for flush finish.

Related product manuals