Vpod Instruction Manual
5
CHAPTER 2 BASIC OPERATION
2.1 Outer View
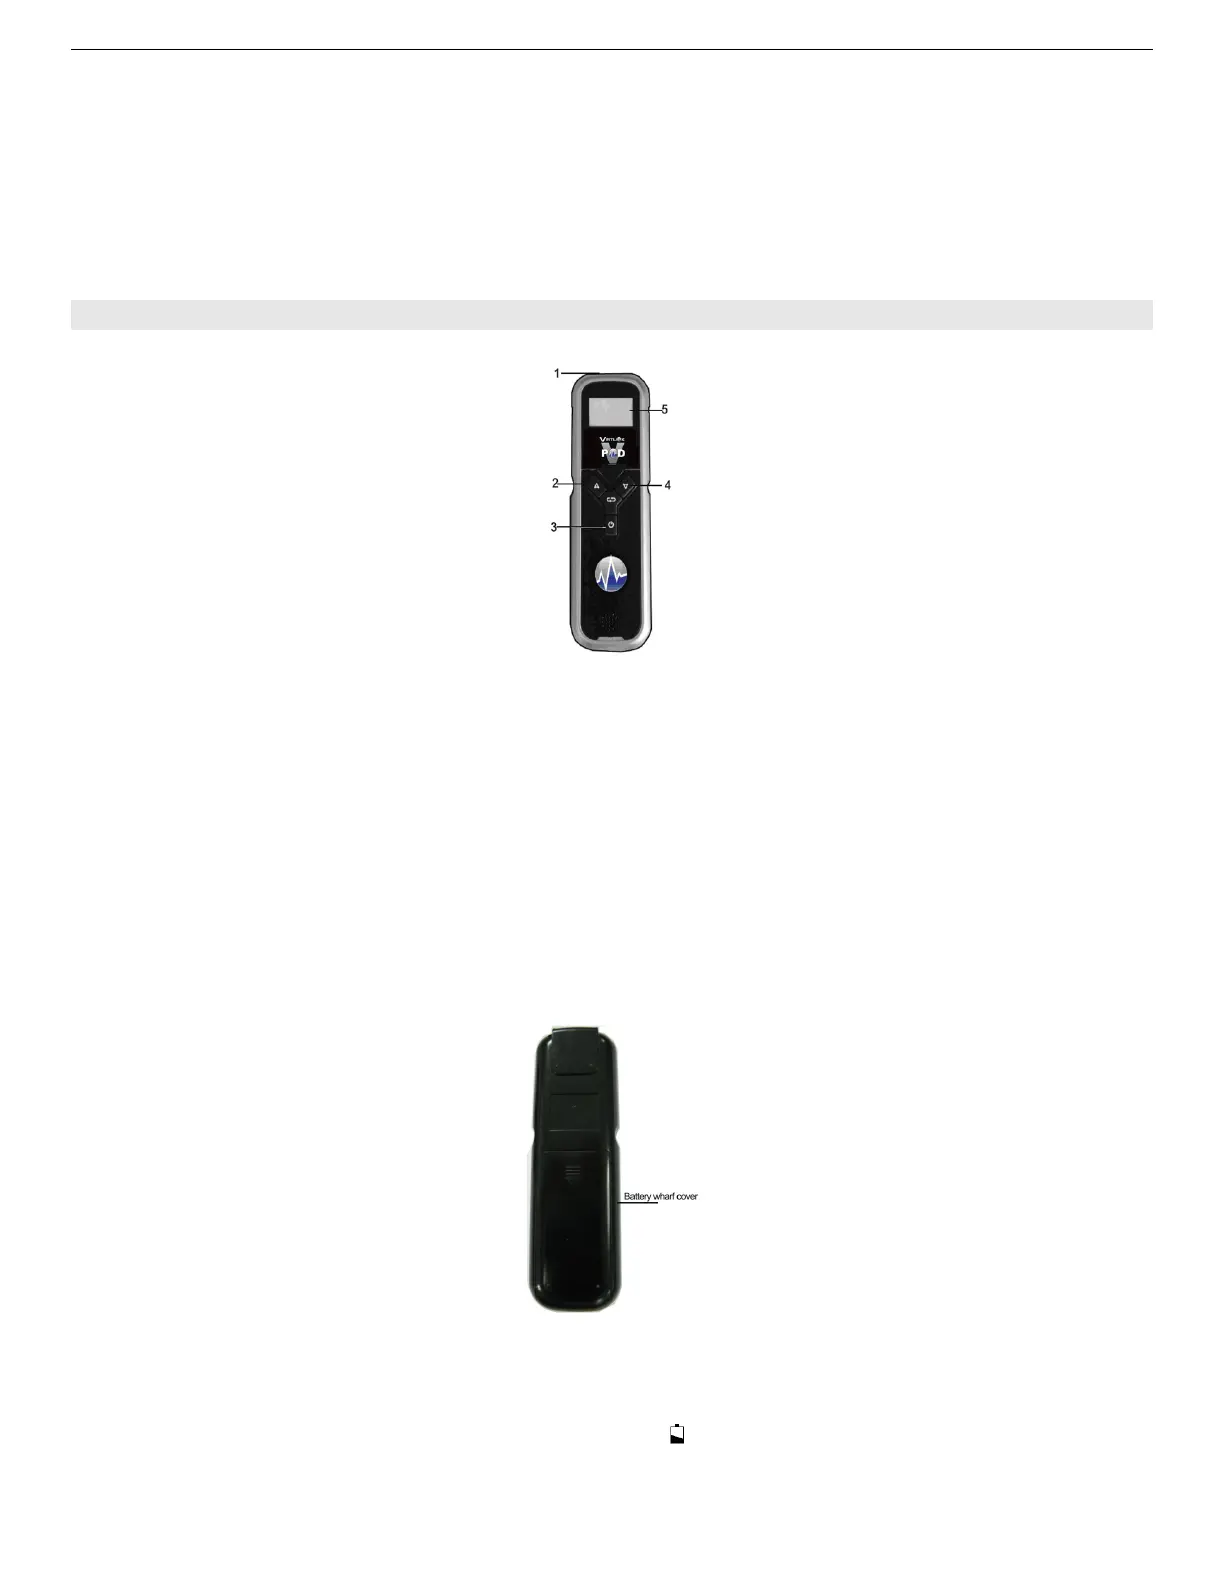
Fig.1
Description of Fig.1:
::
:
1— Double-functional socket:for oximeter probe and data transfer cable.
— Oximeter probe socket: Connect the probe with the oximeter before taking a measurement.
— Data cable socket: Connect the oximeter with PC by a data cable for transferring data recorded
to Virtuox software.
2— The function button: short press the button to change the display mode on the measurement
screen; And on the normal screen, extended press the button for about 4 seconds to change the
setting items.
3— The POWER on/off button
Note:If no press on any button for 30 seconds, the oximiter will power off automatically.
4— The Setting button: Press this button repeatedly to increase the parameter under adjustment by
one decrement.
5— Display screen, displays date and time, SpO
2
data, PR data, error information etc.
2.2 Rear Panel
Fig.2
Install the batteries
The oximeter can be powered by 2 AA-Size alkaline batteries (which will typically provide 50 hours of
continuous operation), or by the optional rechargeable battery pack.
When battery power is lower than 2.7±0.1V, the sign
will flicker in its display area. Replace the
battery (or rechargeable batteries) as soon as possible. The installation steps are shown as Fig. 2.3.
Be sure to insert the batteries in the correct polarity, as indicated by polarity marking (+ and -)