2
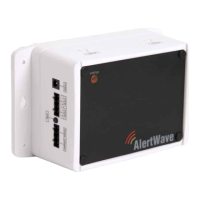
2. Position the VNS2210 device on the mounting surface and confirm that it is vertical to the floor. Note
: When the
device is installed properly, the LED indicator should be on the left top corner (front view).
3. Secure the VNS2210 device to the wall using screws appropriate for the mounting surface (use 1.5”-2” screws).
4. Connect a 4-32 Ohm speaker to the SPEAKER 1 port (polarity is not critical) using the speaker cable provided. An
additional speaker can be connected to the second speaker port using similar quality speaker cable.
5. If the VNS2210 is being used to control a mechanical bell system, connect the bell control lines to the RELAY port
of the VNS2210 as illustrated in the wiring diagram.
6. Connect the power adapter male connector to the POWER port of the VNS2210 device and make sure the Status
indicator is flashing.
Built-In Alerts and Bell Tones
The VNS2210 comes with eight built-in bell tones and alerts:
1. Single Tone
2. Dual Tone Siren
3. Voice Message: “Attention! This is a lockdown emergency. Please take refuge immediately. This is not a drill”
4. Voice Message: “Attention! This is an evacuation emergency. Please evacuate the building and follow evacuation
procedures”
5. Voice Message: “Attention! The emergency condition has been cleared. Resume to normal condition”
6. Voice Message: “Attention! This is a lockdown drill. Please take refuge in the nearest building and follow lockdown
procedures. This is only a drill”
7. Beep Alert
8. School Bell
These tones/alerts can be found on
http://www.visiplex.com/products/download_area.html in the Default Audio Files
section.
Software Installation
The Visiplex Programming Software (VPS) is a user level application designed to program and configure a variety of Visiplex
products. To program the break bell schedule or custom bell alerts into the VNS2210, you will need to install the VPS
software and its USB drivers. Please use the following steps:
1. Log in to your PC as user with administrator privileges.
2. Download the VPS software (
www.visiplex.com/docs/vps_setup.exe)
3. Install the VPS software.
4. Install the USB drivers applicable to your Windows OS (x86 or x64, i.e. 32-bit or 64-bit) from the shortcuts under
the VPS program group.
5. Plug the AC adapter to the VNS2210 and make sure the LED indicator is flashing. If you are planning to test or
verify the built-in default alerts or your custom bell alerts, make sure to have a speaker connected to at least one
of the speaker ports of the VNS2210.
6. Connect one end of the supplied USB cable to the USB port on the VNS2210 and the other end into an open USB
port on your PC. If the USB driver is installed correctly, a message will be displayed at the lower right side of your
screen indicating the COM port that will be associated with the VNS2210. Please remember the port number in case
it is needed later for communication diagnostics.
7. Run the VPS software and allow it to auto-detect the connected VNS2210 and the serial (COM) port used.
8. If for any reason the communication cannot be established, the VPS software can search for the attached VNS2210
by performing the following steps:
8.1 Click on the Settings menu.
8.2 Click on the Detected Device menu item.
8.3 Click on the Auto Detect sub-menu item to let the VPS detect the VNS2210 unit.
 Loading...