VNS2210 Amplifier & Controller Installation Guide – Version 2.00
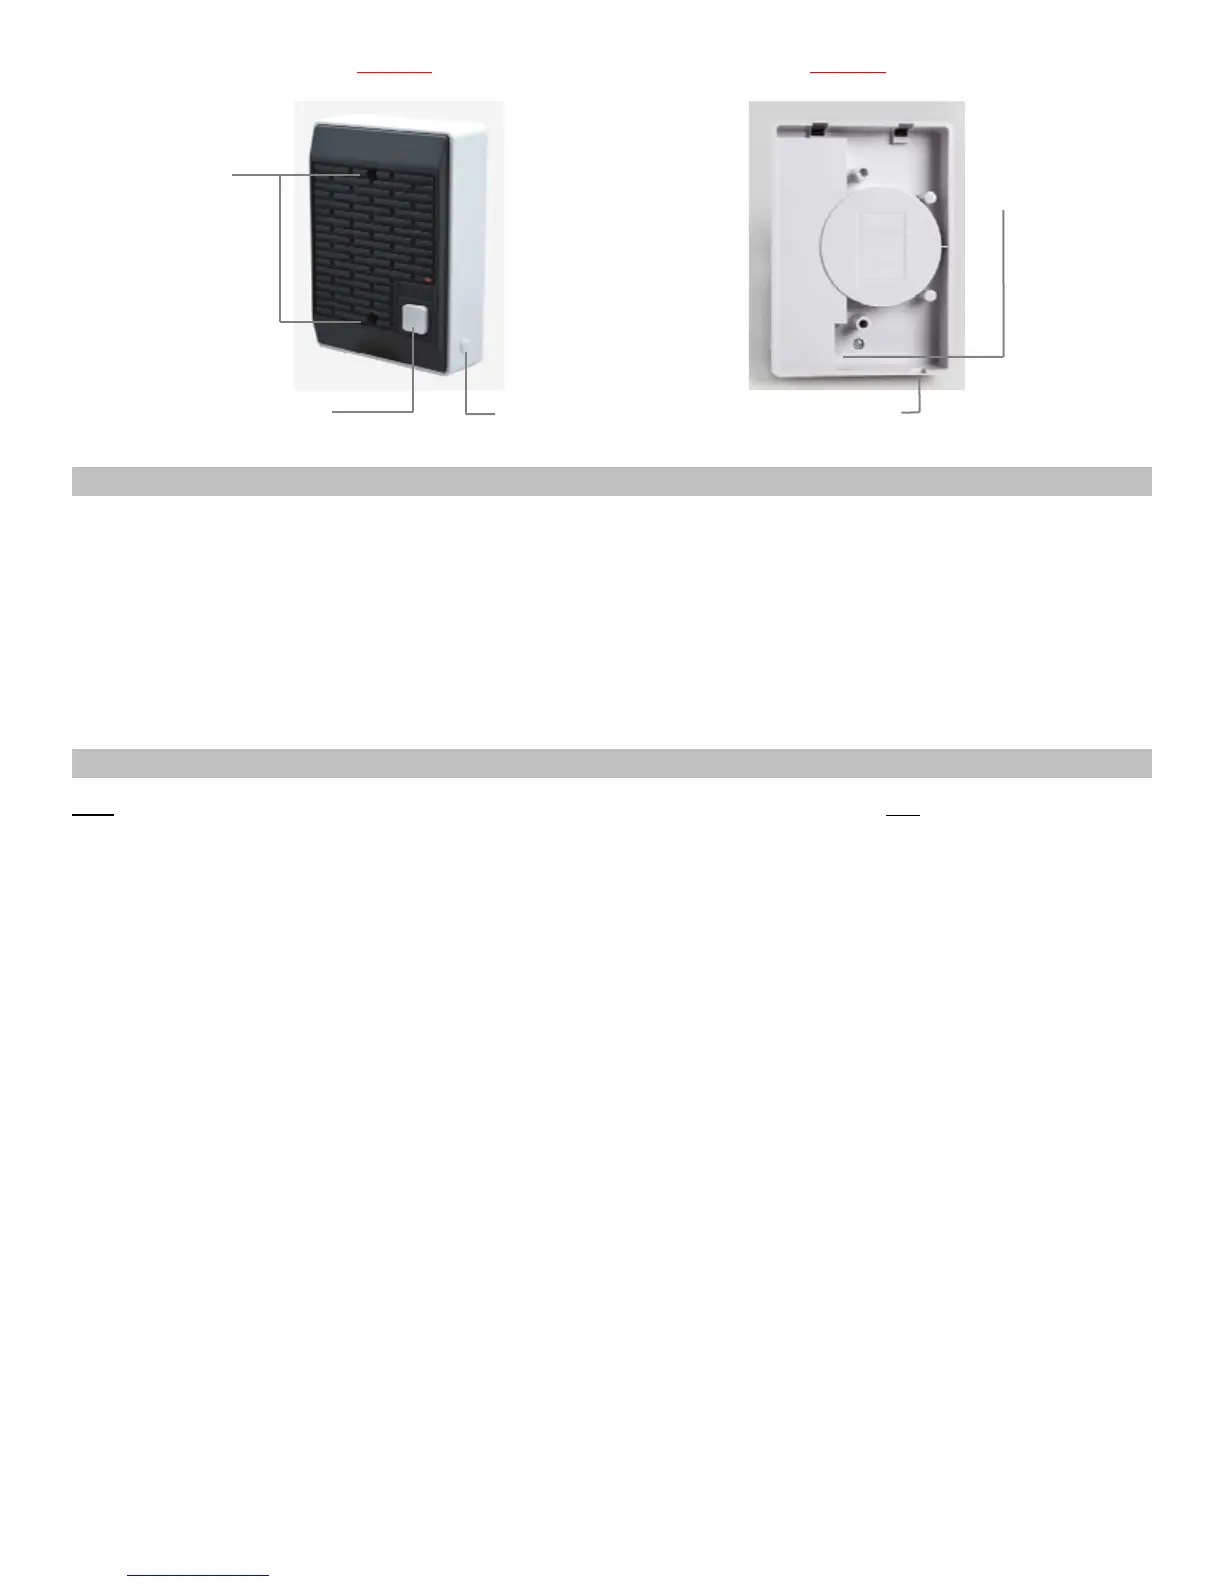
Mounting Holes
Call Button
Microphone Sensitivity
Adjustment
Breakable Data Cable Outlet
RJ45 Data Cable Connection
Default Pre-Programmed Tones & Alerts
1. Single Tone
2. Dual Siren
3. Voice Message: “Attention! This is a lockdown emergency. Please take refuge immediately. This is not a drill”
4. Voice Message: “Attention! This is an evacuation emergency. Please evacuate the building and follow evacuation procedures”
5. Voice Message: “Attention! The emergency condition has been cleared. Resume to normal condition”
6. Voice Message: “Attention! This is a lockdown drill. Please take refuge in the nearest building and follow lockdown procedures.
This is only a drill”
7. Beep Alert
8. School Bell
9. Long Tone
Programming Custom Audio Messages using VPS or VisiDB Software
Note
: The VisiDB software utility is compatible only with older versions of the VNS2210. Use VisiDB only with VNS2210 with versions
earlier than 4.00 and VNS2200 with versions earlier than 3.18.
1. Connect your VNS2210 receiver module to the PC using the special programming power supply. This power supply will have a
serial cable attached to the VNS2210 power port.
2. Make sure a microphone is connected to your PC.
3. Record your WAVE files using a sound recorder software utility or Windows Sound Recorder (located under Start
Menu\Programs\Accessories\Entertainment on Windows XP) or any other audio editing software.
4. Prepare your WAVE files for upload and make sure that they are saved at the correct format:
4.1 Record a wave file or open a pre-recorded file (File, Open).
4.2 Go to File, Save As.
4.3 Enter a file name for the recorded or modified file.
4.4 Click on Change button.
4.5 Set Format to PCM.
4.6 Set Attribute to one of the following: 8.000 kHz, 8 bit, Mono or 11.025 kHz, 8 bit, Mono (Note: Versions 3.05 and
higher may also support 22.050 kHz, 8 bit, Mono).
4.7 Click Save.
4.8 Repeat for all additional WAVE files.
5. Run the VPS or VisiDB software.
6. For VisiDB:
6.1 VisiDB will be connected to the receiver module once it is open. Connected to PA Speaker should be displayed in the
lower right hand corner of the screen.
6.2 Click on Devices menu, Device Programmer, Custom Alerts Programmer. The programmer screen will be
displayed.
7.
For VPS (note: VPS software does not support all versions and models):
7.1 VPS will be connected to the receiver module once it is open. Connected to VNS2210 should be displayed in the lower
right hand corner of the screen.
7.2 Click on Wireless Devices menu, VNS2200/VNS2210 Programmer, Alerts. The programmer screen will be
displayed
Ima
e 2 Ima
e 3
 Loading...