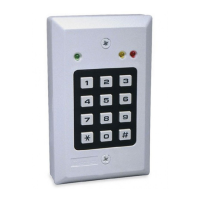
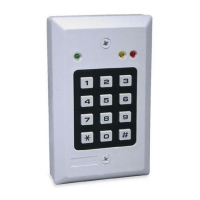
2 D-303015 KP-140 PG2, KP-141 PG2 Installation Instructions
Step 5 Step 6 Step 7 Step 8
Configure Location parameter Enter PARTITIONS.
See Note 3
Assign partitions to the keypad by
pressing the
, and
buttons on the panel
Continue to section 2.3
means scroll and select
Notes:
1. If the keypad is already enrolled, you can configure the keypad parameters and assign partitions via the “Modify Devices” option – see Step 2.
2. The first three digits of the Device ID No. "370-XXXX" refer to KP-140 PG2. For KP-141 PG2, the first three digits of the device ID No. are "371-XXXX".
3. PARTITIONS will appear only if PARTITIONING was previously enabled in the panel (for further details, see "Partitioning" in the PowerMaster Installer Guide).
2.3. Configuring the Keypad Parameters
Enter the menu and follow the configuration instructions for the KP-140 PG2/KP-141 PG2 keypad as described in the following table.
Option Configuration Instructions
Here you determine which of the two tampers (i.e. battery compartment cover or all of the tampers) will be active.
Optional settings: Disabled (default); all tampers; Battery cover.
Note: For UL Listed product, set to “all tampers”.
Here you determine whether or not the control panel will monitor supervision messages sent by the keypad or not (see Note).
Optional settings: ON (default) or OFF.
Notes:
1. Every 5 minutes the keypad performs a communication test session with the control panel (i.e. "Supervision signal) to check
the integrity and quality of the Radio link. If the keypad does not report a supervision signal at least once within a predefined
time window, a “MISSING” trouble alert is initiated. Therefore, if you intend to take the keypad out of the protected premises you
must switch the Supervision OFF to avoid the trouble alert.
2. For UL Listed product, set to “ON”.
Here you determine whether the keypad will sound the exit and entry beeps, or not, or whether the keypad will sound the beeps only
when the system is armed AWAY and not when it is armed HOME.
Optional settings: ON; OFF (default) and OFF @ Home.
Note: For UL Listed product, the sounder cannot be used as the only annunciator for the system.
Here you select the function of the (AUX) button . Four options are offered:
Status: Control panel displays and announces (applies only to control panels that support voice) the system status.
Stop Beeps: Pressing the AUX button will cause the control panel and other devices in the system (such as keypads, sirens etc.) to
stop beeping (for example during exit or entry delays).
Skip exit delay: Pressing the AUX button will immediately stop the exit delay.
PGM: Pressing the AUX button will activate the PGM output.
The functions of the PGM output is configured at the corresponding
sections of the control panel’s Installer Guide (see “OUTPUTS” menu) and User Guide (see “SCHEDULER ” menu).
Not used: No function assigned to AUX button.
Optional settings: Status (default); Stop Beeps; Skip exit delay; PGM; and Not Used.
Note: PGM not to be enabled in UL Listed Product.
2.4 Enrollment of Proximity Tags
The built-in proximity tag reader of the KP-141PG2 can be also used to enroll proximity tags into the PowerMaster panel via the keypad as described in the
corresponding section of the control panel's User or Installer Guide, or as explained in the general description provided below.
Each proximity tag corresponds to its User Code. Therefore, be sure that a corresponding User Code is programmed for each enrolled proximity tag (code "0000" is
not allowed). For example, "T02:Tag <Prox>" must be assigned to User Code 2 and "T14:Tag <Prox>" must be assigned to User Code 14. Partition authorization of
each proximity tag is identical to that of the corresponding User Code. For example, if User Code 3 is set to Partitions 1 and 3, "T03:Tag <Prox>" will also be set to
Partitions 1 and 3.
Means scroll and select
Step 1 Step 2 Step 3 Step 4
Enter the Installer menu of the control
panel and select the
“02:ZONES/DEVICES”
Select the "ADD NEW DEVICES" option When "ENROLL NOW" is displayed, press
the AWAY button (
) on the
KP-141 PG2 keypad - the AWAY button
begins to blink
Present the proximity tag to the KP-141
PG2 keypad within the timeout period.
If the enrollment is successful the display
reads "DEVICE ENROLLED" and then
shows the device details
3. USING THE KEYPAD
3.1 Arming and Disarming the System
Step Basic Arming User Actions Keypad & Panel Response
1
Select a PARTITION
(1)
(when Partition is enabled)
or or
The selected button lights.
K06.DEV SETTINGS K06.LOCATION K06.PARTITIONS
K06:P1 P2 P3

 Loading...