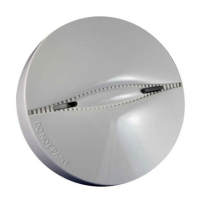
D-302151 MCT-426, MCT-427 Installation Instructions 3
3.5 Mounting
1
Mark and drill 2 holes in
the mounting surface.
Fasten the bracket to the
mounting surface with 2 screws.
2
Align bracket tabs with the
detector slots and rotate the detector
as shown. Pull the detector outward to
verify that it is securely attached.
BRACKET DETECTOR
tab
(1 of 3)
Figure 4. Mounting
Notes
1. A battery must be inserted into the detector before the detector
can be mounted onto the bracket.
2. Unauthorized removal of the unit from the bracket will initiate a
tamper alert!
3.6 Test
Enter the test mode by pressing the test button. In this mode, the
detector will test smoke, heat and battery functions. If all functions are
good, the red LED lights 0.5s, off 0.5s, the yellow LED lights 0.5s, off
0.5s followed by a loud 3-beep alarm and the red LED flashes
simultaneously. Otherwise, the detector produces the warning signals
as detailed in Table 1.
3.7 LED Transmission Procedure
The yellow LED can be set to ON or OFF by pressing the
Transmission LED (yellow) ON/OFF button (see Figure 3), as
indicated in Table 2 below.
Table 2. Interpreting the Transmission ON/OFF Button
Transmission LED ON/OFF
button (yellow) press
LED (yellow) Status during
transmission
Press and release, flashes once ON
Press and release, flashes twice OFF
4. SMOKE DETECTOR INSTALLATION OVERVIEW
4.1 Where to Install Smoke Detectors
In the USA, smoke detectors should be installed in accordance with
the NFPA Standard 74 (National Fire Protection Association,
Batterymarch Park, Quincy, MA 02169). In Canada, smoke detectors
should be installed in accordance with CAN/ULC-S553 - Standard for
the Installation of Smoke Alarms. For complete coverage in
residential units, smoke detectors should be installed in all rooms,
halls, storage areas, basements and attics in each family living unit.
Minimum coverage is one detector on each floor and one in each
sleeping area and attics in each family living unit. For maximum
protection, a smoke detector should be located outside primary
sleeping areas or on each level of your home. Here are a few useful
tips for you:
Install a smoke detector in the hallway outside every separate
bedroom area, as in Figure 5. Two detectors are required in homes
with two bedroom areas, as in Figure 6.
Install a smoke detector on every floor of a multi-floor home or
apartment, as shown in Figure 7.
Install a minimum of two detectors in any household.
Install a smoke detector inside every bedroom.
Install smoke detectors at both ends of a bedroom hallway if the
hallway is more than 12 meters (40 feet) long.
Figure 5. Locations for Placing Smoke Detectors in a Single
Residence with only One Sleeping Area
Install a smoke detector inside every room where one sleeps with
the door partly or completely closed, since smoke could be blocked
by the closed door and a hallway alarm may not wake up the
sleeper if the door is closed.
Figure 6. Locations for Placing Smoke Detectors in Single-Floor
Residence with More than One Sleeping Area.
Figure 7. Placing Smoke Detectors in a Multi-Floor Residence
Install basement detectors at the bottom of the basement stairwell.
Install second-floor detectors at the top of the first-to-second floor
stairwell.
Be sure no door or other obstruction blocks the path of smoke to
the detector.
Install additional detectors in your living room, dining room, family
room, attic, utility and storage rooms.
Install smoke detectors as close to the center of the ceiling as
possible. If this is not practical, put the detector on the ceiling, at
least 10 cm (4 inches) away from any wall or corner, as shown in
Figure 8.
If ceiling mounting is not possible and wall mounting is permitted by
your local and state codes, locate the detectors between 10 - 15
cm (4 - 6 inches) from the ceiling, also see Figure 8.
If some of your rooms have sloped, peaked, or gabled ceilings, try
to mount detectors 0.9 meter (3 feet) measured horizontally from
the highest point of the ceiling as shown in Figure 9.

 Loading...