l Make sure your fire warning system is operational by conducting weekly tests. If you are
unsure about system operation, contact your smoke detector installer or dealer.
l It is recommended that you contact your local Fire Department and request further inform-
ation on home fire safety and escape planning. If available, have your local fire prevention
officer conduct an in-house fire safety inspection.
Testing Your Smoke Detector
Follow the test procedure described here or contact your smoke detector dealer or installer
for testing instructions. It is recommended to test the entire alarm system at least once a
week to verify the operation of all system functions.
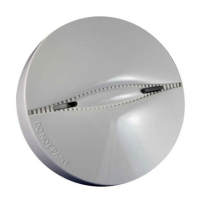
Smoke Detector Unit Test
Initiate test by pressing the test button for 5 seconds, the sounder makes clicking noises during
this time. Press the button until the unit alarm sounds, an alarm should be sent to the control
panel. When the button is released, the alarm should cease. If this does not occur, ensure bat-
teries are the correct type, in good condition and are installed correctly.
Upon completing the functional testing of the smoke detector, check the unit’s sensing chamber
to ensure proper operation. To test the sensing chamber, wave a lit cotton wick or punk stick
around the outside of the unit until a generous amount of smoke enters the sensing chamber or
the unit alarms. If the smoke detector does not function properly, call your smoke detector
installer or dealer for service.
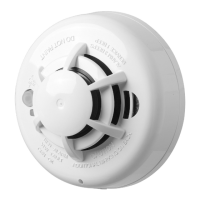
Smoke Detector Test
Before you test, complete the following steps:
1. Insert the battery and then mount the detector on the bracket before conducting the
smoke detector test.
2. After the battery is inserted, the detector enters Local Diagnostic Test Mode for 15
minutes.
3. It is recommended to perform the Periodic Test and use either the Installer code (Installer
Diagnostic Mode) or the User code (User Diagnostic Mode) to test.
CAUTION: The diagnostic test cannot be performed when the tamper is open.
Press and hold the test button for 2 seconds. When the button is released, the following
sequence of events occur:
l Red LED lights for 0.5 s > off for 0.5 s
l Yellow LED lights for 0.5 s > off for 0.5 s
This is followed by 3 loud alarm beeps and at the same time the red LED flashes. Otherwise
the detector produces a warning signal, see the Alarm Indication table for details. In test mode,
the detector tests smoke, heat, and battery functions.
If the detector is in diagnostic mode, the detector performs the diagnostic test as described
below.
Diagnostic Test
The following sequence of events occur during a diagnostic test:
A. The detector performs a communication quality test, the LED lights orange.
B. The LED lights orange, red or green, this indicates the correct operation of the LED.
C. The detector performs a link quality test.
Note: The detector must be in local or diagnostic mode to perform the link quality test.
In diagnostic mode, if you press the test button for more than 6 seconds, an alarm mes-
sage is sent to the panel and a Temporal-3 alarm signal is sounded. After this sequence
is completed, the panel responds by sending an “Alarm in Memory” message to the
device.
D. At the end of the diagnostic test the LED blinks three times. The following table indicates
the received signal strength.
LED
Response
Green LED
blinks
Orange LED
blinks
Red LED
blinks
No blinks
Reception
Strong Good Poor
Paired, no
communicaton
IMPORTANT! Reliable reception must be confirmed. Therefore, "poor" signal strength is not
acceptable. If you receive a "poor" signal from the device, re-locate it and re-test until a "good"
or "strong" signal strength is received. For UL/CUL installations, the test results must be "strong".
See the alarm systems installation guide for detailed diagnostic tests.
Owner’s Maintenance
The smoke detector is designed to require minimum maintenance. If the case becomes dusty,
vacuum with a small brush attachment. If the case is greasy, wipe the case gently with a soft
cloth slightly dampened with soapy water.
Never disassemble the smoke detector; there are no user serviceable parts inside the unit.
You may only remove detector from backplate to replace batteries if not serviced by
installer. When replacing the batteries, follow the instructions specified in the Installation
Instructions.
 Loading...