EasyManua.ls Logo

Vista Landscape Series - User Manual

Vista Landscape Series
2 pages
Print Icon
To Next Page IconTo Next Page
Loading...
SEE REVERSE FOR LED
INSTALLATION INSTRUCTIONS
1625 Surveyor Avenue • Simi Valley, CA 93063 • (805) 527-0987 • (800) 766-VISTA (8478)
FAX: (888) 670-VISTA (8478) • email@vistapro.com • www.vistapro.com
FOR USE ONLY WITH LOW VOLTAGE LANDSCAPE POWER UNITS THAT DO NOT EXCEED 25 AMPS, 15 VOLT MAXIMUM.
WARNING: Luminaires must be installed in accordance with the National Electrical Code (NEC) and local codes. Failure to do so will void the warranty and may
result in serious injury and/or damage to the luminaire.
SAFETY WARNING: Luminaire can become very hot depending on lamp wattage used. Lens and metal around lamp can become hot enough to blister hands.
Particular care should be taken not to locate luminaires where small children can reach them if high wattage lamps are used.
LUMINAIRES ARE NOT TO BE INSTALLED WITHIN 10 FT. (3.05M) OF A POOL OR SPA. SECONDARY CABLE IS NOT TO BE BURIED MORE THAN 6”.
WHEN USING MULTIPLE LUMINAIRES, LOAD IS NOT TO EXCEED THE TOTAL WATTS OF TRANSFORMER RATING. DO NOT USE EXTENSION CORDS
ON POWER UNITS.
NOTE: Always use UL recognized wire connectors for connections.
NOTE: Save these instructions for future reference.
LUMINAIRE IS UL LISTED FOR ABOVE GROUND INSTALLATION ONLY.
Shade
Silicone Filled
Safety Connectors
36” Pigtail
Adjustable Knuckl
e
Main Supply Cable
Ground Stake
Vista Professional Outdoor Lighting reserves the right to modify the design and/or construction of the fixture shown without further notification.
WARNING: TO REDUCE THE RISK OF FIRE, OR INJURY TO PERSONS:
1. Turn off/unplug and allow to cool before replacing lamp.
2. Lamps get hot quickly! Contact only switch/plug when turning on.
3. Do not touch hot lens, guard or enclosure.
4. Keep lamp away from material that may burn.
5. Do not touch the lamp at any time. Use a soft cloth. Oil from the skin
may damage lamp.
6. Do not operate luminaire tting with a missing or damaged cover.
IMPORTANT SAFETY INSTRUCTIONS - THE LIGHTED LAMP IS HOT!
SAVE THESE INSTRUCTIONS
(Leave with property owner/manager)
LUMINAIRE MOUNTING :
1. To prevent electrical shock, disconnect transformer from electrical supply
before installation or service.
2. Run wire pigtail from luminaire through mounting hole in top of ground
stake.
3. Thread luminaire into threaded hole in ground stake.
4. Place stake in desired position and insert into ground until ange of stake is
ush to grade.
5. Strip the two leads from the luminaire pigtail wire. Using two silicone lled
safety connectors (provided), connect leads from luminaire to main supply
cable leads.
NOTE: Luminaires are supplied with 36” of 18-2 cable pigtail for secure
connection to main supply cable. The wire is to be protected by routing in
close proximity to luminaire. The wiring should be buried a maximum depth of
6” (15.2 cm) in order to connect to main supply cable.
6. Aim luminaire to desired angle. Lock into place by tightening Phillips screw
in adjustable knuckle.
NOTE: Avoid aiming xture directly upward. Whenever possible, set at angle
to prevent rain or irrigation water from settling on lens.
NOTE: When positioning xture less than 45° from vertical position, INSERT
enclosed weep hole plug (see gures 1 & 2).
LAMP INSTALLATION/REPLACEMENT:
CAUTION: Do not exceed maximum wattage marked on luminaire label.
1. To prevent electrical shock, disconnect transformer from electrical supply
before service.
2. Remove lens retaining ring and lens.
3. Replace lamp with correct wattage and type marked on xture label.
NOTE: DO NOT touch lamp with bare hands. Always use soft cloth or the
plastic wrapping (if available) from lamp to handle the lamp.
4. Re-install lens and lens retaining ring.
W
E
E
P
H
O
L
E
P
L
U
G
I
N
S
E
R
T
W
E
E
P
H
O
L
E
P
L
U
G
45°
D
O
N
O
T
I
N
S
E
R
T
Fig. 1 Fig. 2
Up & Accent Lights
Landscape Series
2104
Question and Answer IconNeed help?

Do you have a question about the Vista Landscape Series and is the answer not in the manual?

Summary

Luminaire Mounting

Luminaire Mounting Steps

Detailed steps for physically attaching the luminaire to its stake and connecting wiring.

Aiming and Water Prevention

Guidance on aiming the fixture and using a weep hole plug to prevent water accumulation.

Important Safety Instructions

Hot Lamp Precautions

Safety warnings regarding hot lamps, advising against touching them and keeping them away from flammable materials.

Lamp Installation and Replacement

Lamp Handling and Replacement

Instructions for safely replacing a lamp, emphasizing disconnection and avoiding touching the new lamp with bare hands.

LED Luminaire Specifics

LED Operating Voltage Range

Information on the 6-15 volt AC operating range for LED luminaires and its effect on lumen output.

LED Engine Installation;Replacement

Replacing the LED Engine

Procedure for removing and reinstalling the field-replaceable LED engine assembly and its components.

Overview

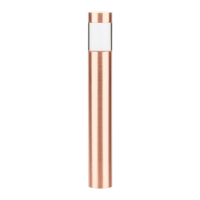
This document provides installation and maintenance instructions for the Vista Professional Outdoor Lighting 2104 Landscape Series Up & Accent Lights. It covers both incandescent and LED versions of the fixture, with separate instructions for each.

Function Description:

The Vista 2104 Landscape Series Up & Accent Lights are designed for outdoor illumination, providing up-lighting and accent lighting in landscape settings. These luminaires are intended for use with low voltage landscape power units. The incandescent version (2104) uses traditional lamps, while the LED version (2104-LED) incorporates a field-replaceable LED engine for energy-efficient lighting. Both versions are designed for above-ground installation using a ground stake. The adjustable knuckle allows for aiming the luminaire to a desired angle, providing flexibility in light direction.

Important Technical Specifications:

  • Power Unit Compatibility: For use only with low voltage landscape power units that do not exceed 25 amps and 15 volts maximum.
  • Installation Codes: Must be installed in accordance with the National Electrical Code (NEC) and local codes.
  • Safety Clearances:
    • Not to be installed within 10 ft (3.05m) of a pool or spa.
    • Secondary cable is not to be buried more than 6 inches (15.2 cm).
  • Wiring: Supplied with a 36-inch (91.4 cm) 18-2 cable pigtail for secure connection to the main supply cable. The wiring should be buried a maximum depth of 6 inches (15.2 cm).
  • Load Capacity: When using multiple luminaires, the total load must not exceed the total watts of the transformer rating.
  • Connectors: Requires UL recognized wire connectors for connections (silicone-filled safety connectors are provided).
  • Operating Voltage (LED Version): The operating voltage range for the LED luminaire is 6 - 15 volt AC. The Vista electronic driver ensures consistent lumen output within this range, mitigating dimness issues often attributed to voltage drop. Note that specific operating voltage ranges for LED luminaires may vary by model, style, and number of LEDs; users should consult factory specifications for precise details.
  • Wattage (Incandescent Version): Do not exceed the maximum wattage marked on the luminaire label.
  • UL Listing: Luminaire is UL listed for above-ground installation only.

Usage Features:

  • Adjustable Aiming: The luminaire features an adjustable knuckle that allows users to aim the fixture to a desired angle. This is secured by tightening a Phillips screw.
  • Weep Hole Plug: For fixtures positioned less than 45° from vertical, an enclosed weep hole plug must be inserted to prevent water accumulation. If the fixture is positioned at 45° or more, the weep hole plug should not be inserted. This feature helps prevent rain or irrigation water from settling on the lens, which can extend the life of the fixture and lamp.
  • Ground Stake Mounting: The luminaire threads into a ground stake, which is then inserted into the ground until its flange is flush with the grade.
  • Silicone-Filled Safety Connectors: Provided for secure and weather-resistant connections to the main supply cable.
  • Field-Replaceable LED Engine (LED Version): The LED version allows for easy replacement of the LED engine, extending the lifespan of the fixture and simplifying maintenance. This involves removing the locking/expansion ring and lens, sliding out the old engine, disconnecting it, connecting the new engine, and reassembling.

Maintenance Features:

  • Lamp Replacement (Incandescent Version):
    1. Disconnect transformer from electrical supply.
    2. Allow the fixture to cool before handling.
    3. Remove the lens retaining ring and lens.
    4. Replace the lamp with the correct wattage and type specified on the fixture label.
    5. Handle the new lamp with a soft cloth or its plastic wrapping to avoid oil from skin damaging the lamp.
    6. Re-install the lens and lens retaining ring.
    • Safety Precautions for Lamp Replacement: The lighted lamp can become very hot. Avoid touching the hot lens, guard, or enclosure. Do not operate the luminaire with a missing or damaged cover.
  • LED Engine Replacement (LED Version):
    1. Disconnect transformer from electrical supply.
    2. Remove the locking/expansion ring and lens.
    3. Slide the field-replaceable LED engine assembly out of its mounting bracket.
    4. Disconnect the connector assembly.
    5. Connect the new field-replaceable LED engine to the connector assembly.
    6. Reinstall the LED engine assembly into the mounting bracket.
    7. Reinstall the lens cover and locking/expansion ring.
  • Cleaning: Use a soft cloth to clean the lamp (incandescent version) to avoid damage from skin oils.
  • General Safety: Always disconnect power before installation or service. Keep lamps away from flammable materials. Avoid locating luminaires where small children can reach them, especially if high-wattage lamps are used, as the lens and metal around the lamp can become hot enough to cause blisters.

The document emphasizes the importance of following all instructions to ensure safe operation, proper installation, and to maintain the product warranty. It also notes that Vista Professional Outdoor Lighting reserves the right to modify the design and/or construction of the fixture without further notification.

Vista Landscape Series Specifications

General IconGeneral
BrandVista
ModelLandscape Series
CategoryOutdoor Light
LanguageEnglish

Related product manuals