EasyManua.ls Logo

Vitamix DRIVE SOCKET - Service Manual

Vitamix DRIVE SOCKET
2 pages
Print Icon
To Next Page IconTo Next Page
Loading...
Replacement Instructions
Read and save these instructions
DRIVE SOCKET
WARNING
for Vitamix Household and Commercial Blenders
WARNING
WARNING: To avoid the risk of serious injury when performing these procedures, basic safety precautions should be
followed, including the following:
IMPORTANT SAFEGUARDS
1. Read and understand the instructions. Refer to the owner’s manual provided with the machine for further information.
2. Alteration or modification of this product in any form is prohibited and may result in bodily injury. Doing so will void the warranty.
Electrical Shock Hazard.
Power MUST be DISCONNECTED from all sources of supply before performing service on
the machine.
Failure to follow instructions can cause death or electrical shock.
To see the complete line of Vitamix
®
products,
visit vitamix.com.
Vita-Mix
®
Corporation
8615 Usher Road
Cleveland, OH 44138-2103 U.S.A.
vitamix.com
©2017 Vita-Mix
®
Corporation. No part of this publication may be reproduced or transmitted in any form or by any means or stored in a database or retrieval system without the written permission of
the Vita-Mix® Corporation.
XDM006 12/17
To Avoid Injury and Property Damage.
Read and understand these instructions before servicing this machine. Refer to the owner’s
manual provided with the machine for further information. The procedures require physical
strength and dexterity.
Alteration or modification of this product in any form is prohibited and may result in bodily
injury. Doing so will void the warranty.
You should only perform these procedures if you completely understand and can follow the
directions.
If you have questions about this procedure, contact Vita-Mix Commercial Customer Service
at 800.886.5235 or Household Customer Service at 800.848.2649.
Question and Answer IconNeed help?

Do you have a question about the Vitamix DRIVE SOCKET and is the answer not in the manual?

Summary

Drive Socket Replacement

Replacement Instructions Overview

Guidance on replacing the drive socket for Vitamix blenders, emphasizing careful handling and understanding of procedures.

Important Safety Safeguards

Critical safety precautions to prevent serious injury during drive socket servicing, including electrical shock hazards.

Drive Socket Servicing Procedures

Disassembly Steps

Detailed instructions for safely removing the drive socket, including unplugging the machine and using specific tools.

Assembly Steps

Step-by-step guide for installing the drive socket onto the motor shaft and securing it properly.

Testing the Drive Socket

Procedure to test the blender after drive socket installation, including checks for vibration and balance.

Overview

The provided document is a replacement instruction manual for a Vitamix Drive Socket, designed for both household and commercial blenders. It outlines the procedures for disassembling and assembling the drive socket, along with important safety warnings and usage notes.

Function Description:

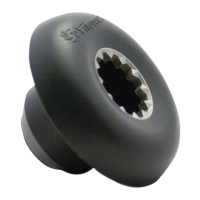
The drive socket is a critical component in Vitamix blenders, serving as the mechanical interface between the motor shaft and the blender container's blade assembly. Its primary function is to transmit rotational power from the motor to the blades, enabling the blending process. When the motor turns, the drive socket engages with a corresponding component on the bottom of the blender container, causing the blades inside the container to spin. This direct mechanical connection ensures efficient power transfer and is essential for the blender's operation. The drive socket is designed to be a replaceable part, indicating that it may wear out over time due to the stresses of blending, and can be serviced by the user or a technician.

Important Technical Specifications:

While the document does not list specific material compositions or precise dimensions, it provides operational specifications related to its installation and maintenance:

  • Tool Requirement: A 5/64" hex wrench is required for both disassembly and assembly of the set screw that secures the drive socket to the motor shaft.
  • Fastener Type: The drive socket is secured by a set screw, which requires 4 to 5 counter-clockwise turns for removal and clockwise turning until contact, then backing off 1½ turns for installation. This specific torque/turn instruction is crucial to prevent overtightening and potential damage to the motor shaft or the drive socket itself.
  • Alignment Features: The drive socket features a "raised arrow" that must be aligned with a small hole in the top cover during disassembly and with a slot in the housing during assembly. This ensures correct orientation and engagement.
  • Sealant Requirement: A small amount of silicone sealant is required over the access hole in the housing after assembly to prevent liquid from entering the housing, highlighting the importance of protecting internal components from moisture.
  • Optional Tool: A Vitamix retainer nut wrench (Item 015596) is mentioned as an optional tool for prying off a stubborn drive socket, suggesting that some drive sockets may be tightly fitted.

Usage Features:

The drive socket itself is not directly "used" by the end-user in the same way as a control dial or a container. Instead, its usage features relate to its role in the blender's operation and its design for serviceability:

  • Power Transmission: It facilitates the core function of the blender by transmitting power from the motor to the blades.
  • Replaceable Component: Its design as a user-serviceable part allows for maintenance and extends the life of the blender. This is a key feature for users who wish to perform basic repairs themselves, reducing the need for professional service or complete unit replacement.
  • Alignment Indicators: The raised arrow and corresponding holes/slots simplify the installation process, guiding the user to correctly position the drive socket.
  • Secure Attachment: The set screw mechanism ensures a firm and stable connection to the motor shaft, critical for preventing slippage and ensuring efficient power transfer during high-speed blending.
  • Vibration Management: The "TEST" section advises adjusting the drive socket's quarter-turn position if the container vibrates excessively, indicating a design consideration for balancing and smooth operation. This suggests that precise rotational alignment can impact the overall stability and performance of the blender.

Maintenance Features:

The document heavily emphasizes maintenance features, particularly those related to the replacement process:

  • Disassembly Procedure: Detailed steps are provided for removing the drive socket, including unplugging the machine, removing the centering pad, locating and manipulating the set screw, and pulling the drive socket off. Specific instructions are given for both "Drive Socket A" and "Drive Socket B" which differ in the location of the set screw and raised arrow relative to the Vitamix logo.
  • Troubleshooting Disassembly: Methods for removing a stubborn drive socket are included, such as using two screwdrivers or a specialized Vitamix retainer nut wrench, demonstrating foresight for common user challenges.
  • Cleaning Instructions: A crucial maintenance note advises careful cleaning of the drive shaft, specifically warning against removing any rubber gasket material that protects the motor bearings. This highlights the delicate nature of internal components and the importance of preserving seals.
  • Inspection: Users are instructed to check the drive shaft for any stuck plastic and to carefully remove it, ensuring a clean surface for the new drive socket.
  • Assembly Procedure: Clear steps for installing the new drive socket are provided, including aligning the squared bottom with the motor shaft, pushing it down, rotating it to align the raised arrow, and securing it with the set screw.
  • Set Screw Adjustment: Precise instructions for tightening the set screw ("Back off 1½ turn. Do not overtighten.") are given to ensure proper tension without causing damage.
  • Silicone Sealant Application: The requirement to apply silicone over the access hole after assembly is a critical step for preventing liquid ingress, which is a common cause of appliance failure.
  • Functional Test: A final test procedure involves plugging in the machine, filling the container with water, and checking for proper function, with a specific note on addressing excessive vibration by adjusting the drive socket's position.
  • Safety Warnings: Throughout the document, prominent warnings are given regarding electrical shock hazards, the need to disconnect power, and the prohibition of alterations or modifications to the product, which would void the warranty and could lead to injury. These warnings underscore the importance of safe and correct maintenance practices.
  • Customer Support: Contact information for Vita-Mix Commercial and Household Customer Service is provided for users who have questions or require assistance, indicating a commitment to supporting product maintenance.

Vitamix DRIVE SOCKET Specifications

General IconGeneral
BrandVitamix
ModelDRIVE SOCKET
CategoryAccessories
LanguageEnglish