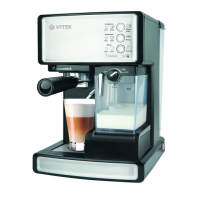
5
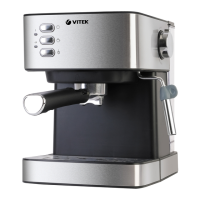
• Install the filter holder (12) into the coffee
maker. The holder (12) ledges should match
the grooves on the boiler «
», after that turn
the filter holder handle (14) to the right until
bumping «
».
• Place one or two cups on the tray (8) grid (9).
• Insert the power plug into the mains socket.
• Switch the coffee maker on by pressing the
on/off button (15) «
», the indicator (16) «I»
will light up.
• Wait until the indicator (18) «Ok» lights up, the
coffee maker is ready for making coffee.
• Switch the water supply on by pressing the
button (17) «
», watch the cup filling with the
ready coffee, press the button (17) «
» again
to switch the water supply off.
• Switch the coffee maker off by pressing the
on/off button (15) «
», the indicator (16) «I»
will go out.
• Wait until the coffee maker cools down and
remove the filter holder (12) by turning the
handle (14) to the left «
». Remove the
ground coffee remnants and wash the fil-
ter (11).
• For easy removing of the coffee remnants use
the retainer (13) to prevent the filter (11) from
falling off the holder (12).
Notes:
– The cups should be preliminary heated up,
when water heats up in the boiler, put the
cups on the tray (1).
– If you need to promptly remove the filter
holder, you have to reduce the pressure in the
boiler, switch the coffee maker off by press-
ing the on/off button (15) «
», place a suit-
able cup under the tip (7) and slightly open
the steam supply by turning the knob (4)
«OFF--- +» counterclockwise. After the pres-
sure in the boiler is released, you can remove
the filter holder (12).
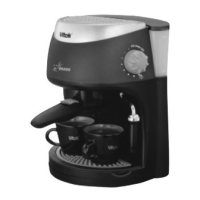
MAKING CAPPUCCINO
• Attention! Be careful not to get burns by the
outgoing steam.
• Make sure that the steam control knob (4)
«OFF--- +» is in the position «the steam sup-
ply is OFF».
• Make coffee, as described in the chapter
«MAKING ESPRESSO», in the cup with
enough capacity to add frothed milk or cream.
• Press the steam supply button (19) « », wait
until the indicator (18) «Ok» lights up. Place
any suitable bowl under the tip (7) for water.
Carefully turn the steam supply knob (4)
«OFF--- +» counterclockwise for a quarter
of a turn to remove the condensed fluid from
the pipe (6).
• After removing the condensed fluid close
the steam supply by turning the knob (4)
«OFF--- +» clockwise until bumping «OFF».
Note: some water or steam may appear from the
filter holder (12) or the steam nozzle, it is normal.
• Put the tip of the cappuccinator pipe (7) into
a glass with cold milk or cream, carefully turn
the steam supply control knob (4) «OFF--- +»
counterclockwise for a quarter of a turn or
more. The tip (7) should not touch the bot-
tom of the glass, as this can hinder the steam
release; you can make thick frothed milk in
several seconds.
Note: - to avoid splashing milk always immerse
the tip (7) deeper than 1 cm from the milk sur-
face.
• The outgoing steam creates whirls which
froths milk; from time to time lift and lower the
bowl with milk against the tip (7) to make the
milk foam.
• Сlose the steam supply by turning the knob (4)
«OFF--- +» clockwise until bumping «OFF».
• Switch the steam supply off by pressing the
steam supply button (19) «
» again.
• Switch the coffee maker off by pressing the
on/off button (15) «
», the indicator (16) «I»
will go out.
Note: - making the milk foam is an art. You may
not make it at the first try, don’t worry and experi-
ment until you achieve good results.
IMPORTANT:
– It is important that milk for making foam is
fresh and without additives, is not so-called
long storage milk. Take usual whole milk with
fat status from 4% to 6%, cream fat status
should be not less than 10%.
– Right after making frothed milk or cream clean
the tip (7) - to do this put the tip (7) into a glass
of water, switch the steam supply on by press-
ing the button (19) «
» and turn the steam
supply knob (4) «OFF--- +» counterclockwise to
release some steam. After that close the steam
supply by turning the knob (4) «OFF--- +»
clockwise until bumping «OFF» and switch
the steam supply off by pressing the steam
supply button (19) «
», switch the coffee
maker off.
IM VT-1504.indd 5 31.05.2019 14:27:43