Do you have a question about the Vitek VT-1508 and is the answer not in the manual?
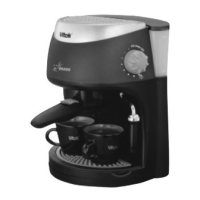
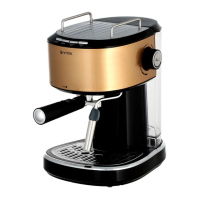
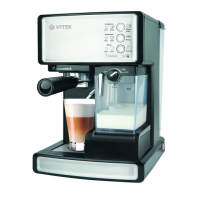
This document describes the Vitek VT-1508 coffee maker, designed for making "ESPRESSO" and "CAPPUCCINO" coffee.
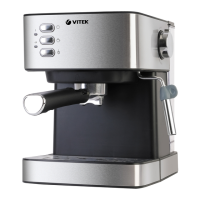
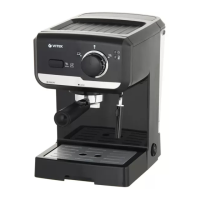
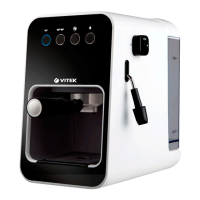
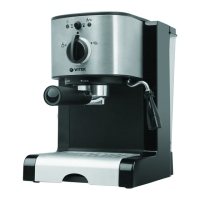
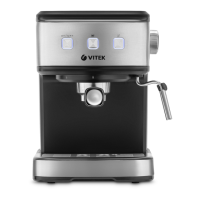
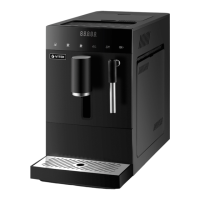
The coffee maker features a water tank (2) with a lid (1), a steam supply control knob (3) for adjusting steam output, a cappuccinator pipe (4) with a removable tip (5) for frothing milk, and a tray grid/drip tray (6) for collecting spills. The control panel includes several sensory buttons: a steam supply on button (9), a manual water supply button (10), a double espresso button (11), an espresso button (12), and an On/Off button (13). A cup warming tray (14) is located on top of the unit. Coffee is prepared using a coffee filter (15) and a measuring spoon with a ground coffee tamper (16).
Before First Use: After transportation or storage at low temperatures, allow the coffee maker to stand at room temperature for at least three hours. Unpack the unit, remove all packaging materials, and inspect for damage. Ensure the operating voltage matches your mains supply. The unit operates with AC systems at 50 Hz or 60 Hz, requiring no additional frequency settings. Before initial use, wash all removable parts (2, 7, 15, 16) with warm water and neutral detergent, then dry them.
Preparation for Operation: Sensory buttons are used for mode selection; a light touch activates the desired mode, accompanied by a sound signal. If the coffee maker is switched on but no action is taken, it will emit sound signals and switch off after 25 minutes. Before making coffee, rinse the boiler. Remove the water tank (2), fill it with cold water up to the "MAX" mark, and reinstall it. Insert the coffee filter (15) into the holder (7) without adding ground coffee. Install the filter holder (7) by aligning its ledges with the grooves on the boiler and turning the handle to the utmost right position. Place a suitable cup on the tray grid (6). Plug the power cord into the mains socket. Switch on the coffee maker by pressing the On/Off button (13); a sound signal will sound, and the blue indicator light will flash. Wait for the water in the boiler to heat up until the light glows constantly. Press the manual water supply button (10) for 3 seconds to activate the pump, then it will pause before supplying water continuously. Once the cup is filled, press the button (10) again to stop water supply and empty the cup. Repeat this procedure several times to clean the boiler. Do not remove the filter holder (7) during operation. To remove it, turn the handle to the utmost left position.
Rinsing the Cappuccinator Pipe (4): Ensure sufficient water in the tank (2). Place a suitable cup under the cappuccinator pipe (4). Switch on the coffee maker (13). Press the steam supply button (9); the red indicator light will flash. Wait until it glows constantly. Slowly turn the steam supply control knob (3) to «OFF--- +»; steam will exit the tip (5). After 10-15 seconds, set the knob (3) to «OFF». Switch off the coffee maker (13). Remove the tray grid (6), empty the drip tray, and reinstall them. The coffee maker is now ready.
Making Espresso: Fill the water tank (2) with cold water up to "MAX," ensuring the level does not drop below "MIN." Add ground coffee to the filter (15) using the measuring spoon (16), tamping it lightly. Install the filter holder (7) by aligning its ledges with the boiler grooves and turning the handle to the utmost right. Place a cup on the tray grid (6). Plug in the power cord. Switch on the coffee maker (13); a sound signal will sound, and the blue indicator light will flash. Wait for the water to heat up until the light glows constantly.
Making Cappuccino: ATTENTION! Be careful to avoid burns from outgoing steam from the cappuccinator pipe (4) and removable tip (5). Make espresso as described above, in a warm cup with enough capacity for frothed milk.
Heating Beverages: You can heat beverages by submerging the cappuccinator pipe (4) (without tip (5)) into a cup. Switch on the coffee maker (9) and wait for the boiler to heat up (red indicator glows constantly). Submerge the pipe (4) into the beverage. Slowly turn the steam supply control knob (3) to «OFF--- +» and fully open steam supply. Once the beverage reaches the desired temperature, close steam supply (3) to «OFF». Switch off the coffee maker (13).
How to Make Good Espresso: Use freshly ground coffee intended for espresso machines. Lightly tamp the ground coffee in the filter (15) with the back of the measuring spoon (16). Coffee strength depends on bean quality and grind fineness. If coffee pours too slowly, it means the grind is too fine or tamped too firmly.
Descaling: For effective operation, descaling is recommended every 2-3 months, or more frequently with hard water.
Cleaning: If filter (15) openings are blocked with ground coffee remnants, clean them with a small brush. Wipe the coffee maker body with a soft, slightly damp cloth, then dry it. Do not use metal brushes or abrasive cleaners. Do not immerse the power cord, power plug, or coffee maker body in water or other liquids. Wash removable parts (3, 6, 7, 15, 16) with warm water and neutral detergent, then rinse and dry.
Drip Tray and Grid (6): Remove the grid (6) from the tray, remove the tray, empty the water, wash the tray, and reinstall it. Place the grid (6) on the tray.
Storage: Before storing, unplug the unit and let it cool completely. Clean the unit. Do not leave or store the coffee maker in places with temperatures below 0°C. Store the unit in a dry, cool place away from children and disabled persons.
| Brand | Vitek |
|---|---|
| Model | VT-1508 |
| Category | Coffee Maker |
| Language | English |