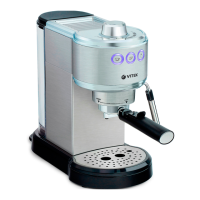
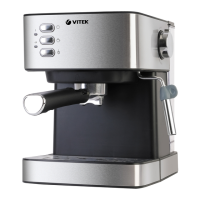
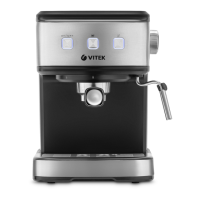
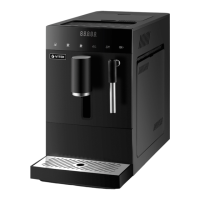
The Vitek VT-1515 is a coffee maker designed for brewing espresso and cappuccino.
Function Description
The coffee maker is capable of preparing both espresso and cappuccino. It features a steam supply control knob for adjusting steam intensity, and dedicated buttons for single and double espresso shots. The device includes a water tank for fresh water, a removable drip tray for easy cleaning, and a coffee filter holder for ground coffee. A measuring spoon with a tamper is provided for precise coffee preparation.
Important Technical Specifications
- Power Supply: 220-240 V, ~50/60 Hz
- Rated Input Power: 1350 W
- Water Tank Capacity: 1 L
- Device Type: Coffee maker (espresso and cappuccino)
- Components: Coffee maker – 1 pc., Filter holder – 1 pc., Coffee filter – 2 pcs., Measuring spoon – 1 pc., Manual – 1 pc.
Usage Features
Before First Use:
Upon unpacking, ensure all packaging materials are removed. Check the unit for damage; if damaged, do not use it and contact a service center. Clean all removable parts (water tank, filter holder, coffee filters, measuring spoon, drip tray) with neutral detergent and dry thoroughly. Fill the water tank with clean cold water, ensuring it's within the MIN and MAX marks. Place a cup under the coffee outlet. Turn on the coffee maker and allow it to heat up. Press the single espresso button to flush the system with hot water. Repeat this process 2-3 times.
Preparing Espresso:
- Fill the water tank with clean cold water up to the "MAX" mark.
- Insert the coffee filter (15 or 16) into the filter holder (17).
- Add ground coffee to the filter using the measuring spoon (19), gently tamp the coffee with the back of the spoon.
- Insert the filter holder (17) into the unit, aligning the groove on the filter holder with the "INSERT" mark on the unit, then turn it to the right to the "CLOSE" position.
- Place a cup on the drip tray grid (6).
- Plug the power cord into an electrical outlet.
- Switch on the coffee maker by setting the power switch (14) to the "I" position. The indicator lights (4, 5) will illuminate, indicating heating.
- Once the indicator lights (4, 5) stop flashing and glow constantly, the coffee maker is ready.
- Press the single or double espresso button (3) depending on the desired amount of coffee. The pump will operate for 20-30 seconds.
- Once the desired amount of coffee is brewed, the pump will stop.
- To stop brewing manually, press the espresso button again.
- Remove the cup and enjoy your coffee.
Preparing Cappuccino:
- Prepare espresso as described above.
- Fill the water tank with clean cold water up to the "MAX" mark.
- Fill a cup with milk (preferably cold milk with 3.5% fat or higher) up to the "MAX" mark.
- Place the cup with milk under the cappuccino pipe (11).
- Turn the steam supply control knob (2) to the "OFF- +-" position to the "OFF+" position. The steam indicator light (3) will illuminate.
- Once the steam indicator light (3) stops flashing and glows constantly, the coffee maker is ready for steaming.
- Immerse the cappuccino pipe (11) into the milk.
- Turn the steam supply control knob (2) to the "OFF+" position to the "OFF++" position to start steaming the milk.
- Move the cup up and down to create foam.
- Once the desired amount of foam is achieved, turn the steam supply control knob (2) to the "OFF- +-" position to the "OFF-" position to stop steaming.
- Remove the cup with frothed milk.
- Add the frothed milk to your espresso.
- After steaming, clean the cappuccino pipe (11) with a damp cloth and wipe the pipe (12) under a water jet.
Hot Water Supply:
- Fill the water tank with clean cold water up to the "MAX" mark.
- Place a cup under the cappuccino pipe (11).
- Turn the steam supply control knob (2) to the "OFF- +-" position to the "OFF+" position. The steam indicator light (3) will illuminate.
- Once the steam indicator light (3) stops flashing and glows constantly, the coffee maker is ready for hot water supply.
- Turn the steam supply control knob (2) to the "OFF++" position to start hot water supply.
- Once the desired amount of hot water is supplied, turn the steam supply control knob (2) to the "OFF- +-" position to the "OFF-" position to stop hot water supply.
- Remove the cup.
Maintenance Features
Cleaning:
- General Cleaning: Unplug the coffee maker before cleaning. Wipe the exterior with a soft, damp cloth. Do not use metal brushes or abrasive cleaners.
- Drip Tray: Remove the drip tray (6) and grid (7), empty the collected liquid, wash them with warm water and a neutral detergent, then rinse and dry.
- Water Tank: The water tank (8) should be cleaned regularly with warm water and a neutral detergent.
- Coffee Filter Holder and Filters: After each use, remove the filter holder (17) and empty the used coffee grounds. Wash the filter holder and filters (15, 16) with warm water and a neutral detergent.
- Cappuccino Pipe: After each use, clean the cappuccino pipe (11) with a damp cloth and wipe the pipe (12) under a water jet to remove any milk residue.
- Descaling: Regular descaling is necessary to remove mineral deposits. The frequency depends on water hardness and usage. Use a descaling solution suitable for coffee makers. Follow the instructions provided with the descaling agent.
Troubleshooting:
- Unit doesn't turn on: Check if the power plug is properly inserted into the socket.
- Water leaks from the lower part of the unit: The water tray is full. Empty the water tray.
- Coffee leakage from the filter holder: Loose connection of the filter and boiler gasket, ground coffee got on the edges of the filter. Clean the edges of the filter.
- Coffee has a foreign smell: Wrong process of scale removal in the boiler. Improper storage of coffee. See the chapters "Before using the unit", "Descaling" and perform them several times. Use fresh ground coffee. Keep coffee in a dry cool place.
- Steam doesn't froth milk: Low temperature of outgoing steam. The bowl is too big or of improper size. You used skimmed milk. Froth milk only after the ready indicator lights up. Use narrow high container for frothed milk. Use only whole milk with fat content 4-6%.
Recycling:
For environmental protection, do not dispose of the unit and batteries with usual household waste after the service life expiration; apply to specialized centers for further recycling. The waste generated during the disposal of the unit is subject to mandatory collection and subsequent disposal in the prescribed manner.
Warranty:
The unit has a 3-year operating life. The manufacturer provides a 1-year warranty from the date of purchase. The warranty card, sales receipt, or other document confirming the purchase date and place must be presented for warranty service.