Do you have a question about the Vivitar DVR 8K-KIT v2 and is the answer not in the manual?
Covers warnings against moisture, liquids, and excessive heat for user safety.
Details precautions for battery handling to prevent bursting, fire, or chemical burns.
Lists the necessary computer configurations for transferring videos and photos.
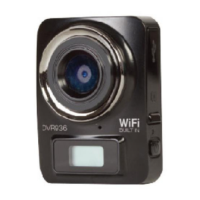
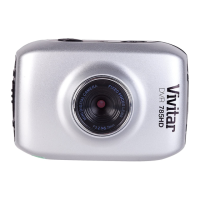
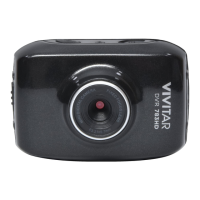
Identifies and illustrates the various parts and controls of the camcorder.
Explains the functions of each button on the remote controller for operation.
Details the steps to insert the battery and charge the camcorder using a USB cable.
Explains how to power the camcorder on and off using the touch screen or power button.
Guides users on selecting modes and accessing system settings for customization.
Provides a comprehensive list of adjustable sub-menu options and their content.
Instructions for inserting a memory card and formatting it for optimal use.
Details various recording modes, photo/video capture, and special features like IR Night Vision.
Explains how to navigate and view recorded videos and photos on the camcorder.
Provides instructions for connecting the camcorder to an HDTV for playback.
Guides on connecting to a computer for file transfer and using the camcorder as a webcam.
Details on downloading and connecting the HelloCam app via the camcorder's Wi-Fi.
Addresses common problems like power, charging, remote control, crashes, and memory card recognition.
Presents the official statement regarding FCC compliance and operational conditions.
Outlines the terms, coverage, exclusions, and procedure for obtaining warranty service.
Provides website, email, and phone contact details for technical assistance and resources.
This document serves as an easy guide for the Vivitar 8K Digital Camcorder (DVR 8K-KIT v2), providing essential information for its operation, maintenance, and troubleshooting. It is designed to help users understand the camera's functions and ensure proper usage.
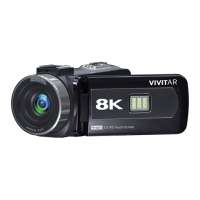
The camcorder is a digital device capable of recording videos and capturing photos. It features an 8K resolution, indicating high-quality image and video capture. The device is designed for ease of use, as suggested by the "Easy Guide" title.
The Vivitar 8K Digital Camcorder is primarily used for recording videos and taking still photographs. It supports various recording modes, including normal video, slow motion, loop recording, and time-lapse video. For photography, it offers single photo capture, auto photo mode (automatically taking photos after a specified number of seconds), burst photo mode (taking multiple photos in succession), and a timer mode for delayed photo capture.
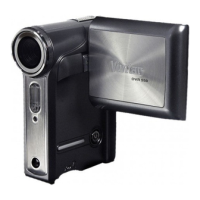
The camcorder is equipped with a touch screen for intuitive navigation and control. Users can access different modes and settings directly from the screen. Alternatively, physical buttons are available for controlling various functions, including power, mode selection, menu access, zoom, photo shutter, and record/stop.
One notable feature is the IR night vision and LED light capability, allowing for recording in low-light conditions. This can be toggled on or off using a dedicated button. The camcorder also supports an external microphone via a 3.5mm jack, enhancing audio quality for recordings.
For connectivity, the camcorder includes a Type-C USB interface for charging and connecting to a computer. It also has an HDMI output interface for connecting to high-definition televisions, enabling playback of recorded content on a larger screen.
A built-in Wi-Fi function allows the camcorder to connect to a smartphone or tablet via the "HelloCam - Action Camera" app. This feature enables users to monitor the camcorder remotely, take photos/videos, and download content to their smart devices. The app requires Android 6.0 or higher or iOS 8.0 or higher.
The manual provides important warnings and cautions regarding the safe use of the camcorder and its battery. These include:
The document emphasizes the importance of reading the manual before use and keeping it for future reference. It also includes FCC statements regarding compliance and interference, as well as Vivitar's warranty information and technical support contact details.
| Image Sensor | 8.0 Megapixel |
|---|---|
| Video Resolution | 8K |
| Storage Media | microSD card |
| Connectivity | HDMI |
| Storage | Micro SD card (up to 128GB) |