Do you have a question about the Vivitar Vivicam 4100 and is the answer not in the manual?
| Brand | Vivitar |
|---|---|
| Model | Vivicam 4100 |
| Category | Digital Camera |
| Language | English |
Explains the conditions and potential interference of the FCC statement.
Lists registered trademarks and product names.
Details about product variations, illustrations, and manufacturer liability.
Important safety warnings regarding camera usage, handling, and potential hazards.
Lists precautions to avoid damage or improper operation of the camera.
Provides guidelines for optimal battery performance and safety.
Instructions for installing software like Photo Explorer and Photo Express from the CD-ROM.
Overview of the process to transfer files from camera to computer.
Introduces the camera's capabilities, resolution, LCD monitor, and memory.
Lists all items included in the camera package.
Lists accessories that can be purchased separately for the camera.
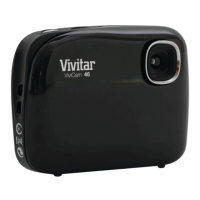
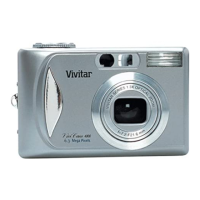
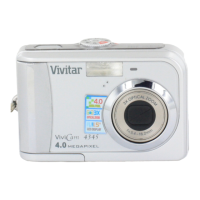
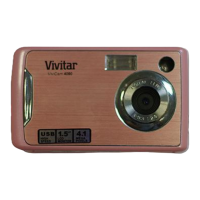
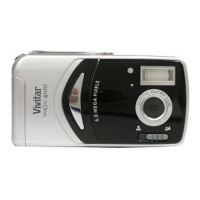
Identifies and describes the components visible on the front of the camera.
Identifies and describes the components visible on the rear of the camera.
Details the buttons and functions of the camera's control panel.
Explains the meaning of different LED indicator statuses and sounds.
Describes different scene modes and their suitable shooting situations.
Explains the various indicators displayed on the LCD monitor during still image recording.
Step-by-step guide on how to insert AA batteries into the camera.
Instructions for inserting and removing an SD memory card, including write protection.
Guide on how to set the camera's date and time.
Steps to select the desired language for the camera's on-screen display.
Instructions on how to securely attach the camera strap to prevent slippage.
Steps to turn the camera on and off using the power switch.
How to use the LCD monitor for composing, reviewing, and adjusting settings.
Guide for general shooting using the Normal mode for subjects at varying distances.
Instructions on how to use and limitations of the camera's digital zoom feature.
Explains how to select and use different flash modes for photography.
Guide on setting and using the self-timer for group shots or self-portraits.
Instructions for close-up photography with the macro mode and its limitations.
Explains how resolution and quality settings affect image files and storage.
Table showing approximate image count based on resolution, quality, and media.
How to use Auto mode for automatic camera adjustments and simple shooting.
Instructions for using Sports mode to capture fast-moving subjects continuously.
How to use Night Scene mode for balanced lighting in low-light conditions.
Instructions for using Portrait mode to highlight subjects against blurred backgrounds.
How to use Landscape mode for vivid scenery with enhanced color and saturation.
Instructions for using Backlight mode to brighten subjects in shadow or against bright backgrounds.
Guide for recording video clips at a specific resolution and frame rate.
How to play back still images one by one on the LCD monitor.
Instructions on how to enlarge images to view fine details.
Function to view multiple thumbnail images for quick scanning.
Steps to select and play recorded video clips.
How to set up and view images as an automated slide show.
Feature to prevent accidental erasure of recorded images.
How to delete individual captured images or video clips.
Instructions for mass deletion of all stored images and video clips.
Utility to format SD memory cards or the camera's internal memory.
Lists CPU, OS, memory, and device requirements for transferring files.
Overview of the process to transfer files from camera to computer.
Guide for installing the USB driver, specifically for Windows 98/98SE.
Steps to connect the ViviCam 4100 to a computer using a USB cable.
Instructions for copying images and video clips from the camera to the computer.
Steps to install Ulead Photo Explorer for media management.
Steps to install Ulead Photo Express for photo project creation.
Information on accessing and installing the user manual from the CD-ROM.
Guide to installing Adobe Acrobat Reader for viewing PDF documents.
Details the options available within the camera's Capture menu.
Explains settings for image size, quality, and scene modes within the Capture menu.
How to adjust exposure compensation (EV) for optimal brightness.
Guide to setting white balance for different lighting conditions.
Explains ISO sensitivity settings and color options.
Details settings for saturation, sharpness, and date imprinting.
Refer to deleting images section for details.
Feature to copy images/clips from memory to SD card.
Refer to automated playback section for details.
Refer to protecting images section for details.
Options for setting EV and White Balance when recording video clips.
Settings for camera date/time and memory card formatting.
Controls whether button presses generate beep sounds.
Configures language, screen brightness, auto power off, and resets settings.
Illustrates connections to computer, card reader, and printer.
Technical details including sensor, resolution, lens, and zoom.
Further technical specs like white balance, file formats, power, and dimensions.