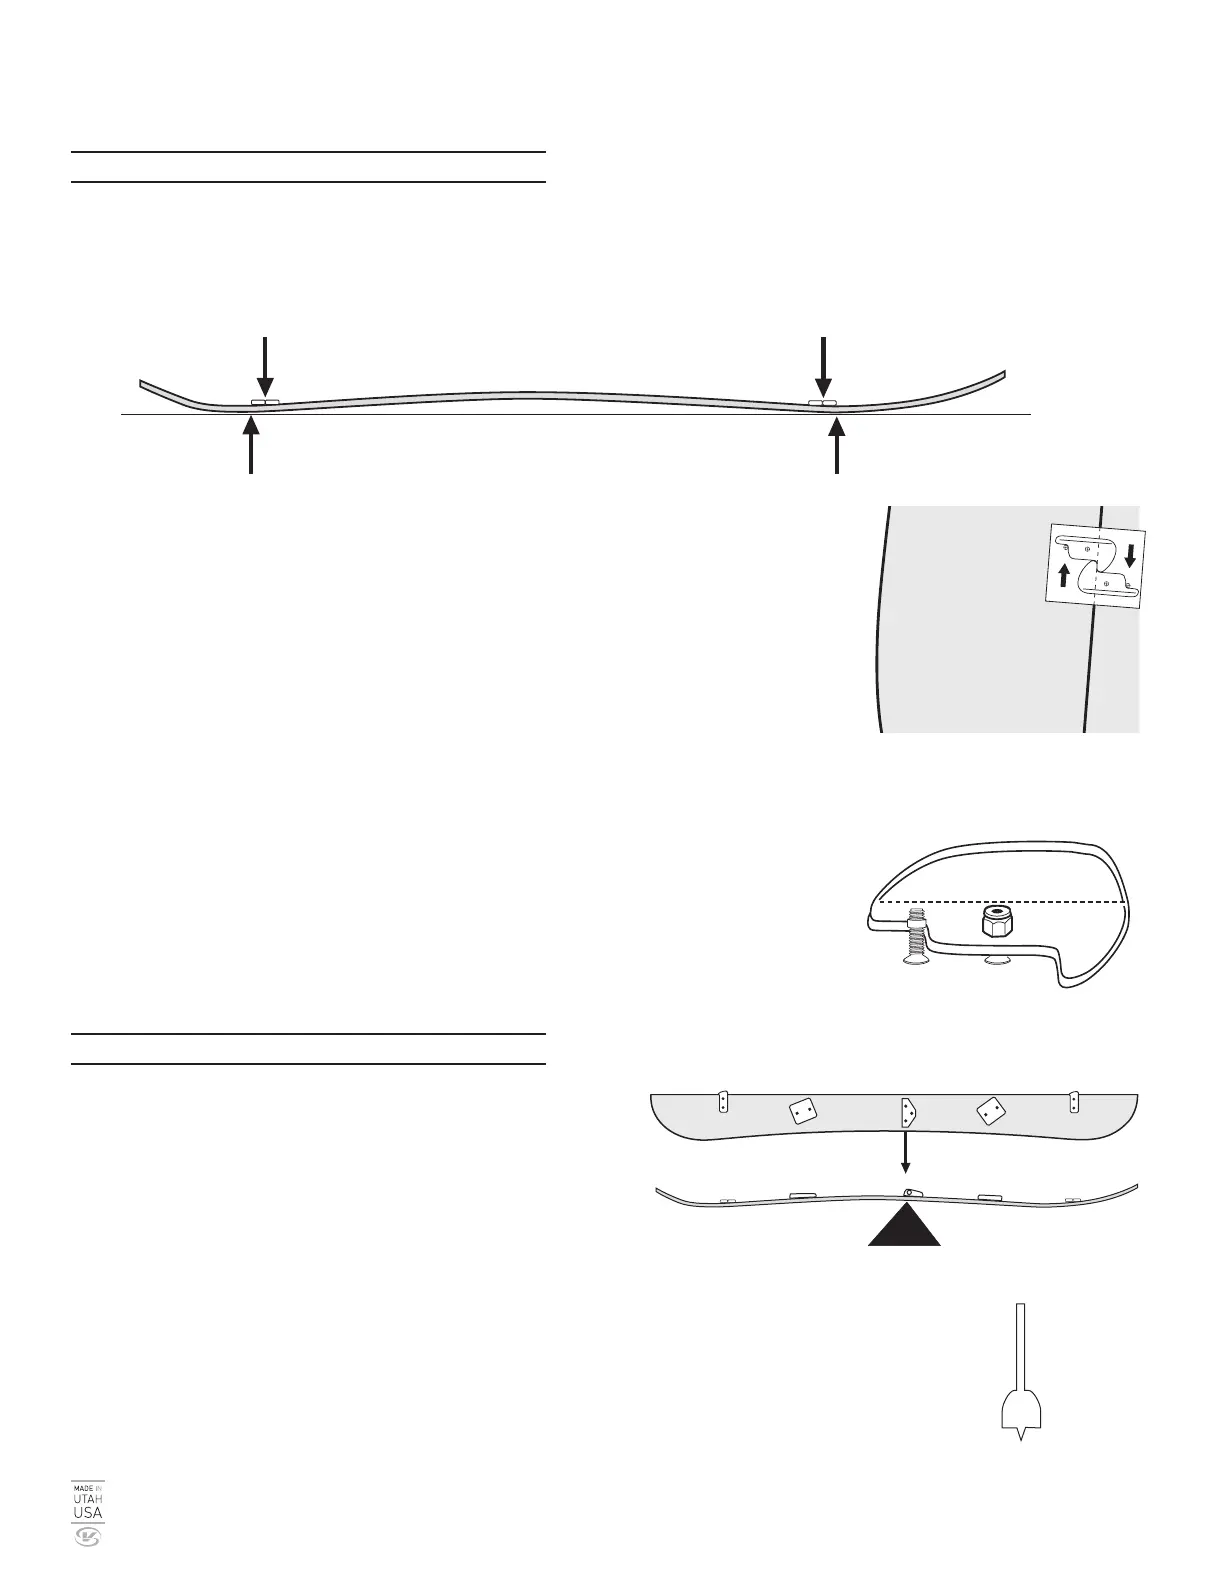
A. Measure 1 inch in from contact point of running surface of snowboard.
B. Make sure board is pulled tightly together (length and width), center hook stickers on board, aligning dotted line with split
of board.
MOUNTING HOOKS
Contact Point Contact Point
Center of Hooks 1 inch in
from Contact Point
Center of Hooks 1 inch in
from Contact Point
Make sure the tip and tail radius
will not interfere with the hooks
when the hooks are pivoted.
C. Peel backing of one half of sticker and apply to one half of the board tip. Pull boards
together tightly, peel backing off, and attach other side of sticker to second half of board.
Rub down well. Repeat for the other sticker.
D.
Center punch hole locations on sticker. Check placement of hooks before drilling.
E. Drill holes 3/16”.
F. Flip board over. Using 82º countersink bit, drill base as per screwhead size. Screwhead
must be flush with base of board.
G. Thread screw through from the bottom of the board with 1/8” hex wrench and mount
hooks. Put bushing on outside screws. Use 3/8 socket (nut driver) while holding screw
with hex wrench. Tighten nuts on top of bushings so there is some resistance to keep hooks
in position.
H. Make sure pivoting hooks are clear of snow before assembling board. Pucks won’t line
up if there is ice in hook.
I. Scraper - Use tool to remove ice and snow build-up on tip and tail clips, tip and tail
hooks, and climbing skins.
Mount hooks on tail first.
Align dotted line with
split of board.
Put bushing on outside screw
MOUNTING TOURING BRACKET
A. Determine balance point of board.
B. Align and tape templates so the pivot point of the touring
bracket is just ahead of balance point of the board. Center
punch drill locations.
C. Mount the touring bracket using the 6 M6 x 12mm screws
and M6 T-nuts supplied. Locate the bracket, drill a 1/8”
pilot hole (front hole first), finish with 19/64” bit, follow with
a 3/4” wood bit on the bottom of the board to counter sink
the T-nuts.
D. Put plastic pin guide under bracket.
E. Tighten screws.
Determine balance point of
board and scribe line
Use 3/4” wood drill bit to
counter sink T-nut
voilésplitkit
diy splitboard hardware
voile.com
 Loading...