A. With the bend in the climbing wires facing up, place the 75mm Climbing Wire
into the narrower foward slot of the Heel pad. Place the 55 mm Climbing Wire
into the rear slot of the Heel pad. (see figure 1)
B. With the square tab of the Climbing Heel Shim facing the tip of the splitboard,
place the shim under the Climbing Wire assembly. (see figure 2)
C. Locate the Climbing Pad and follow the same drill and mount procedure as
Touring Bracket using 4 M6 x 16mm screws and M6 T-nuts.
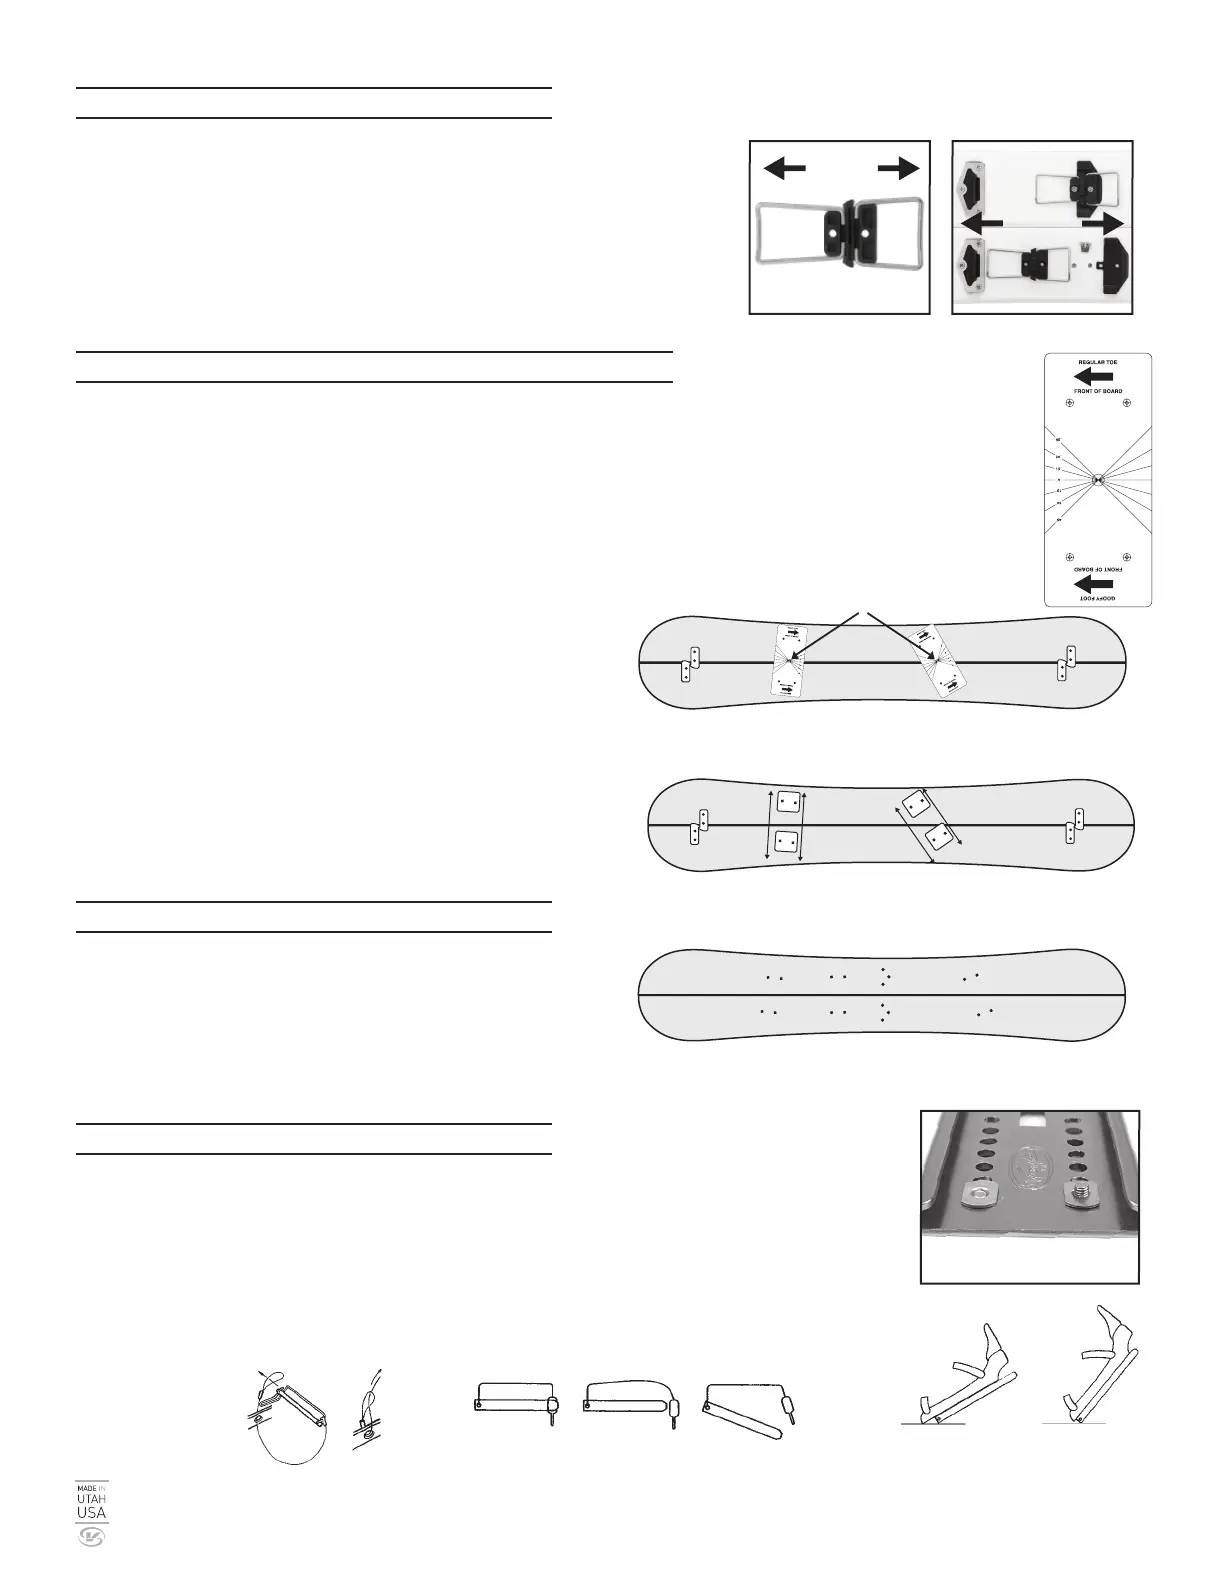
MOUNTING CLIMBING WIRE
A. Using your old board stance as a guide, determine the center of the stance. Mark the stance width and angles.
Note: Stance should not be closer than 18 inches and back foot cannot be greater than 25 degrees. If these guidelines
are not followed, pucks will interfere with touring brackets. Make sure slider tracks will slide on before drilling.
B. Make sure hooks are tight before putting stickers on. Place stickers on board, pressing one side down while pulling
the board tightly together as you did with hook stickers. Carefully attach stickers avoiding any wrinkles.
C. Locate sticker at stance locations.
D. Center punch hole locations on sticker.
E. Drill pilot hole with 1/8” bit and finish with 19/64” drill bit.
Use 3/4” wood paddle bit, drill from bottom of board to
countersink t-nuts.
F. Use a #3 Phillips Posi Driver for screws. Use M6 x 12mm
truss-head screws for puck mounting.
G. Make sure the sides of the two blocks are parallel. Screw pads down.
MOUNTING PUCKS
Make sure the sides of the two blocks
are parallel and the track slides easily
Stance Mark
Correct Incorrect
A. Use lock tight on T-nuts when mounting bindings onto slider track.
B. Binding mounting screws may need to be shortened so they do not interfere with Pucks.
C. Binding Mount - Some bindings could cause slider tracks to bend. Check diagram for proper application.
D. Girth-hitch pin to binding.
E. If pin springs become loose or bent, slightly bend them back to position.
MOUNTING BINDINGS
Incorrect Correct
Girth-hitch Bend spring back
A. Before installing petex disks, attach hardware/screws to prevent
epoxy thread contamination. Tighten screws to fully set t-nut.
B. Epoxy petex disks to board base where t-nuts are installed.
C. After epoxy cures, sand flat with sanding block.
INSTALL PETEX DISKS
Board Base
Tips:
1. Clean petex disks with acetone /alcohol for better adhesion.
2. Recommend marine epoxy for best adhesion.
Tip
Tail
Tail
Tip
75mm 55mm
Figure 1
Figure 2
voilésplitkit
diy splitboard hardware
voile.com
 Loading...